
Monday 15th May 2017
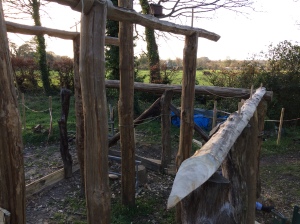
Today saw the restart of the Neolithic Longhouse Project at La Hougue Bie after a few weeks off.
This week will see the delivery of the remaining timber elements for the building from the Cranborne Estate in Dorset. The use of imported timber has become necessary to ensure that the remaining elements of the building will be of a suitable grade. Neolithic builders had the luxury of largely untouched woodlands to choose their raw materials from and would undoubtedly pick specific trees to fulfill specific tasks. The start of this project utilised timber from Jersey which we have used to best purpose, but the prospect of finding all of the remaining timber on an essentially deforested (since the Neolithic!) island within the remaining time frame and to the desired grade was unlikely.
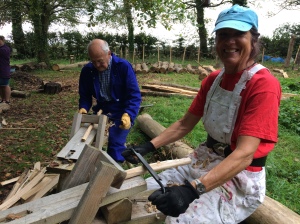
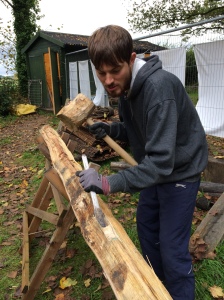
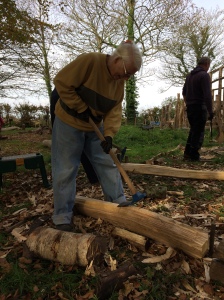
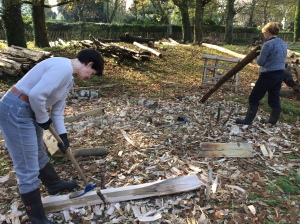
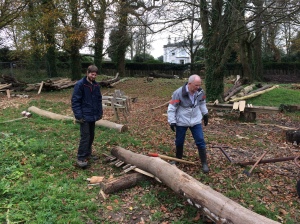
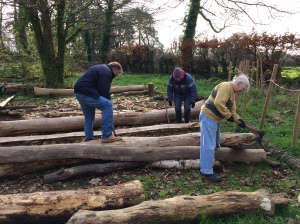
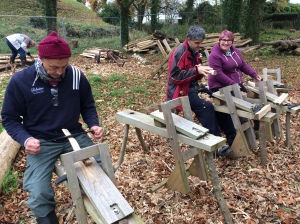
Today’s tasks involved clearing the remaining timber to create a space for the new shipment. This involved heavy work with cant hooks and the timber arch.
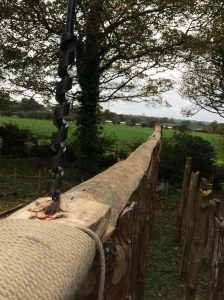
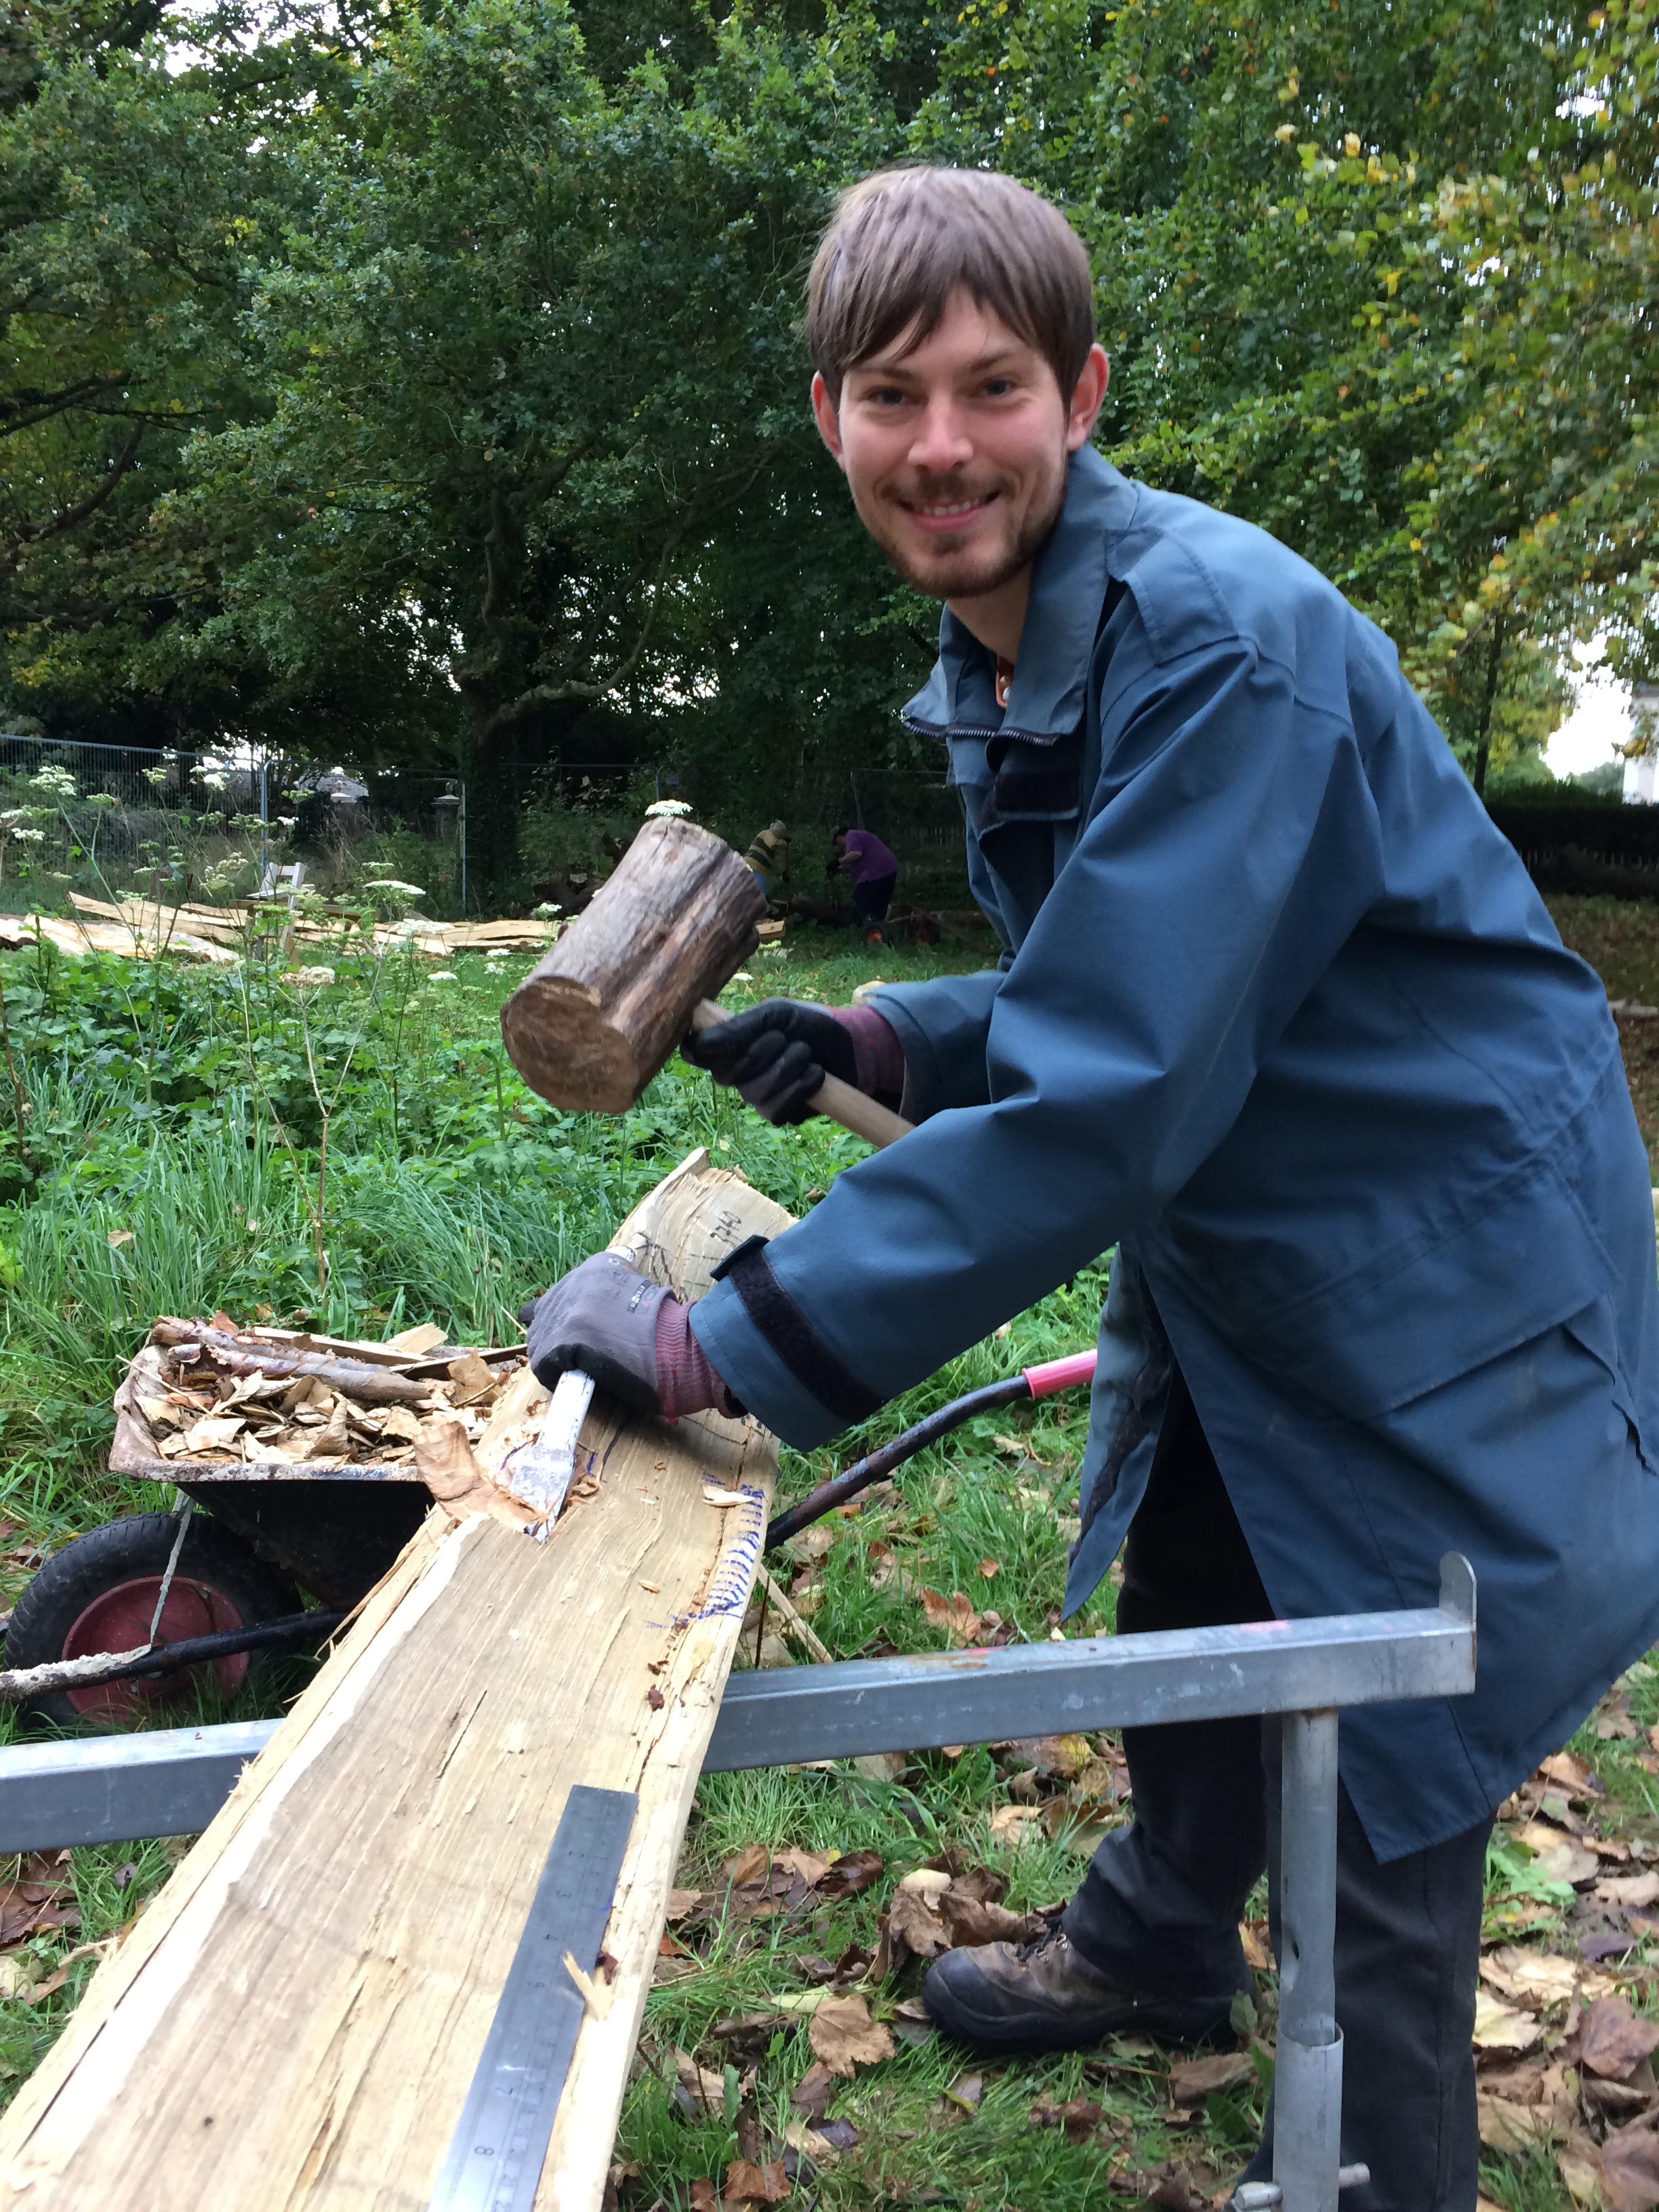
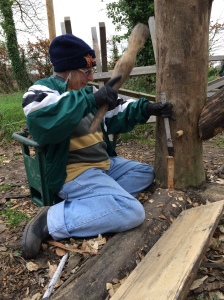
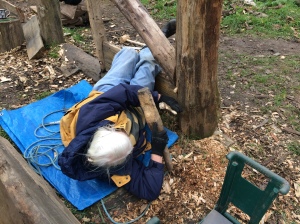
Mortises continued in the sill beams of the longhouse. This involved chisels, augers and mauls and lots of time and effort! The next project week will see the introduction of flint tools to the preparation and construction of the timbers. The aim of this project was always to familiarise the volunteers with the use of hand tools first (in this case steel) and then to introduce replica flint tools once fitness and stamina levels were up to speed. It will be interesting to see how the team cope with the introduction of tools that add a significant amount of time and effort to each task!

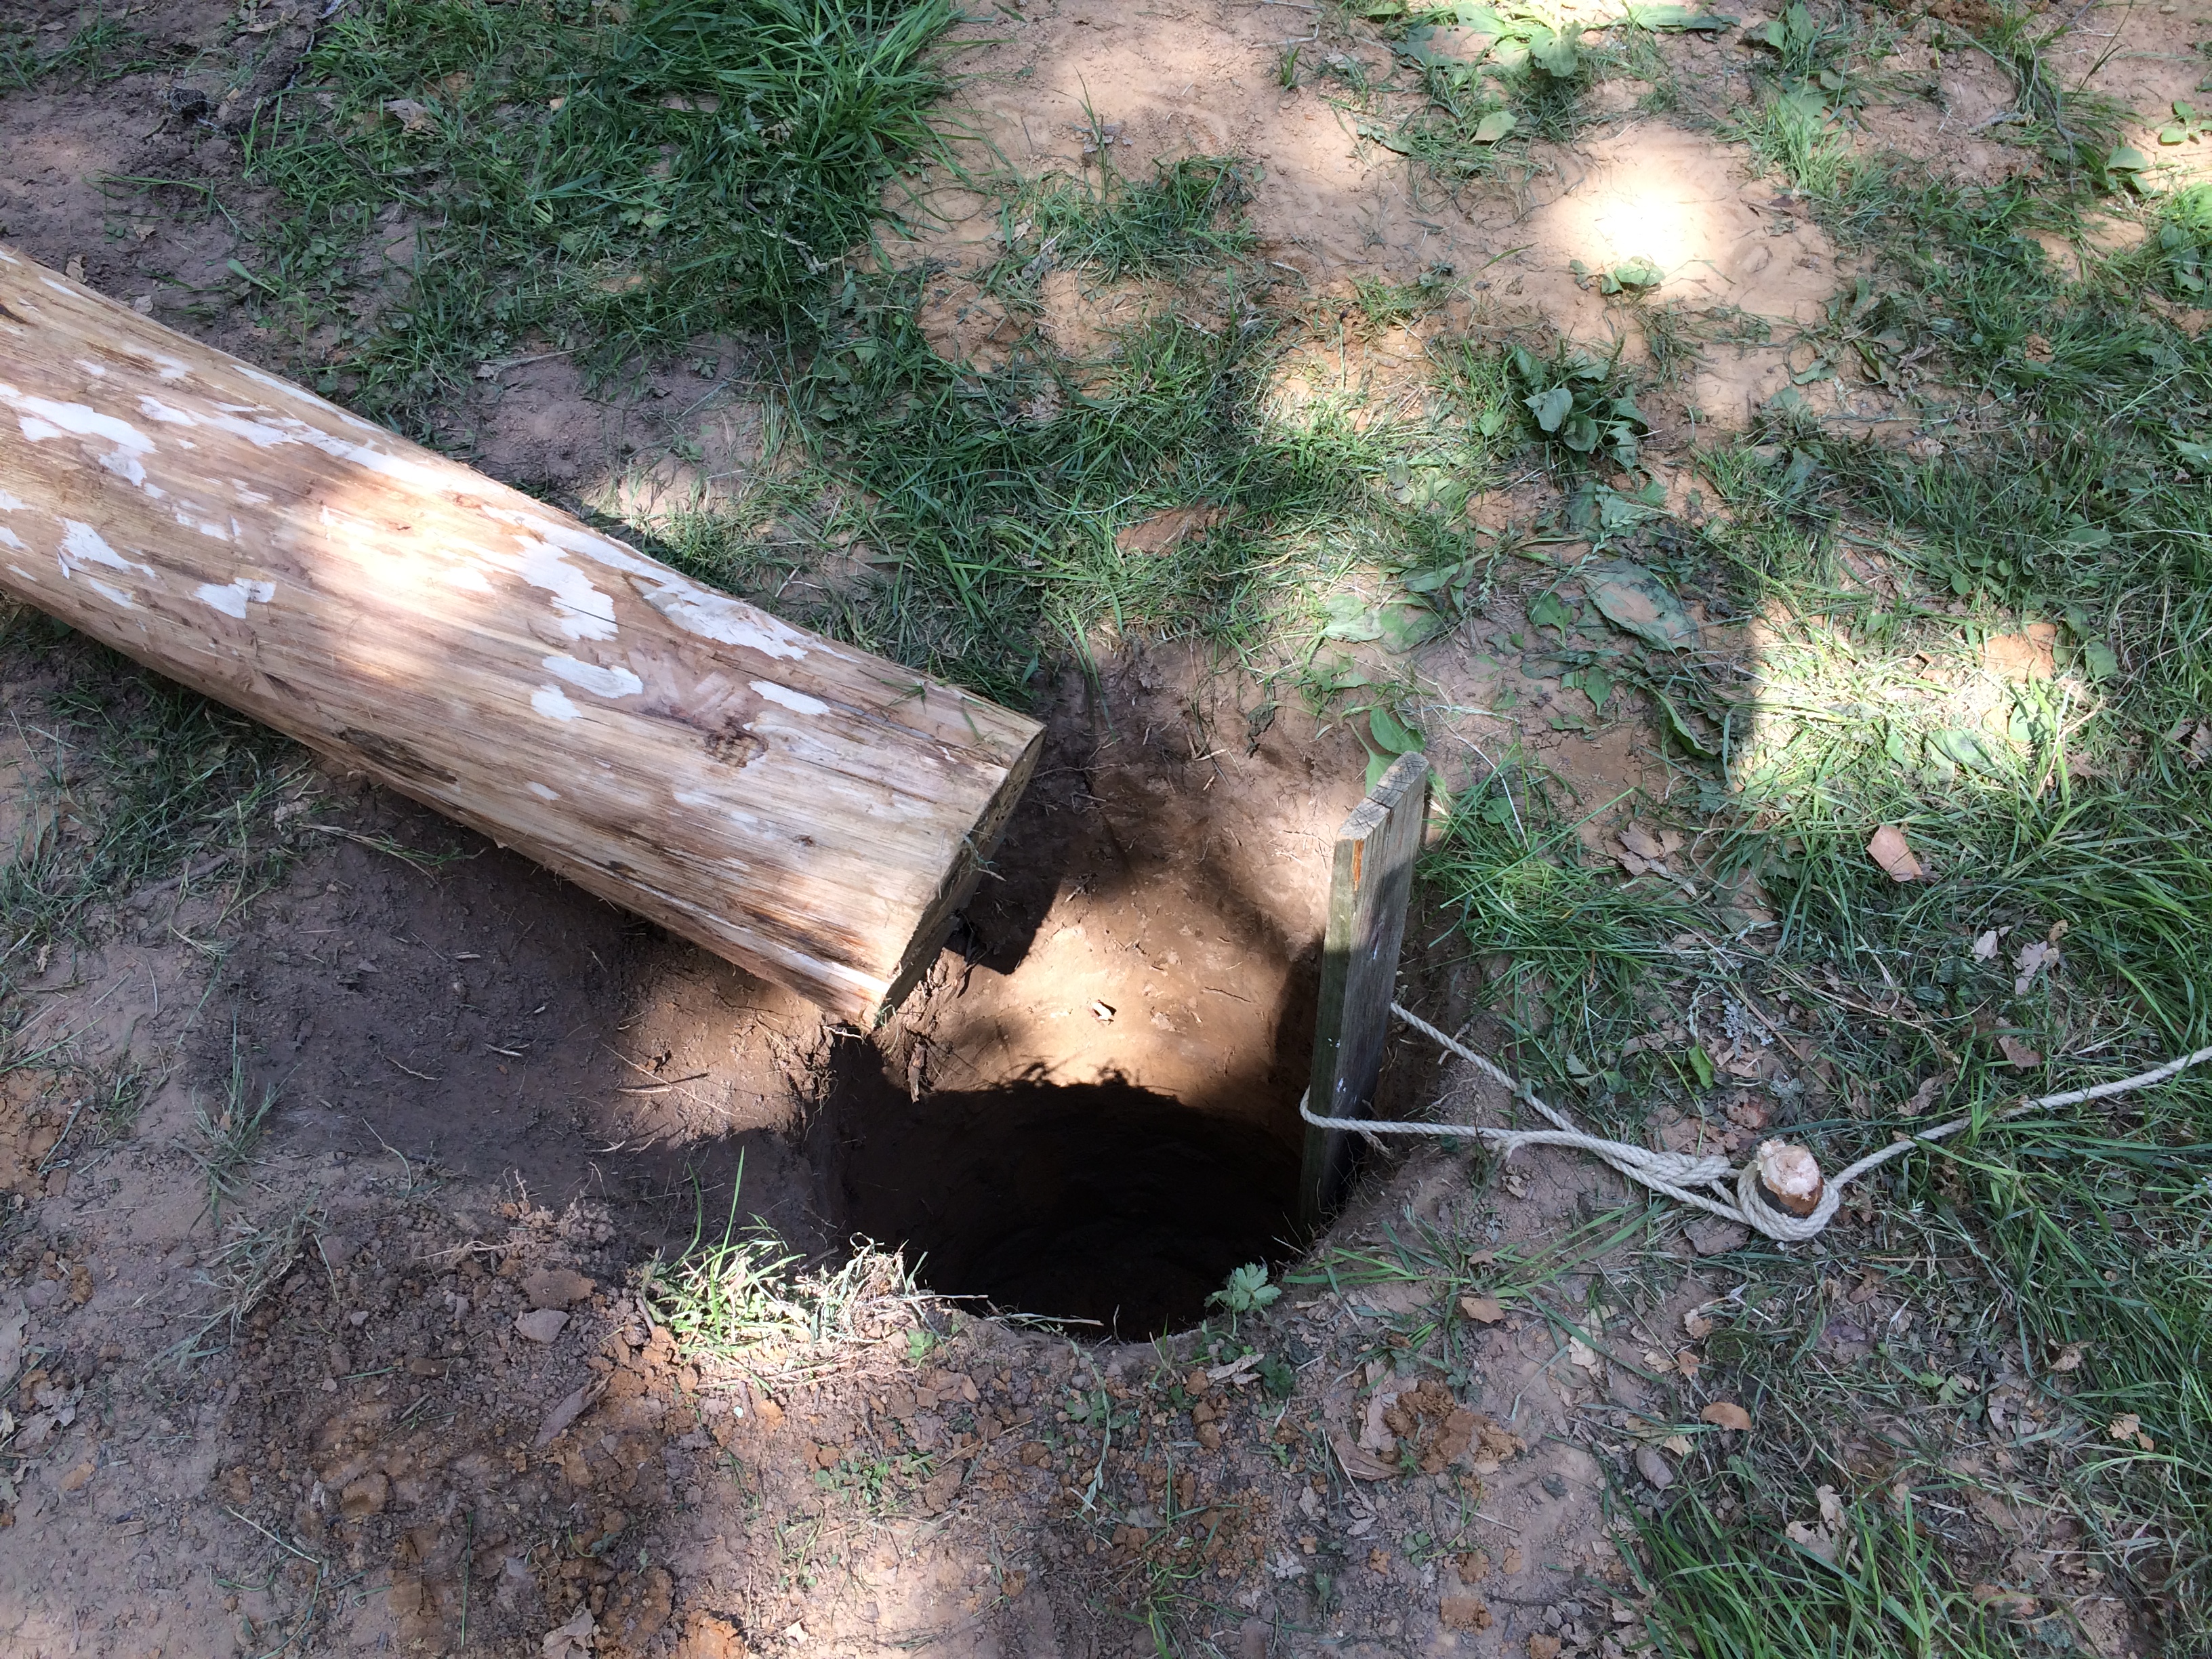
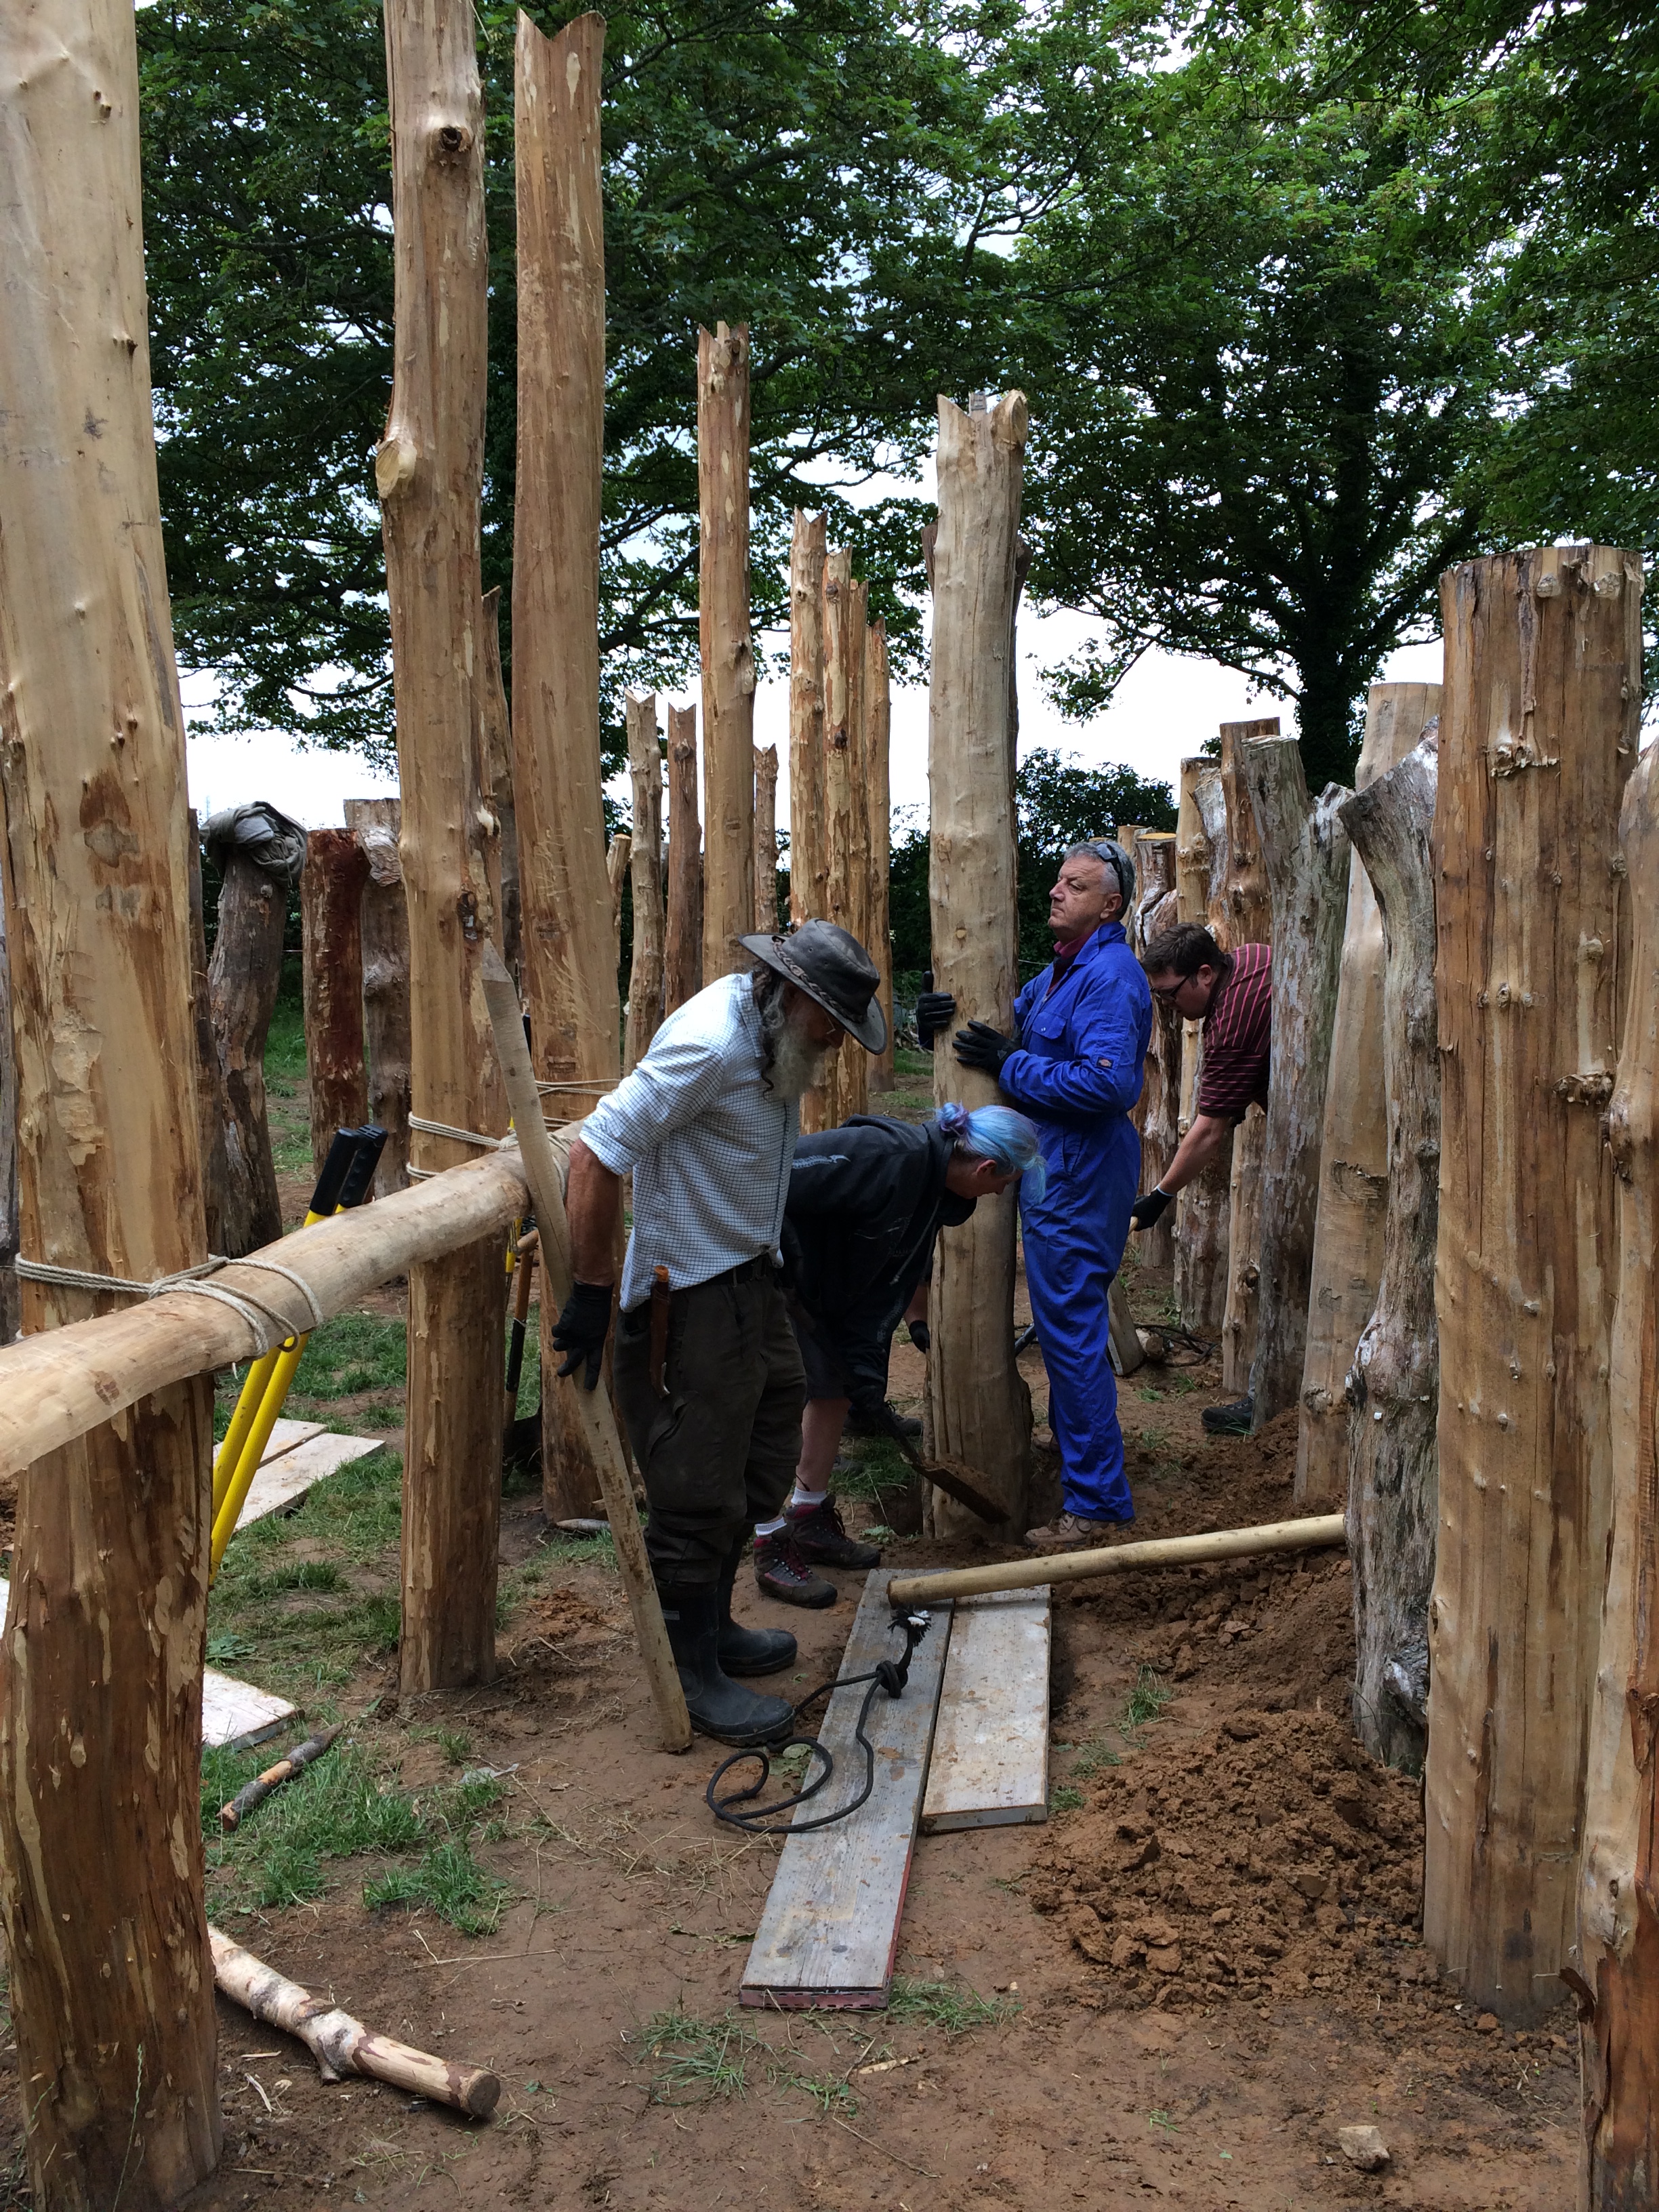
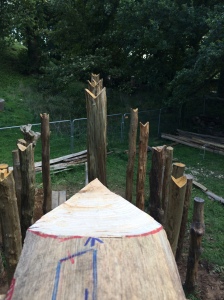
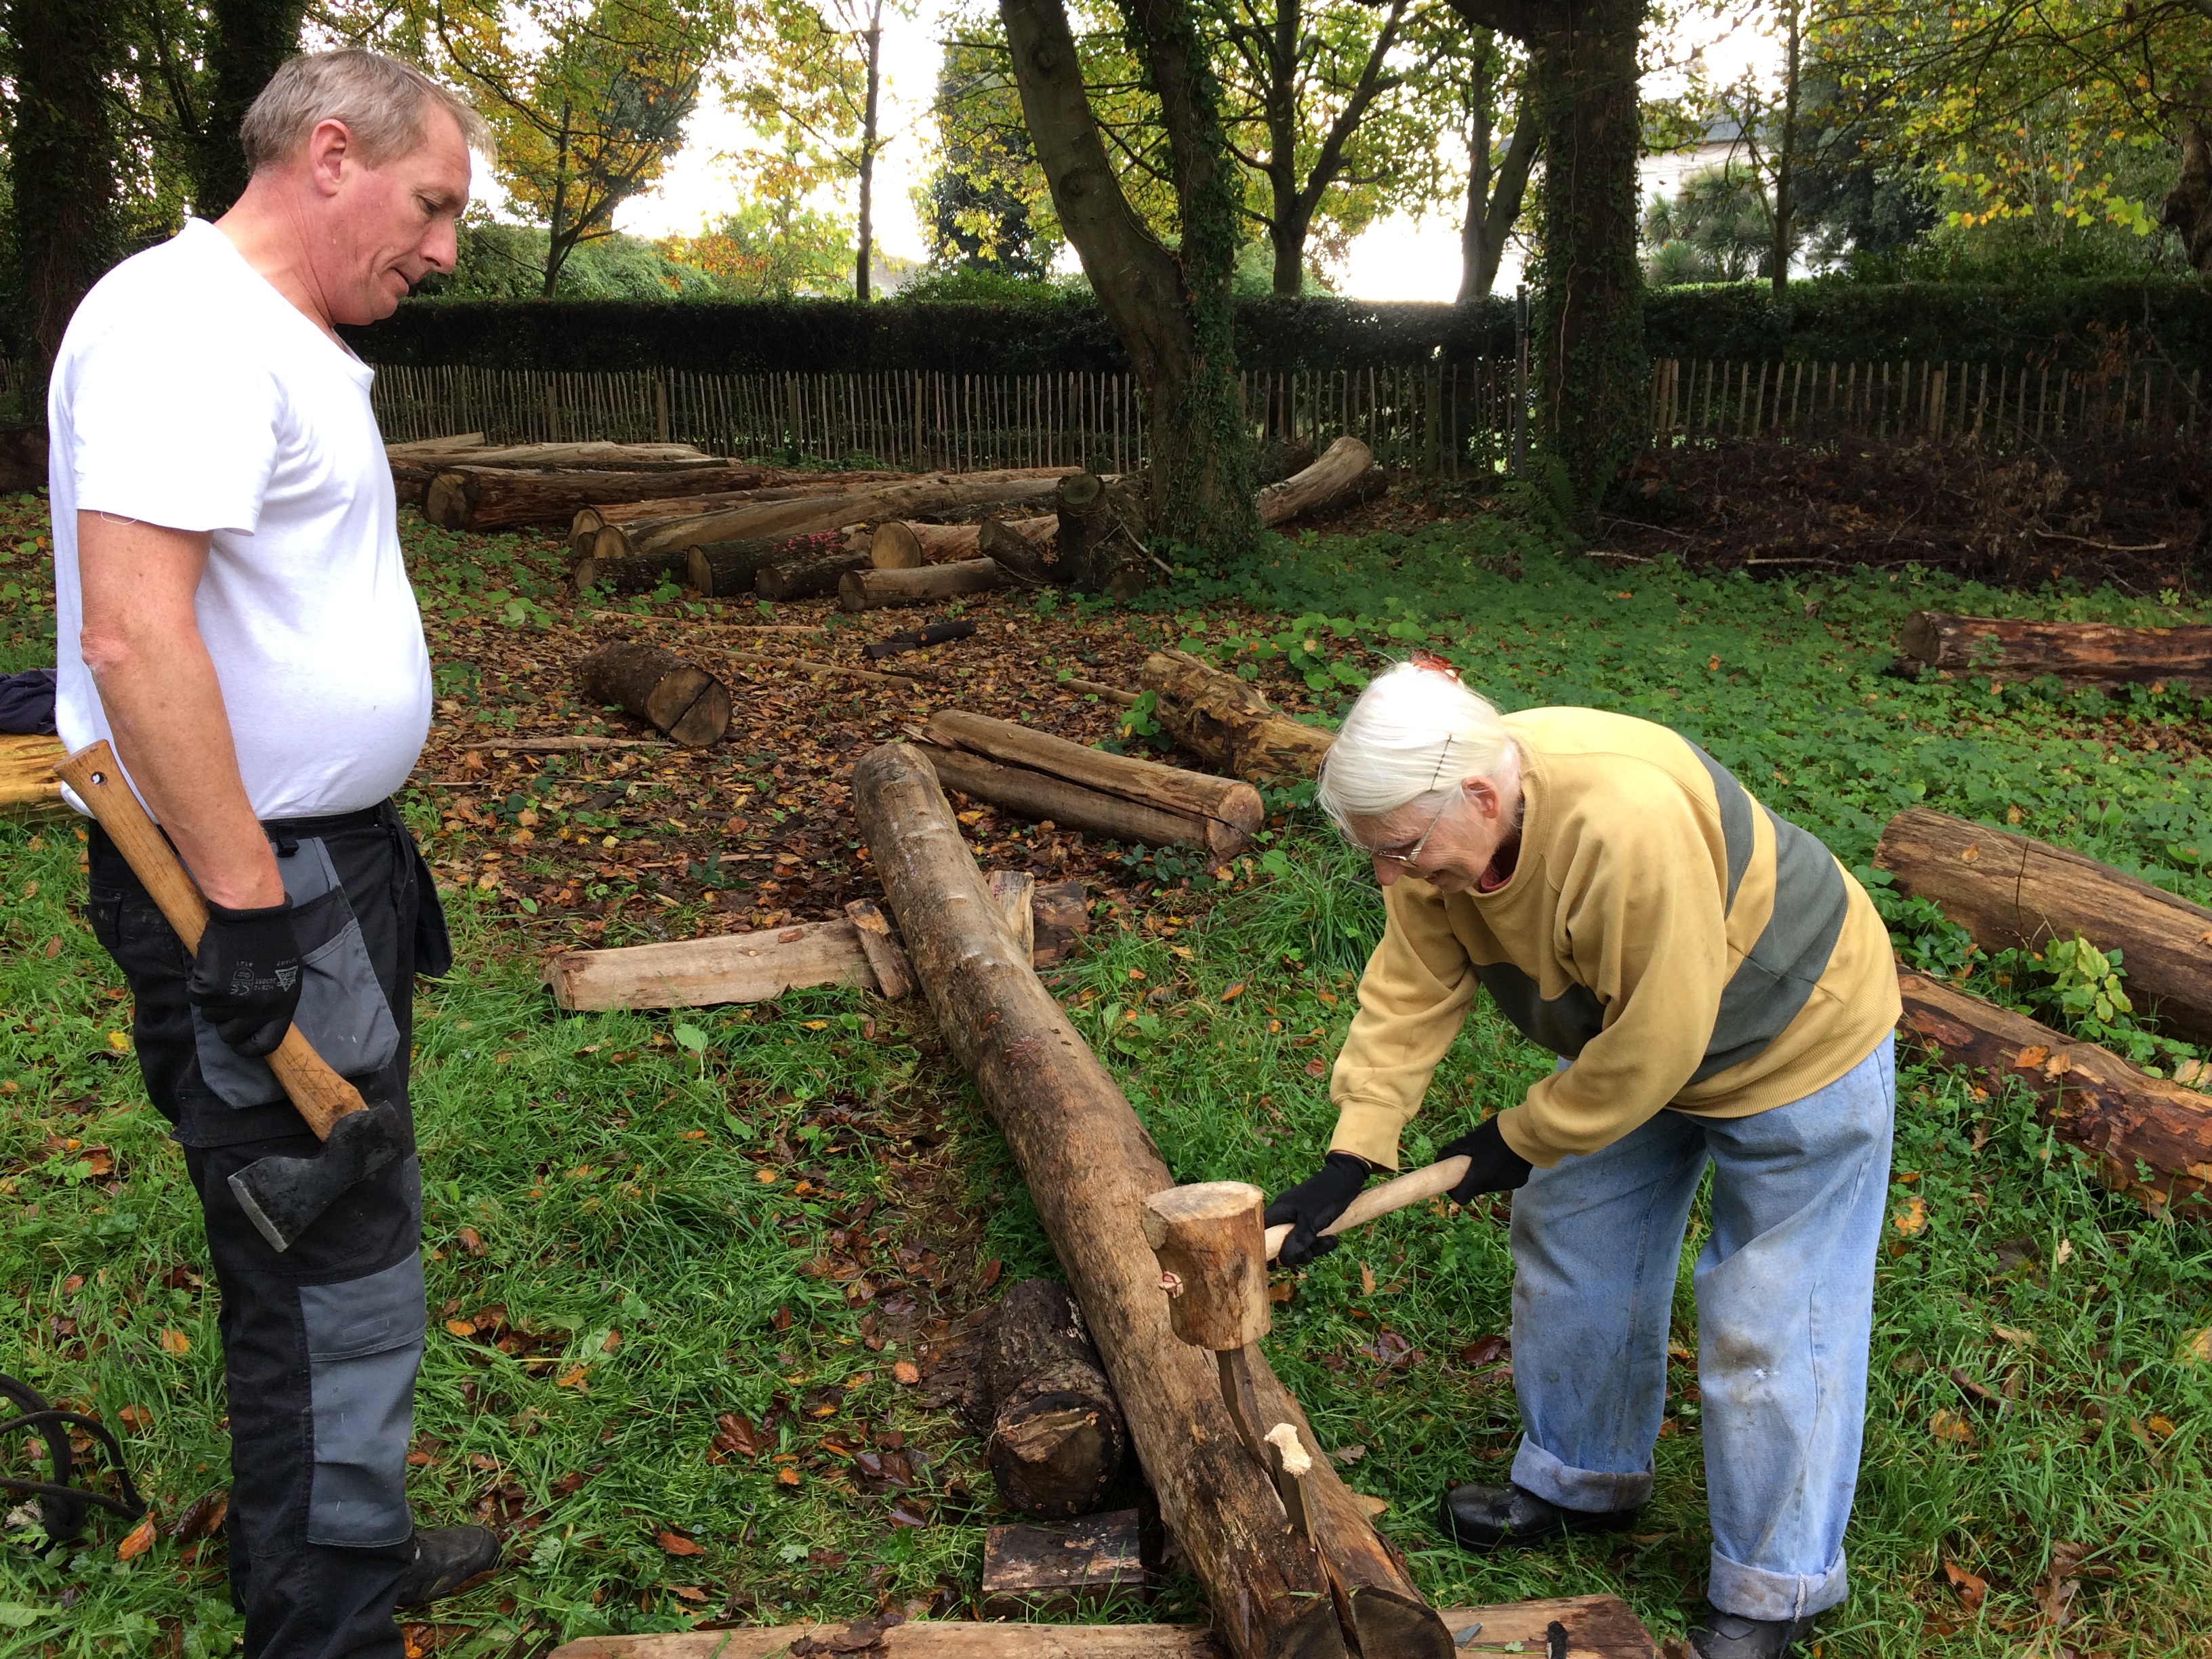
Some of the placed earthbound posts from our previous visit were finally tamped in today. The process involved the use of a groma (4 plumb bobs on a cross that sits on top of each post). Although this method is known from classical times, we have employed it here to ensure our irregular posts sit in the centre of each excavated hole. I’m almost certain this method would not have been necessary in the Neolithic period to locate wall posts in a residential building but it enables us to ensure our posts match the original archaeological floor plan. It does raise the question of how large timbers or stones were placed accurately in large Neolithic monuments such as Stonehenge and I have no doubt that plumb bobs and other surveying tools were employed to ensure alignments and vertical accuracy.


Each post was then backfilled with thin layers of soil that were tamped with wooden poles to ensure the hardest compaction of the soil around the posts.
Tuesday 16th May 2017
The weather today has been calm and bright.
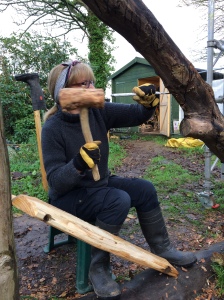
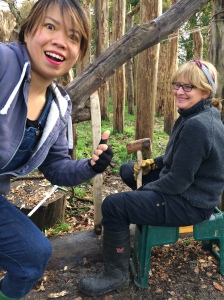
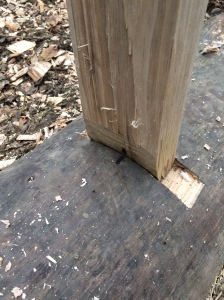
Astra and Rosie continued on the mortises for Posts 17 and 21. These deep mortises have been chiseled through the incredibly dense Holm Oak that forms this Sill Beam. Resilient and tool blunting, it usually takes more than a day for one person to cut a mortise. Just before lunch the team lifted post 17 into place – another one complete. Rosie’s mortise is also finished but now awaits the arrival of the new timber to find a post and cut a tenon into it.
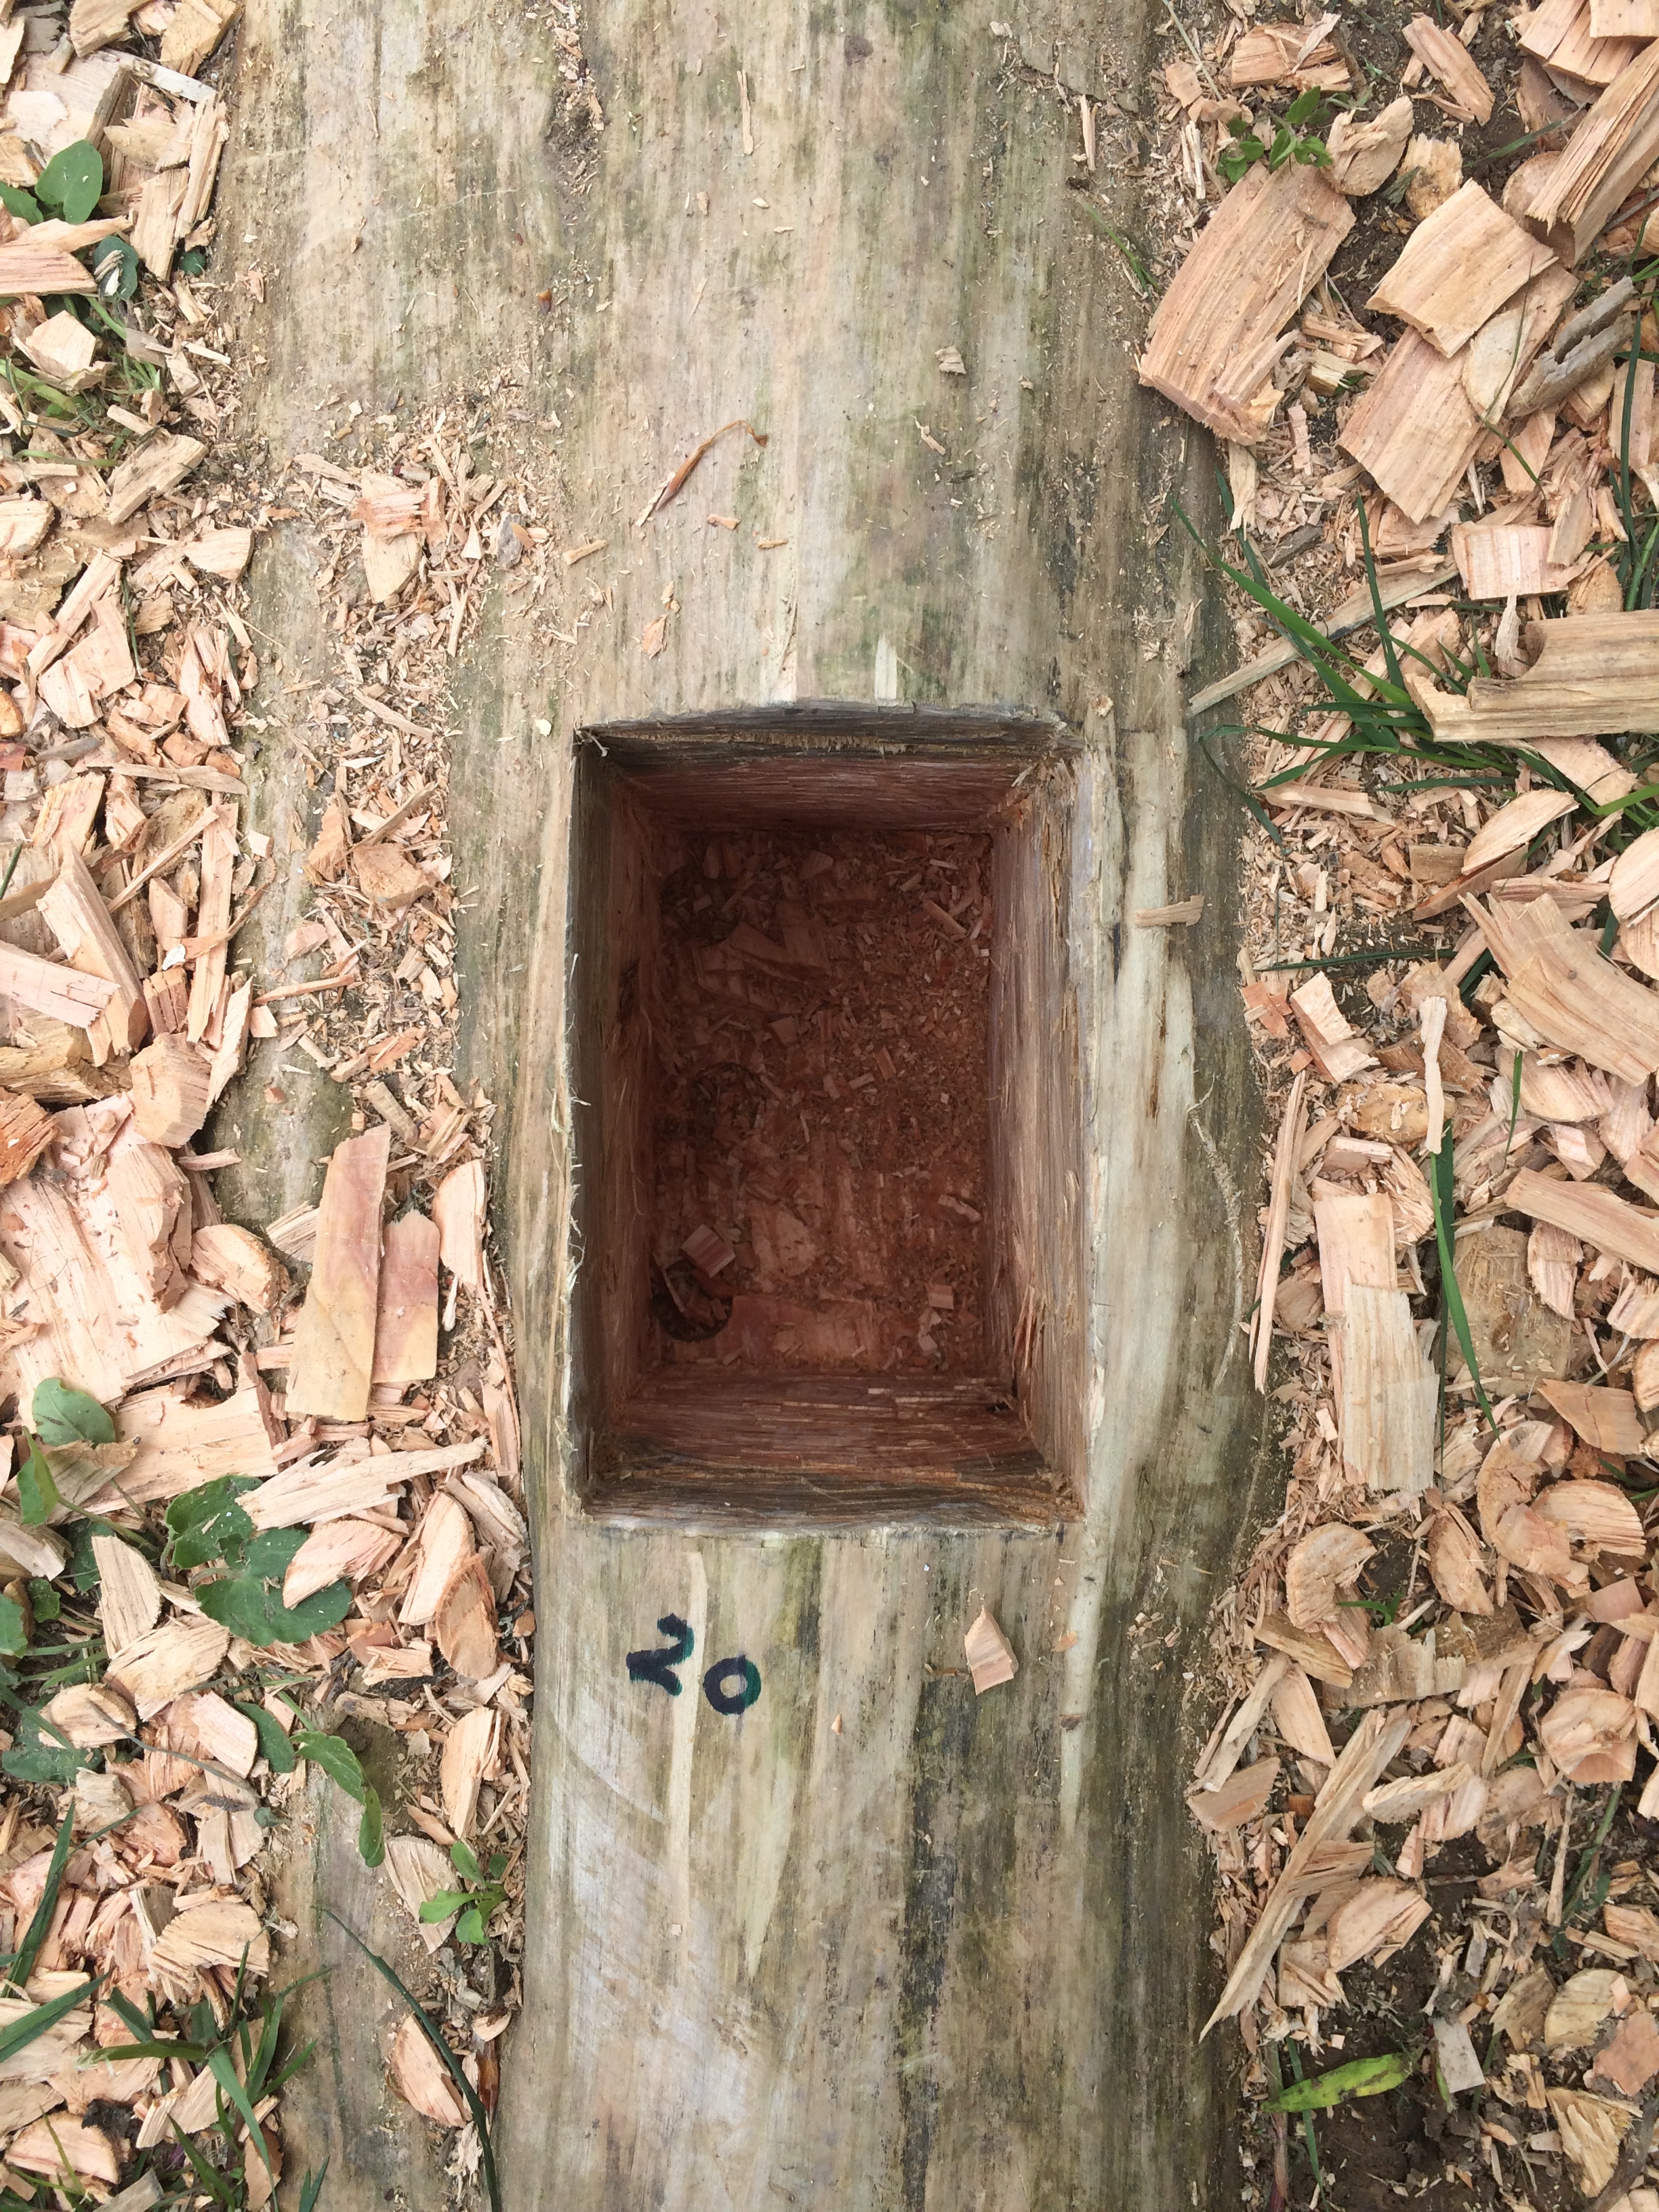
Derek has completed mortise 20 and also await a new piece of timber to create a matching post. In the meantime he has begun and finished the mortise for post 22 today, a stirling achievement!
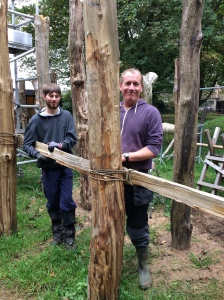
Bill, Edward, Lewis, Danny and Ray have secured three more earthbound posts by aligning them with the Groma and then tamping back with soil. It’s interesting to see the effect of this operation on the appearance of the site. Everything is starting to look really solid and almost monumental.


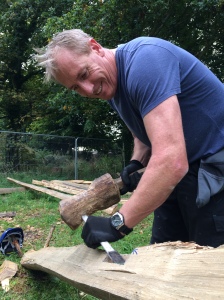
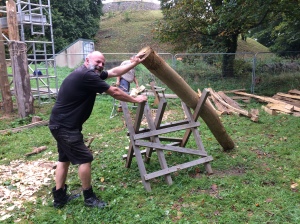
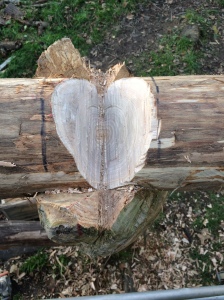
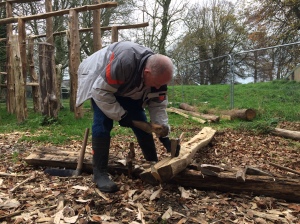
The remains of the old Neolithic building were finally removed today. Four machined timber posts were sitting proud of our eventual floor level. The team excavated to the depth of their concrete footings and split out the timber posts using froes and mauls – hot and sweaty work on a day like this!
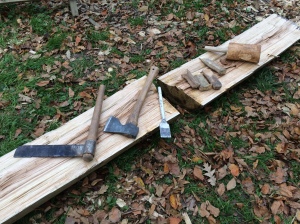
The final task today has been to look at ways of splitting longer pieces of timber using froes and wooden wedges. This is a Dark Art and will be required extensively later on in the project when we start to produce planks for floors and furniture. The process is not as easy as it looks and relies on giving the timber time to split rather than just hammering wedges into a split. It’s early days, but by the end of the project the volunteers will be expert at producing split planks. Edward is already showing some skill at this task.
Wednesday 17th May 2017
Last night saw the delivery of the timber from Cranborne Estates in Dorset.


The driver showed impressive skill and speed at unloading despite an early hydraulic failure with the HiAb crane. Huge thanks to Daryl and Gaynor for their support and help – and to Chris O’Conner who escorted the haulier to and from the site, provided lighting and ensure everything went ship shape and Bristol fashion for the operation.
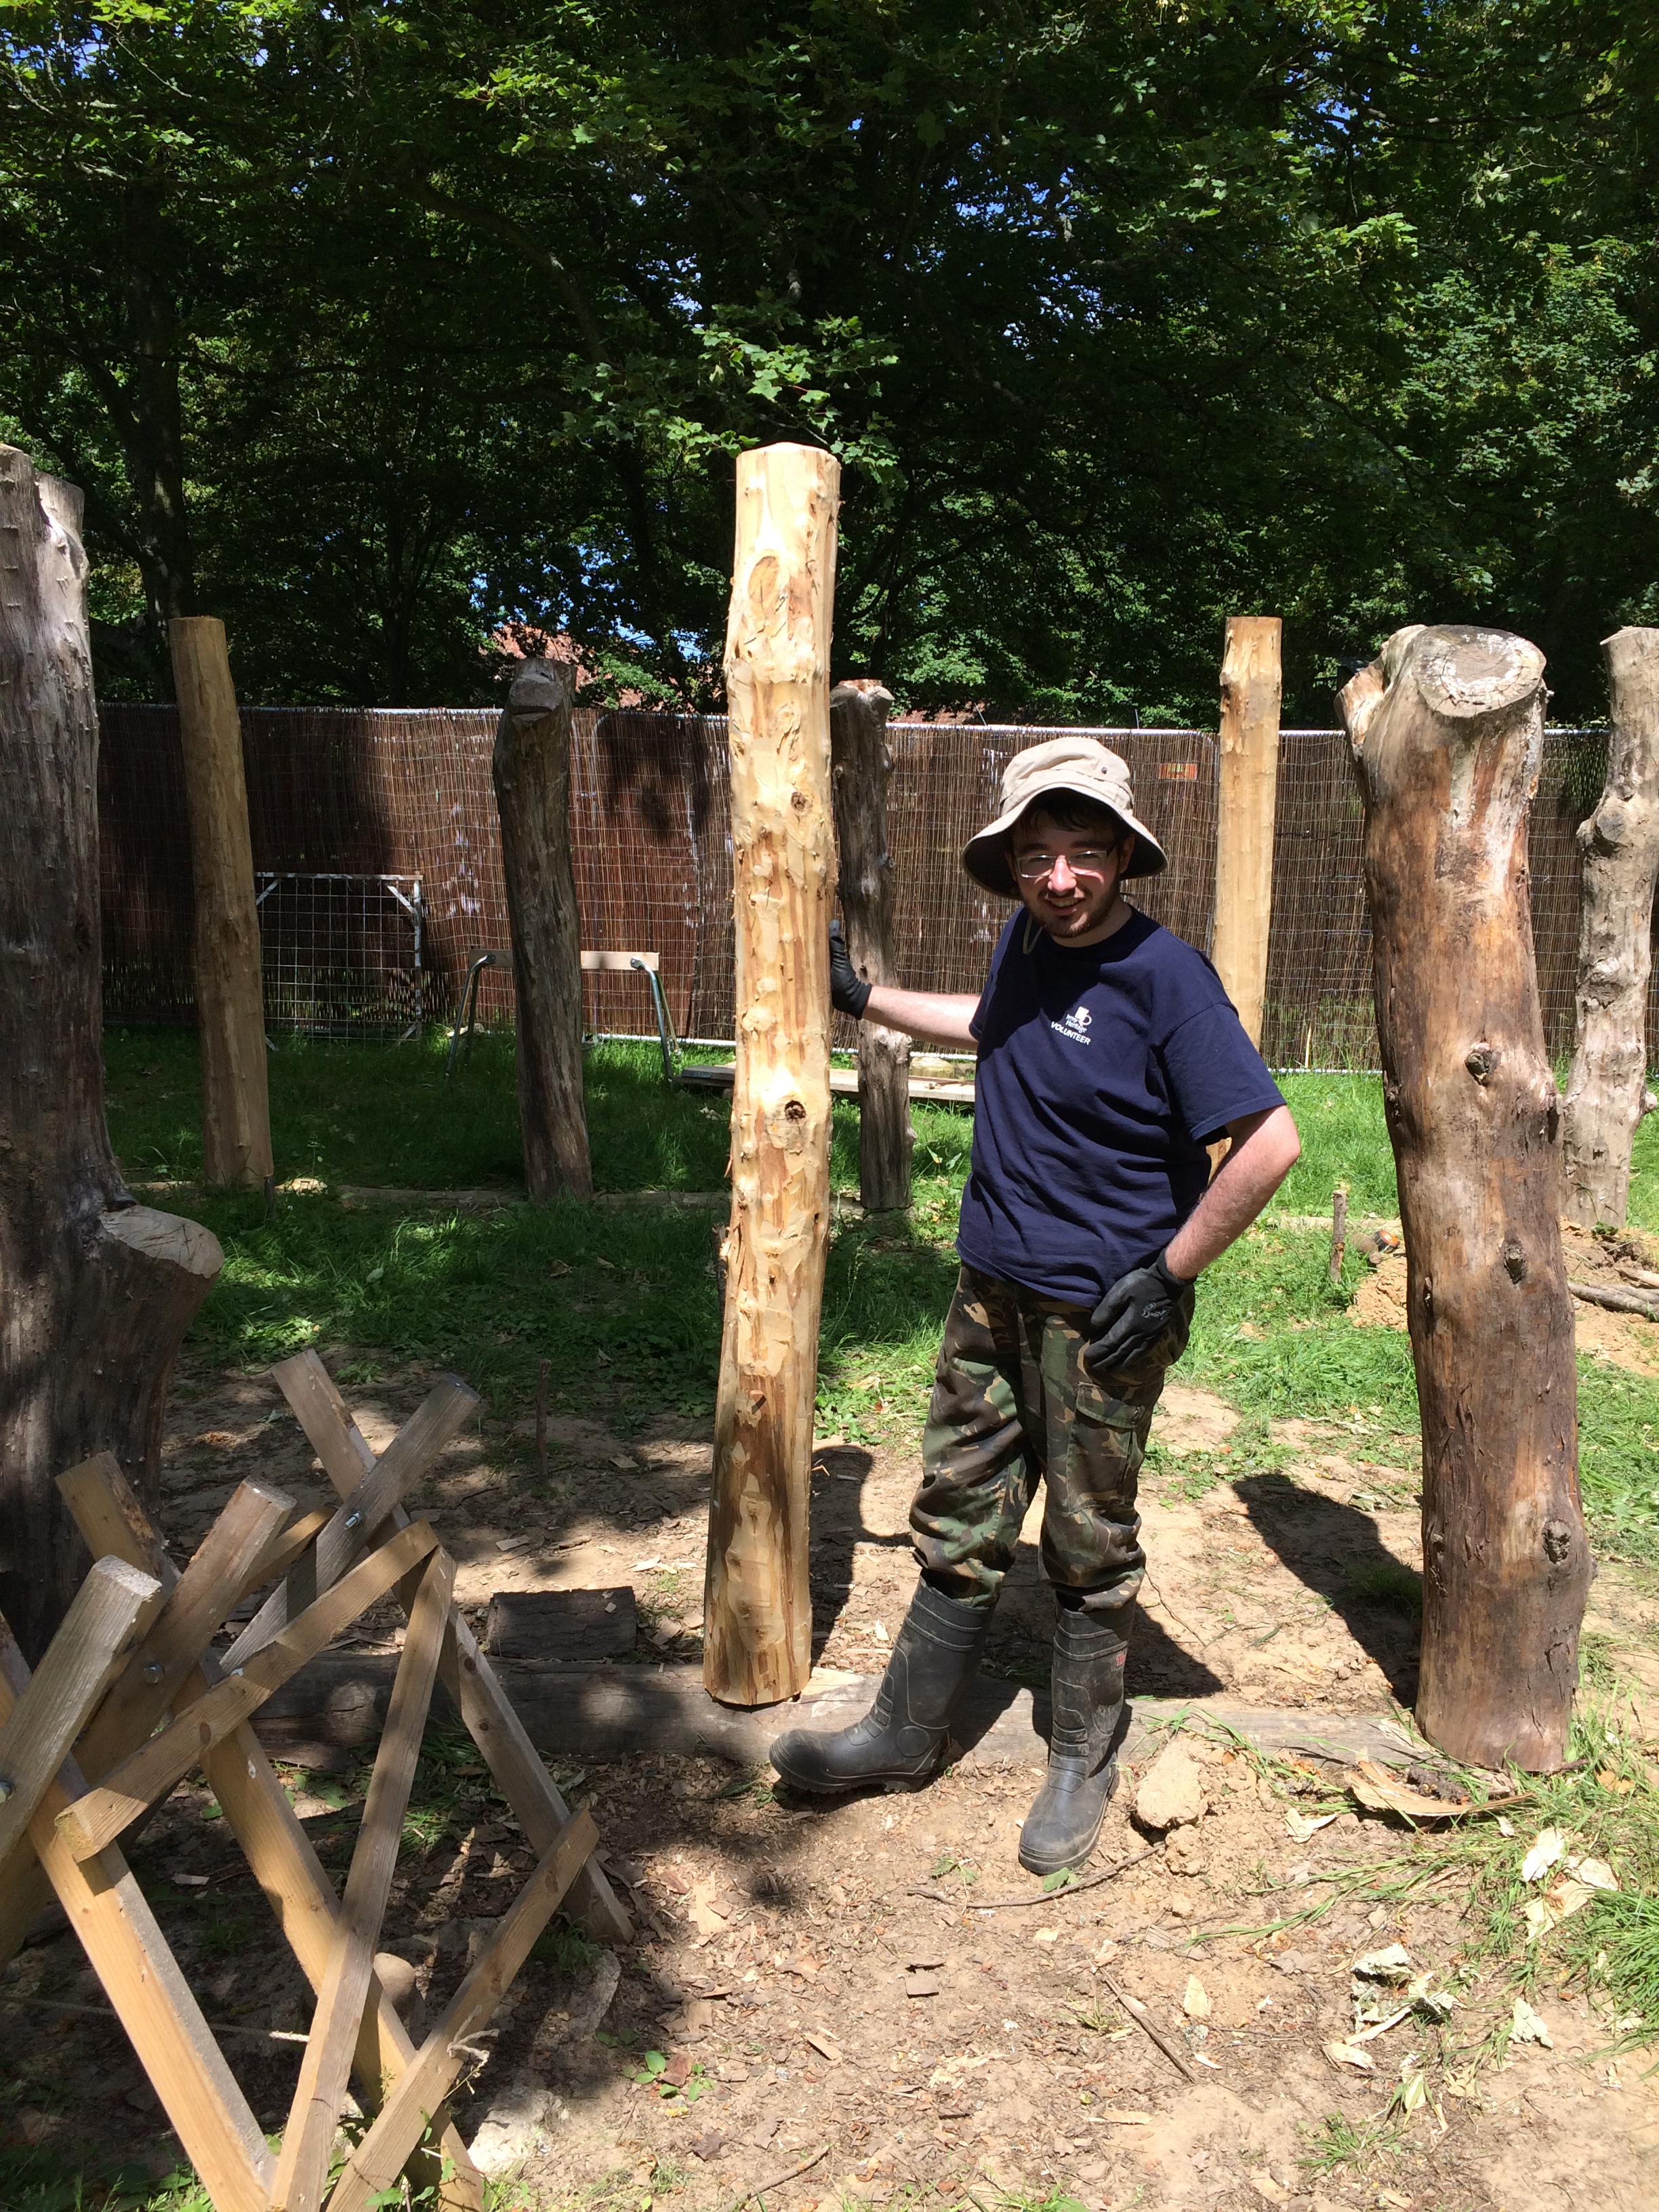
Today we begin the task of debarking this new load of timber in preparation for shaping and jointing the timbers. The first mission is to process the 16 remaining earthbound wall posts that will completed the exterior walls of the building.


The stripped bark of the sweet chestnut trees is being saved to turn into cordage later on in the project. Although not as perfect as the inner bark of the lime tree, Sweet chestnut bark has cordage making properties once the sap has been removed after an ageing process. Traditionally, cordage barks would undergo a retting process where the freshly stripped bark would be bundles and placed in a flowing stream for several weeks. This would mechanically and bacterially remove the sap from the bark and reveal the layers of inner bark as leaves or sheets. The retted bark would then be dried for later use.
What is noticeable today is the speed at which volunteers are stripping each log. The timber is freshly cut which helps, but each volunteer also has many hours of experience with this task behind them.


The weather today has been incredibly wet with persistent heavy rain falling for most of the day. The volunteers have shown great spirit despite this and successfully prepared 18 wall posts.
Thursday 18th May 2017
A good turn out today after the onslaught of heavy rain yesterday.
The mission is on the strip the bark from the huge pile of new timbers before it begins to dry out. Experience from the first batch highlighted the increased difficulty of bark stripping when the timber has been cut for some time.
Work is also continuing with the digging of post holes for the remaining 16 earthbound posts. We aim to dig a hole, place a post and immediately align using the groma and back-fill before moving onto the next post hole.

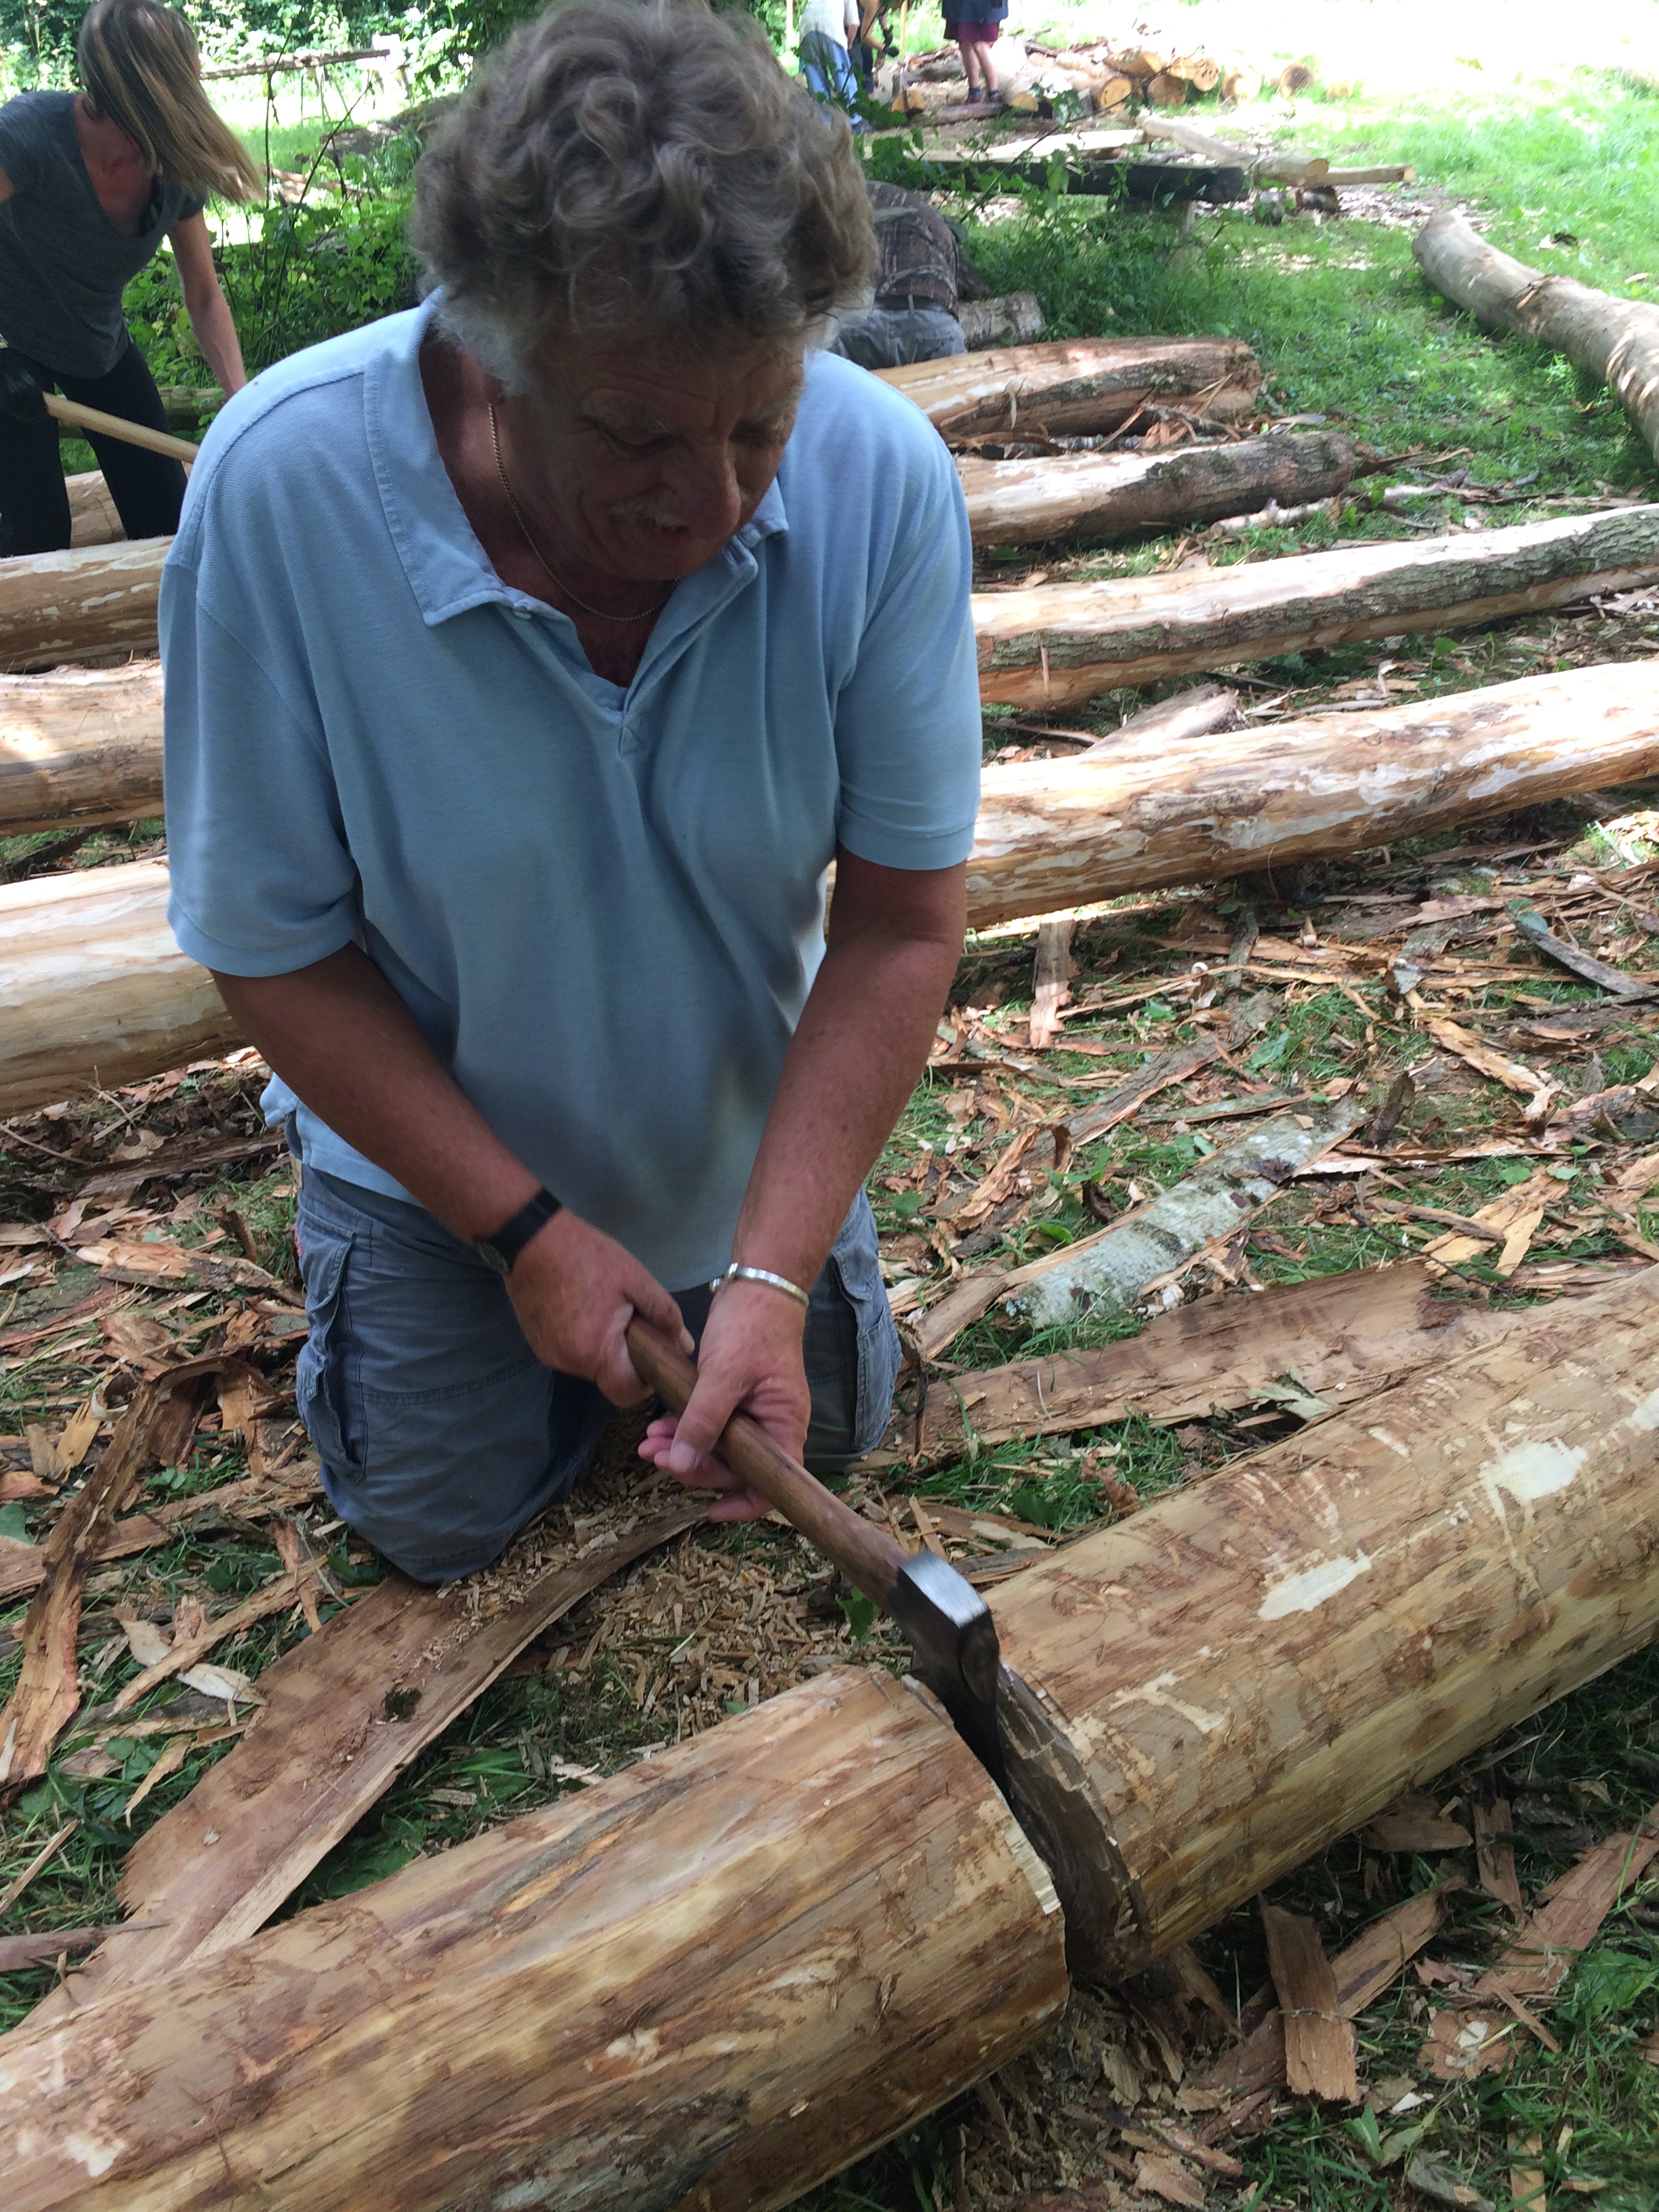
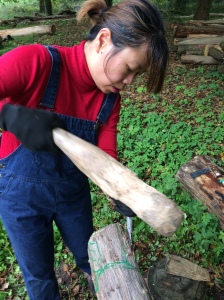
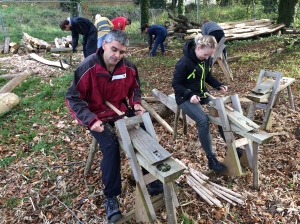
Today, the volunteers are learning the of splitting long timbers. Yesterday we ran through the theory of splitting and today the first team is putting the theory into practice. The successful splitting of long timber into halves, quarters or even planks requires skill and an understanding of how the grain in a particular piece of wood runs. Splitting requires judgement and sometimes patience to get right, so today will be another steep learning curve for those involved. The aim of splitting our long timbers is to produce 48 split rafters for the roof structure (when we get there!). It is important that this process begins now to ensure the timber is green (freshly cut and full of water) as this makes the process of splitting far easier.


Danny and Derek have formed a splitting team and are working with success through a reasonably straight grained timber. Tim and Bill started the process with a tricky twisted timber and did really well to produce 2 rafters.
At this stage we are keeping them as halves while splitting skills are developed. It may be that we quarter the logs later on as skills improve. This would reduce the weight of the rafters and make them more graceful on the finished frame.


The process is using wooden wedges, axes and mauls only- requiring the wedges to be continuously re-shaped and sharpened to ensure good performance. The temptation for volunteers new to this sport is to drive a wedge into an existing split rather than working ahead and determining the course of the split. Tim, Derek and Astra have that understanding.
Friday 19th May 2017
The weather is fine with sunny spells and a gentle breeze. Work continues on rafter splitting today, Tim, Bill and Mike on a tricky twisted log, Phil and Astra on a knotty but straight grained log. They are still in the learning stage of splitting but are improving rapidly. The key is to work ahead of the split in order to determine is course or to bring it back in line. Twisted grain remains a difficulty even with this knowledge though!
Derek is continuing with the tenon for post 22. The Sweet Chestnut is fresh and very wet – making chiselling easier than previous tenons.
Alcindo and Iris are moving and stripping more rafter poles to then be split.
The site has been tidied to remove most trip hazards and to organise pegs and waste wood into stacks and piles. It is crucial that this is done regularly to avoid the build up of materials that then create hazards to the team.
Much thought continues with the need for so many internal timbers. Perhaps one way of placing them and making them necessary is to ½ or ¼ split the intended posts. This would give room inside the end bays to actually move! Another suggestion is that some posts support a low level or mezzanine raised floor for dry storage, or that the “posts” are actually the structural components of stalls or storage compartments? Astra has made an interesting suggestion that perhaps the “purlin post holes” actually represent the supports for a platform that run around the perimeter of the bay – offering a raised area for sleeping or storage. This requires more thought and design with engineering input.

Where the 1/2 split 4500mm timbers are sturdy enough they are being split into ¼ to make rafters. We are being selective in choosing the straightest timber to split.

Saturday 20th May 2017
Today is our first Volunteer Saturday on this project. The weather is fine – if a little chilly. The tasks continue from the week with the pressure on to strip the bark from as many green timbers as possible before it becomes more and more difficult with the passing of time.
Splitting continues to prepare the 48 rafters that the building will require. Depending on the skill levels of the volunteers, we will split each round timber in ½ or ¼.


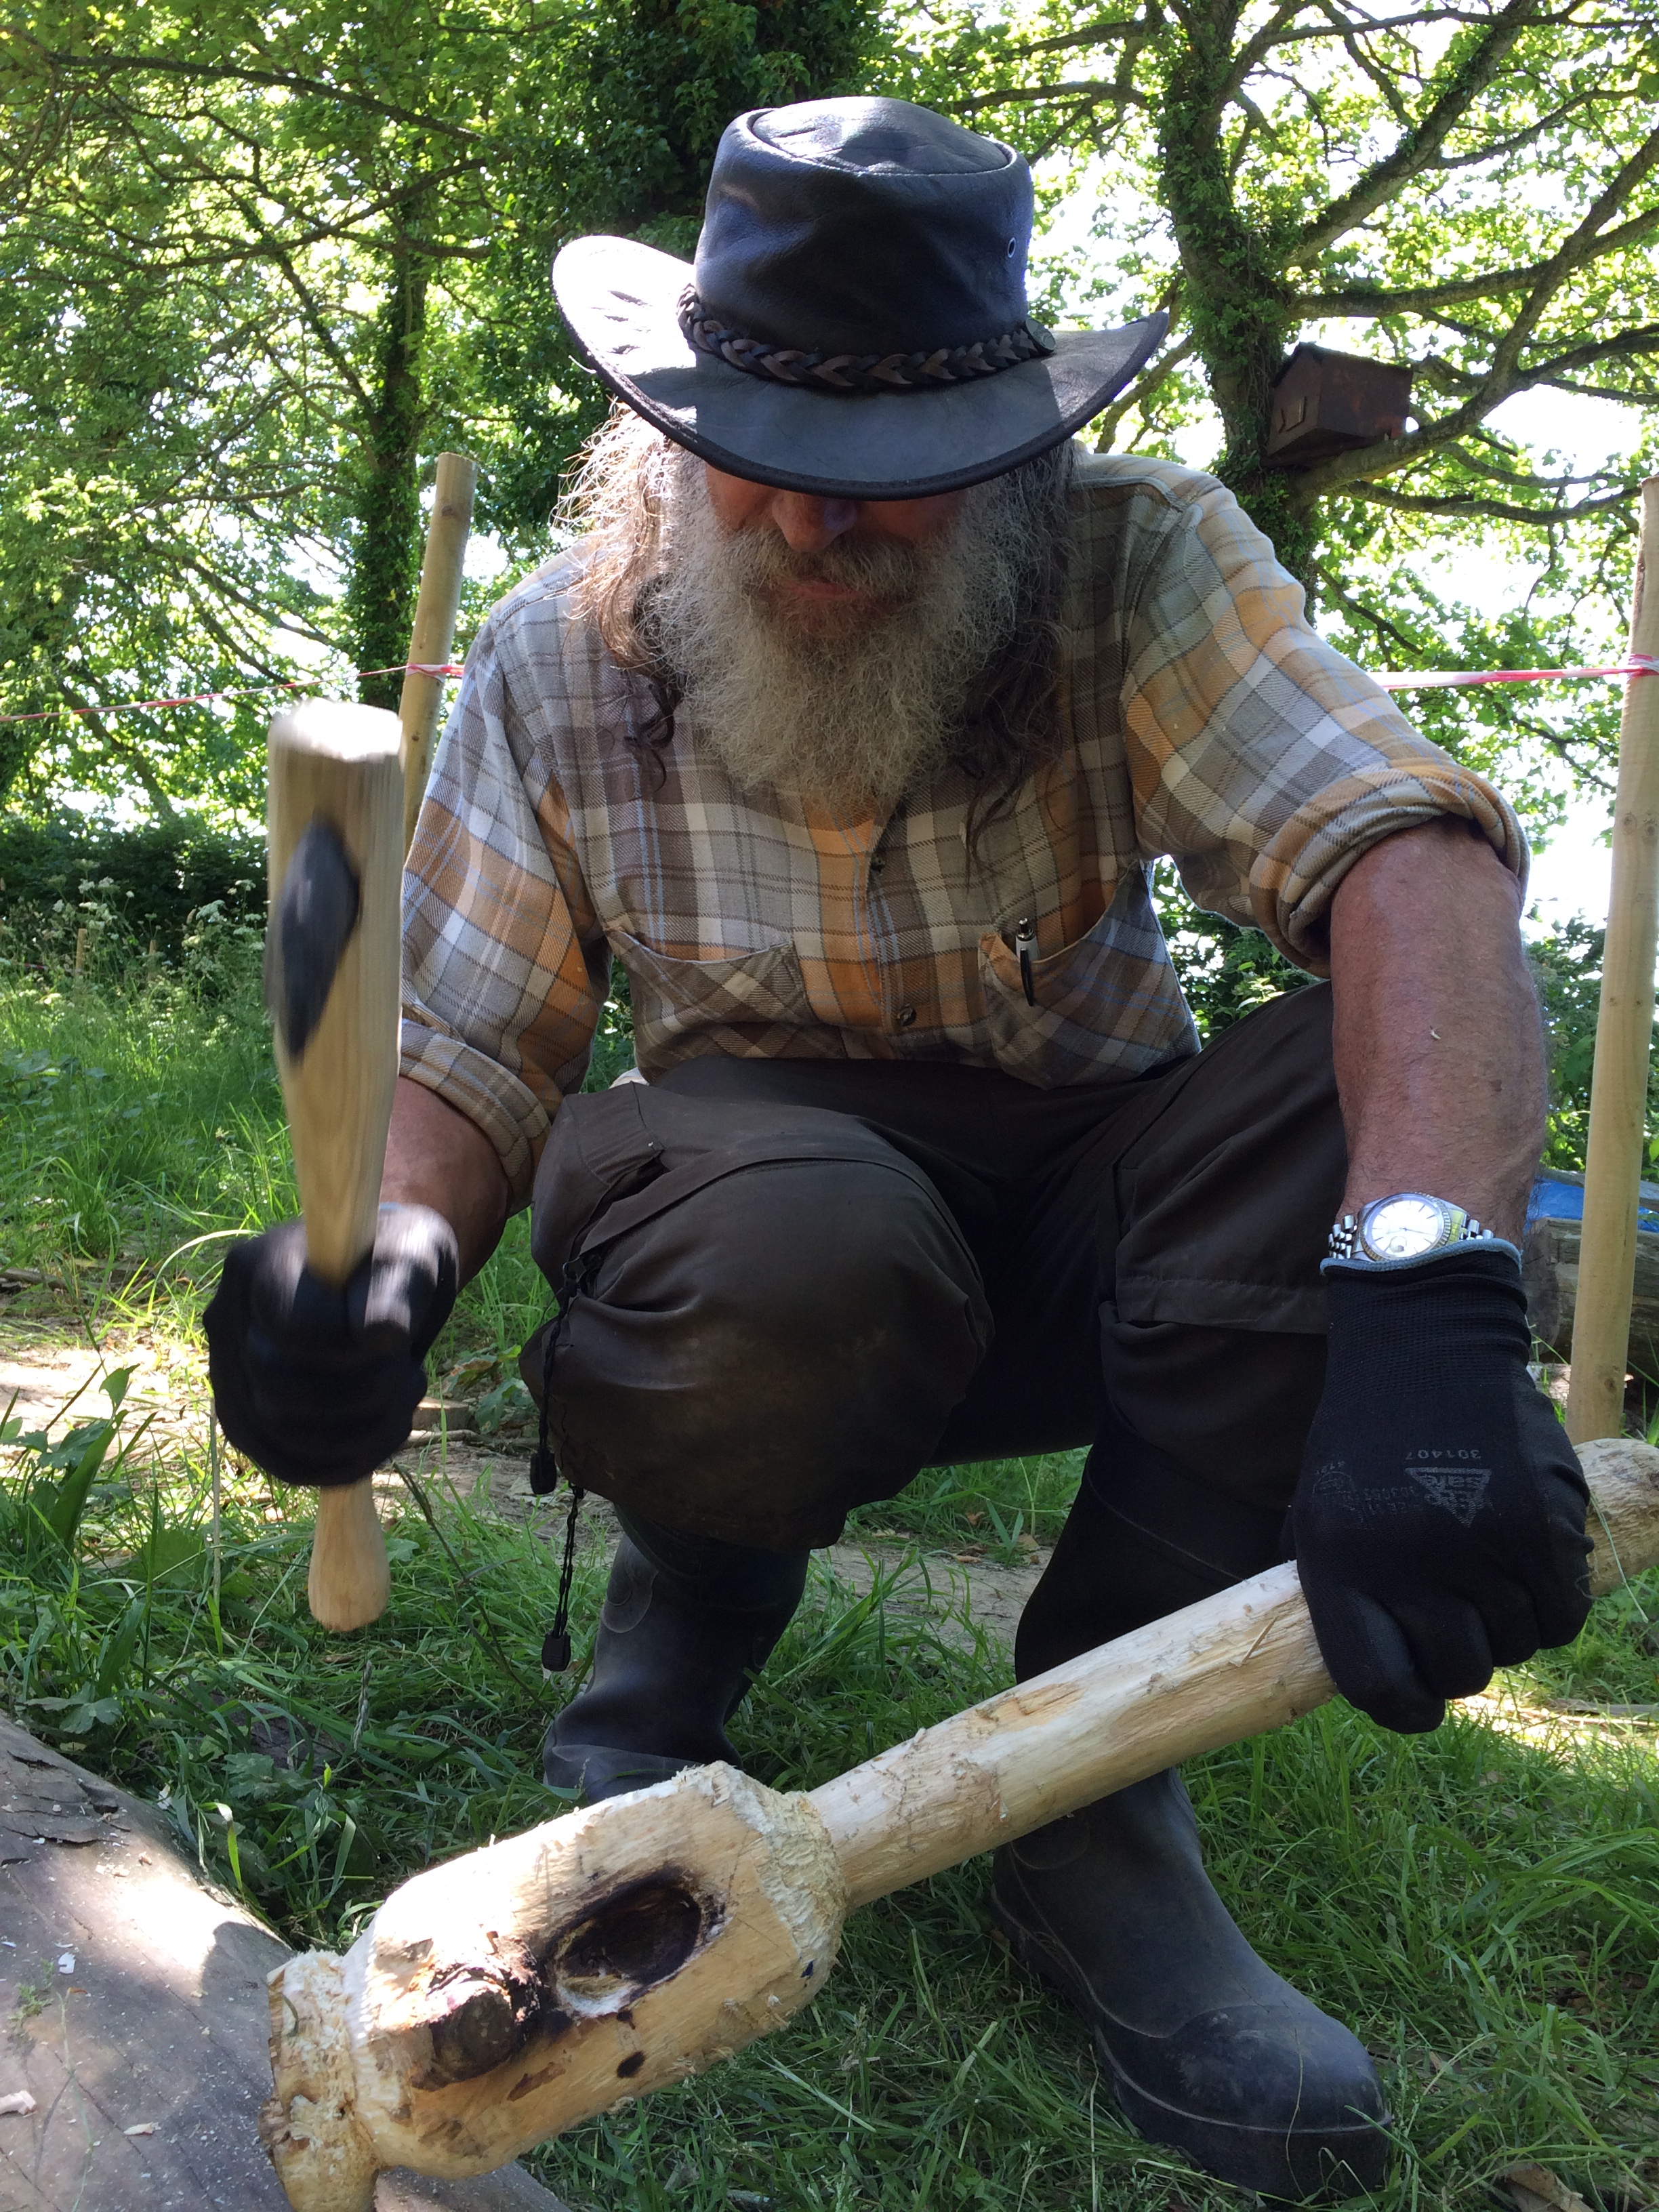
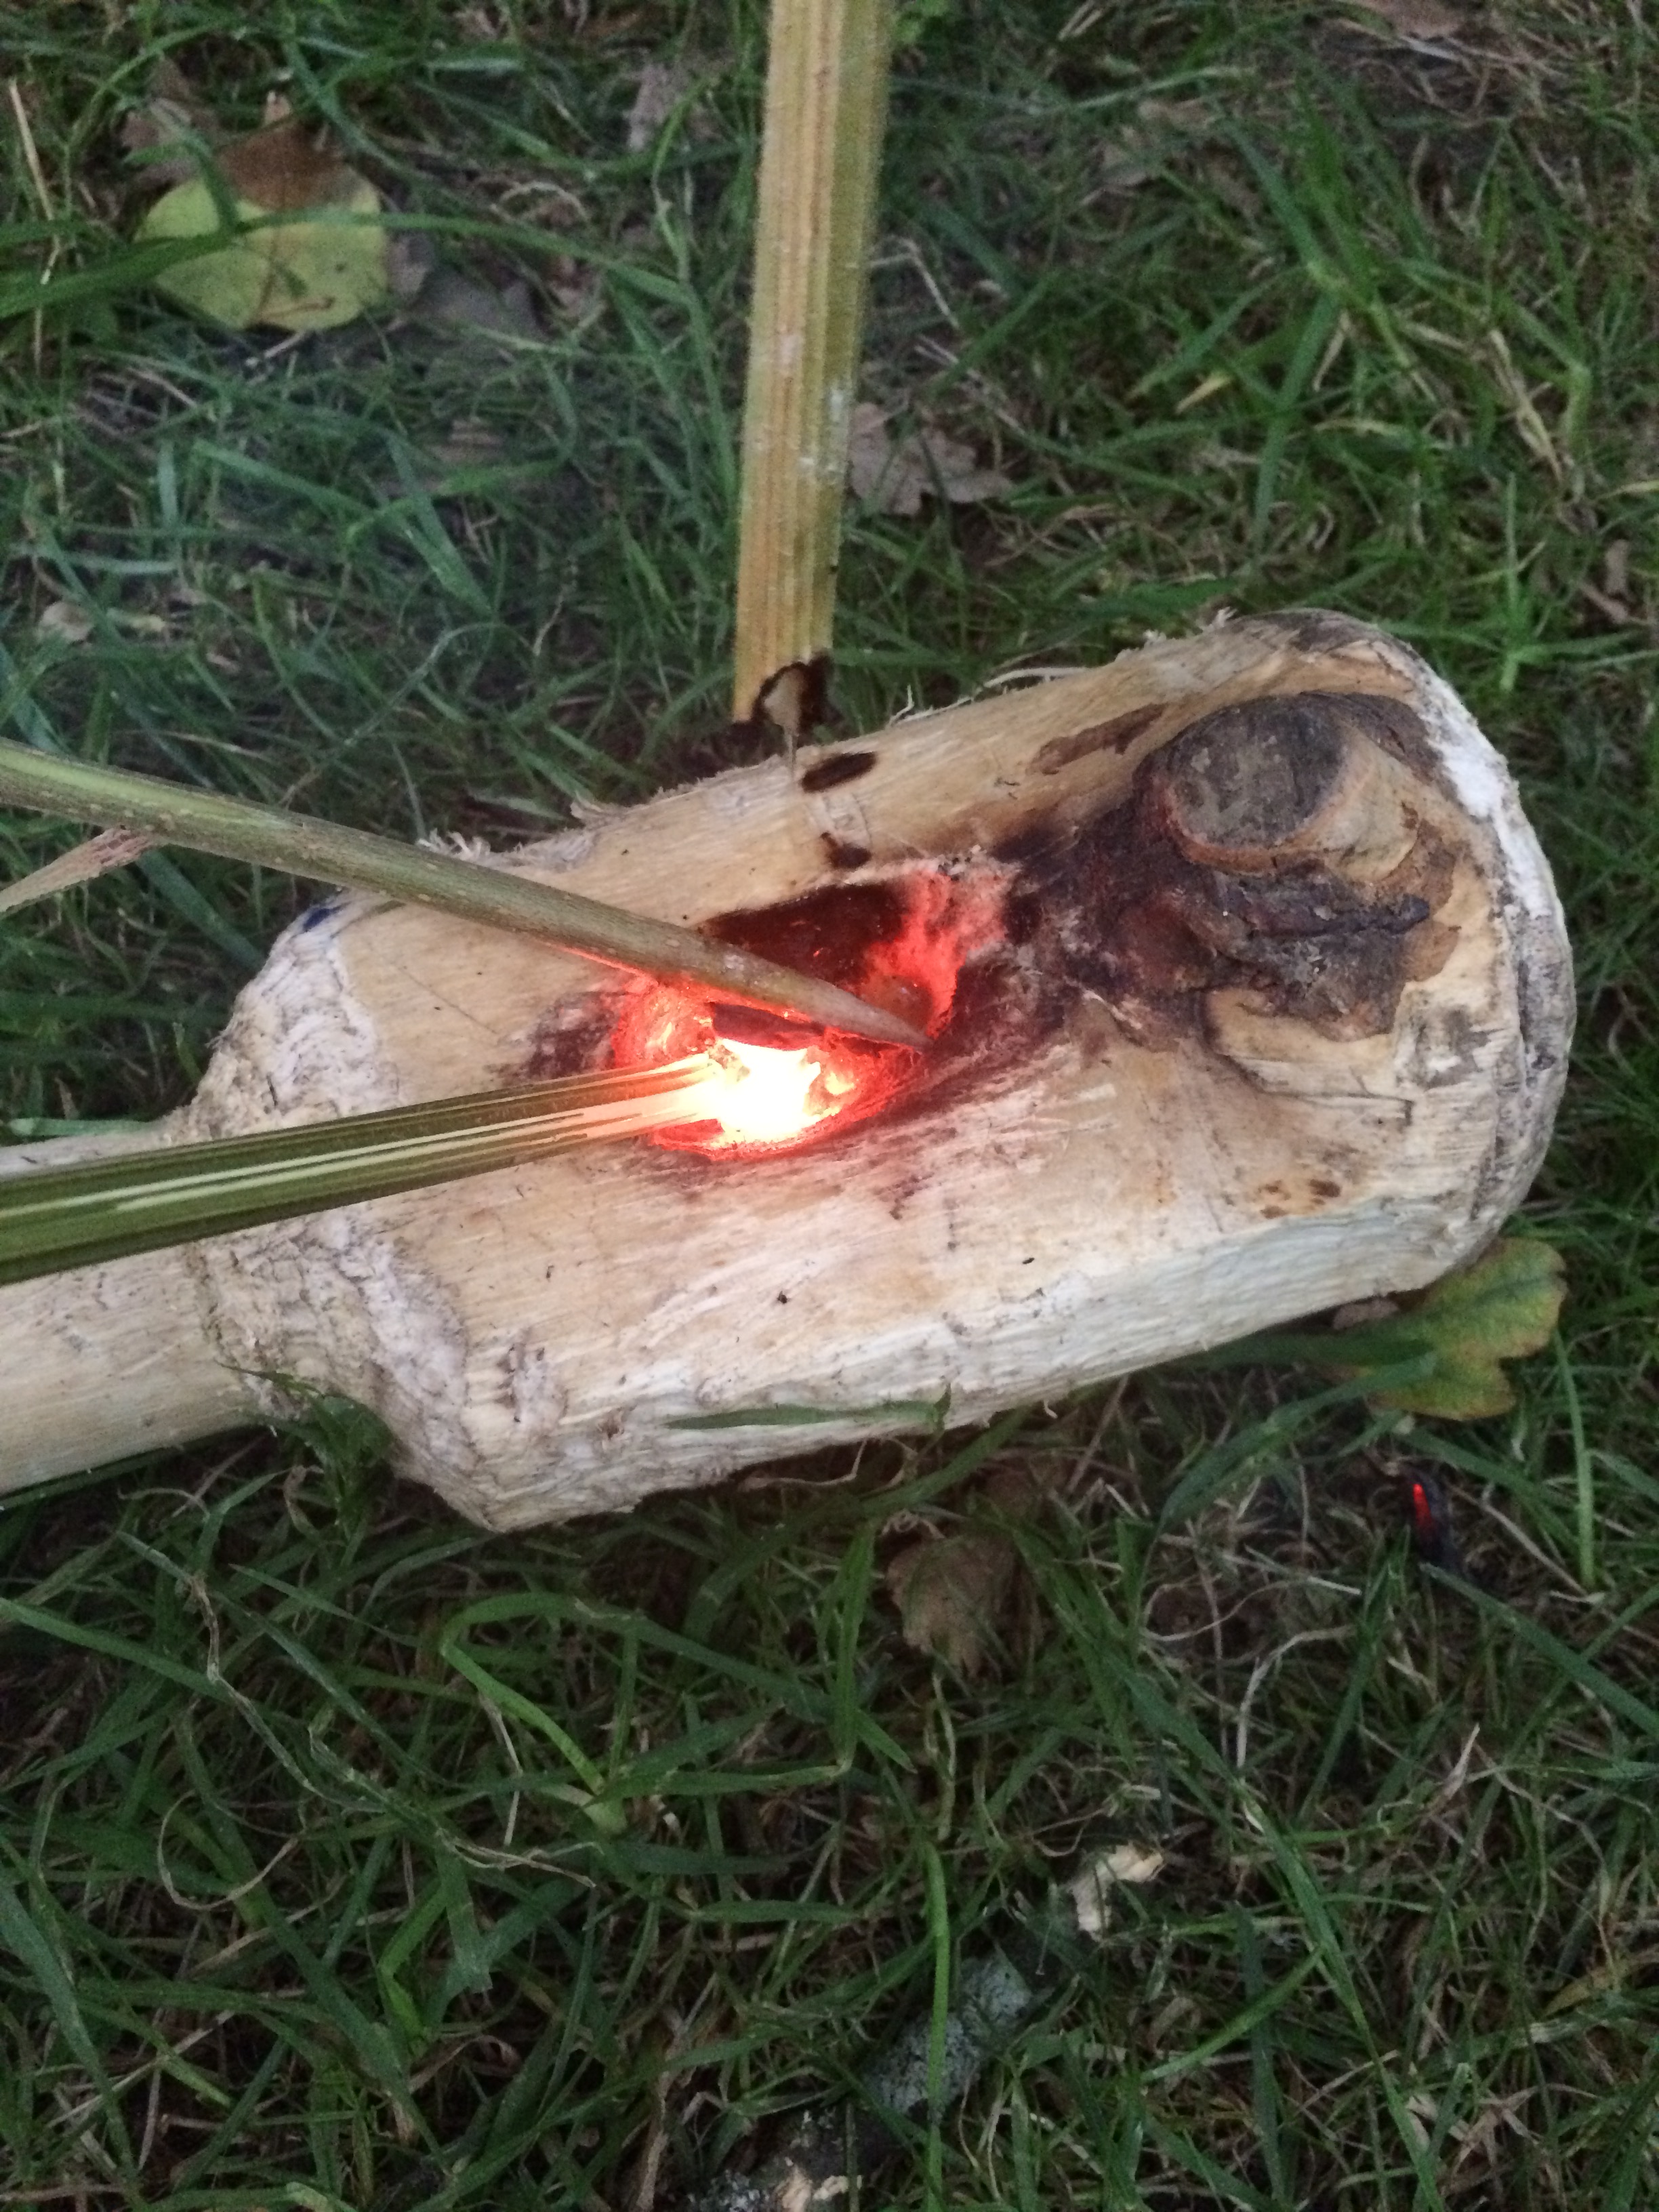
Last night we had a BBQ on site to celebrate the end of a hard week. Much food was cooked and consumed and a small experiment was also tried. The practise of burning rather than cutting holes in timber is known from various cultures across the world. The presence of a fire and lots of spare wood threw up the chance to have an initial go at this idea. A seasoned slab of Oak was selected with a split surface. Using a pair of bellows (we thought about the potential of making a bag bellow with leather and some kind of bone nozzle) we pressed a small ember against the surface of the timber and blew a directed jet of air onto it (preferably at the base – at the contact point between the ember and the wood). The ember burned into the surface and created a hollow that subsequent embers could be placed into and held down with a hazel stick. It was possible to determine the size of the hole with the size of the ember and how precisely it was held in the centre of the depression, but the direction of airflow also had an effect on the hole shape. We were all surprised at the relative speed the hole was formed with comparatively little effort!


Today Derek displayed his great skill and precision in the cutting of Mortise and Tenon joints. Post 22 went in with a fantastic fit and stands proud as the penultimate sill beam post.
Splitting continues with Phil, Bernie and Andrea who are splitting quarters and halves into some straight grained timber – and some less than straight grained timber! Over half of the required rafters have now been split – pretty amazing for 3 days work!


Today marks the end of another very productive week at La Hougue Bie. The project has momentum, the volunteers are enthusiastic, developing and mastering their skills, and the sun is beginning to shine more regularly – we look forward to a fantastic summer!
Visit Week: June 12th – 16th 2017
Monday 12th June 2017
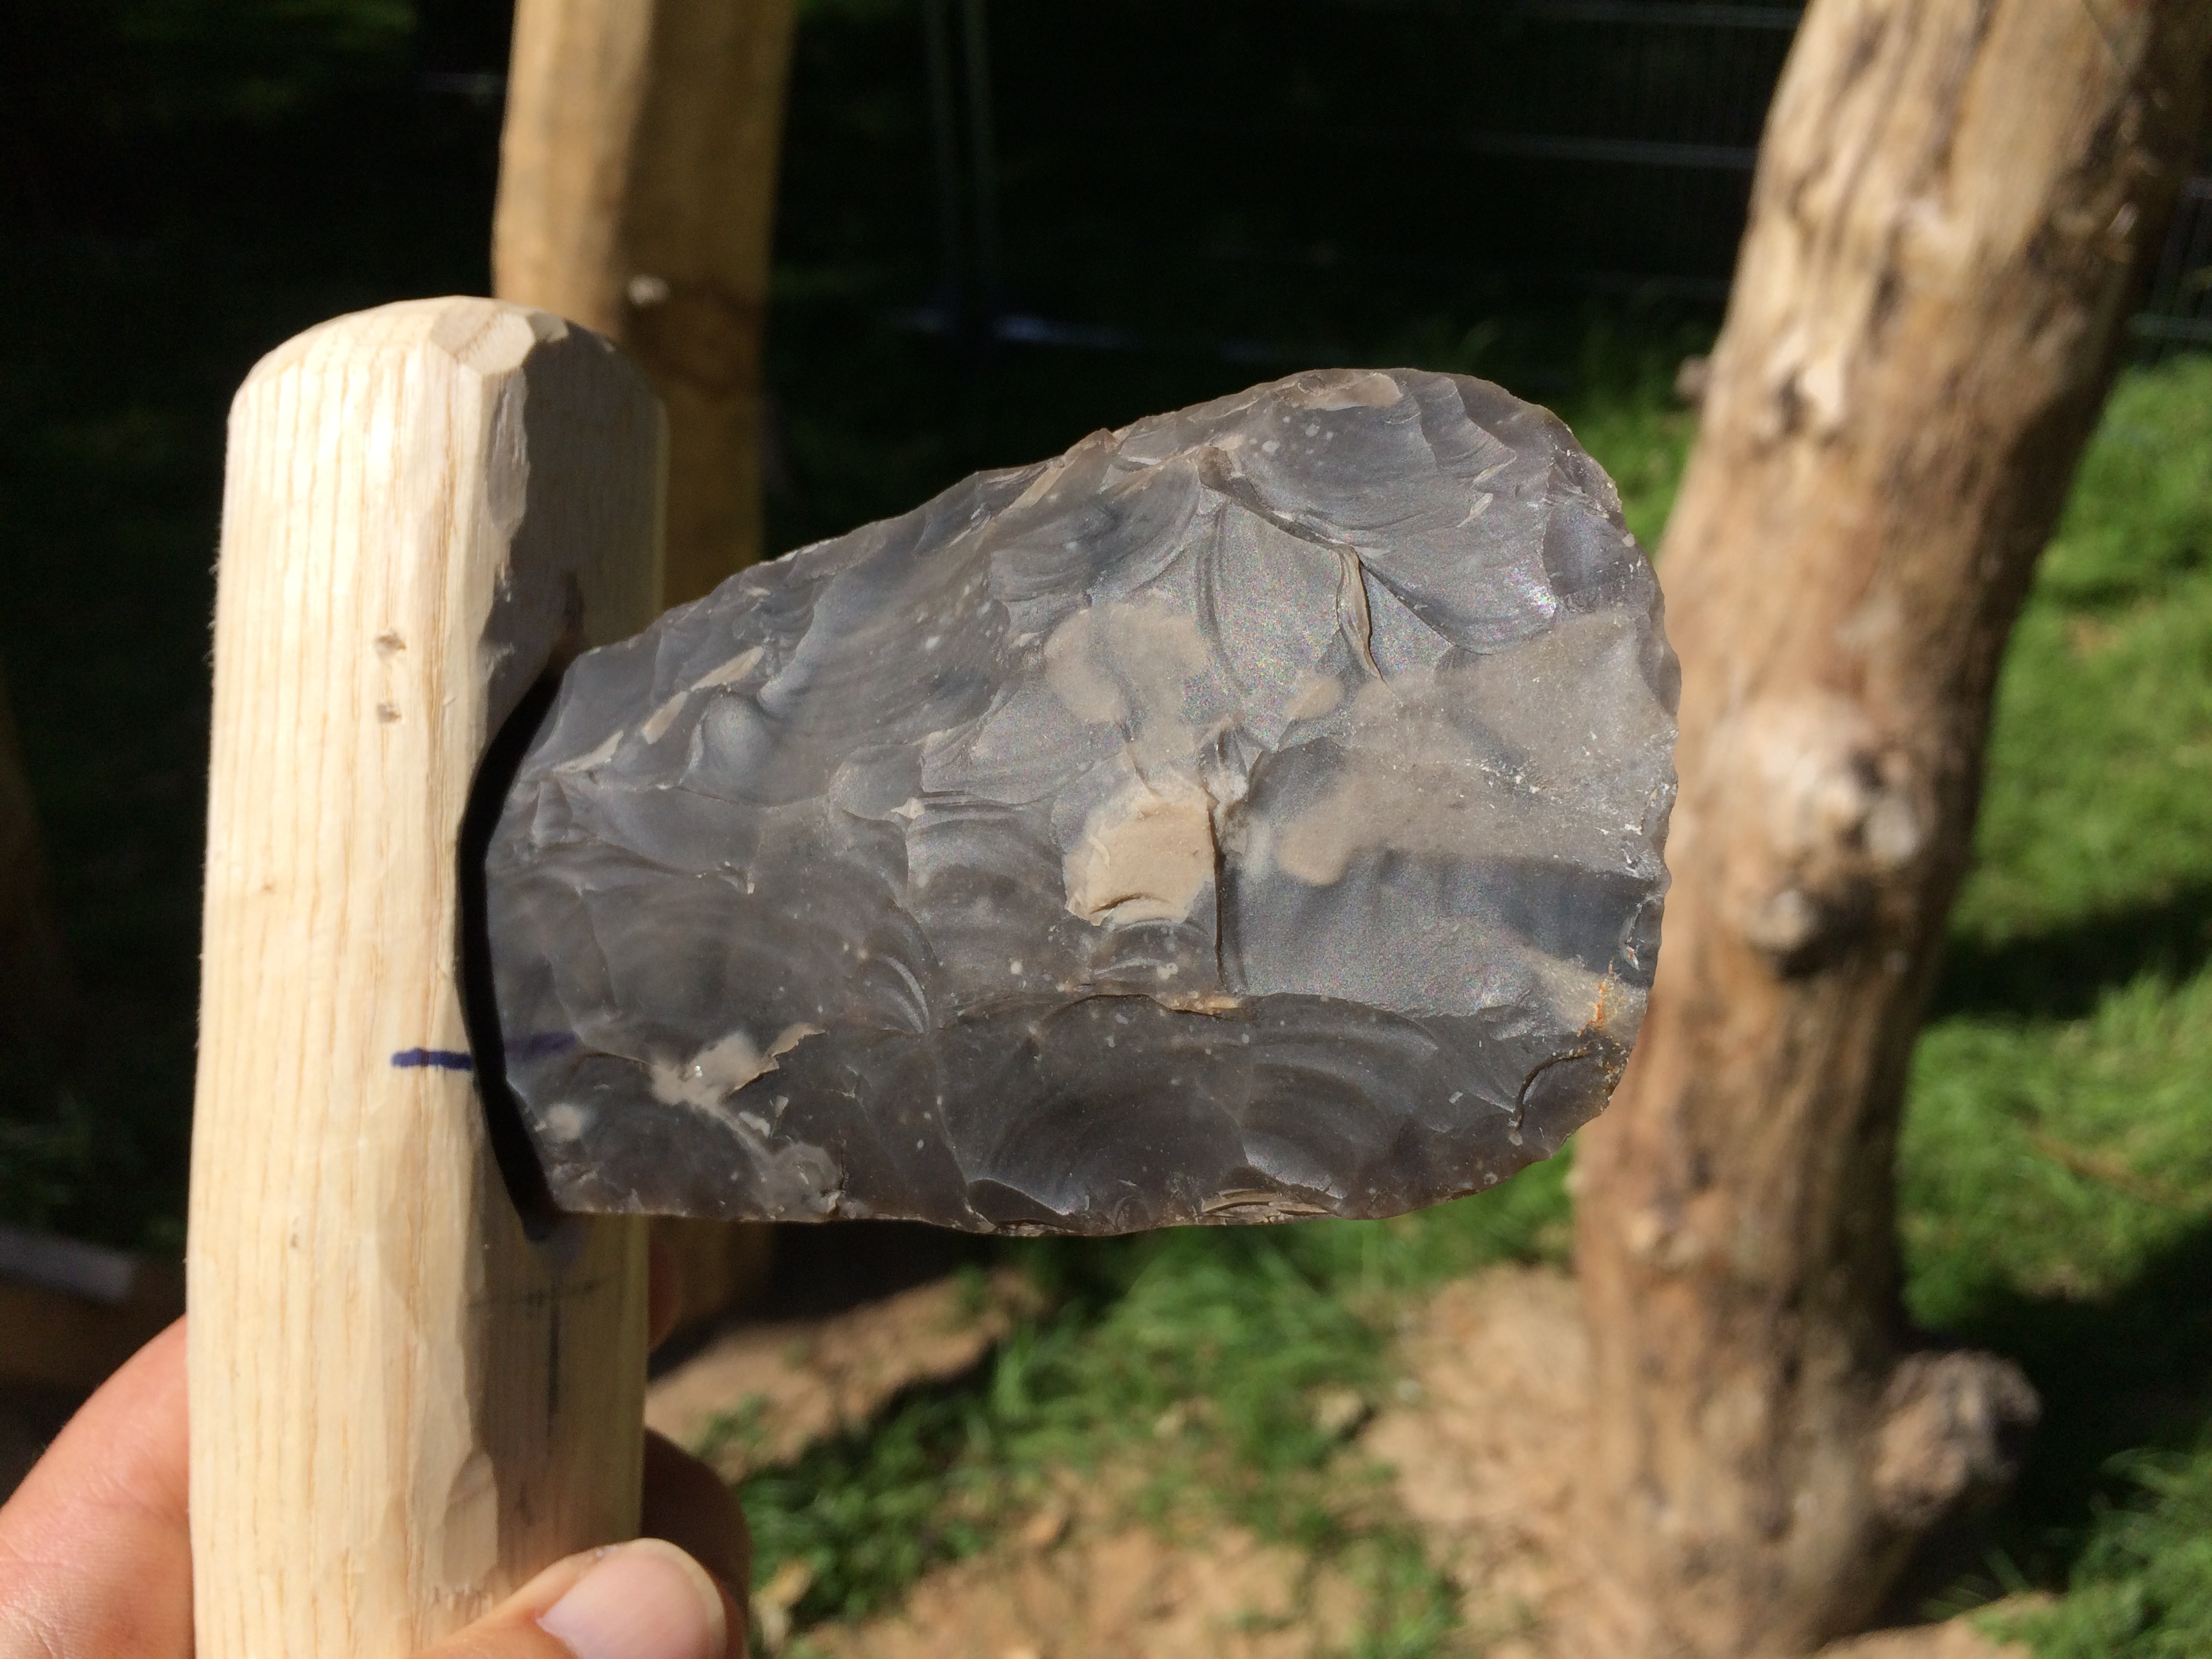
Another week begins at La Hougue Bie. Today saw the arrival of the flint axe heads that will be used during this project. Work so far has been carried out with steel axes to build the required stamina in our volunteers. From now on work will be undertaken with flint and steel, with the aim being to produce a portion of each construction stage entirely authentically.
The decision has been made to showcase a couple of our interpretations of the internal post hole configurations. The Western end of the building will demonstrate animal pens (with an eventual mezzanine storage area above). This solution makes sense of the posts as strong points within a pen system for a range of livestock.

The eastern end (main entrance) will show raised platforms at the edges of the building that sit on a frame supported between the posts. In this way, the narrow unusable space between the wall and purlin posts make more sense as an area to lie, store things, sleep or sit on rather than an area to walk about in. Again, possibilities exist to build a storage mezzanine as an expansion project.
It should be stated at this point that this building is an experimental interpretation of the ground evidence available to use. The exact use and layout of these buildings is still unclear to archaeology and it is only through the reconstruction of full sized replicas that we can begin to understand the strengths and pitfalls of various interpretations. What is clear at this stage is that this building would contain all of the resources required to sustain a farming family/community and as such, space would have been well organised and at a premium.
The flint axe heads have been produced by Will Lord and are finely knapped but unpolished. One of the key features of the Neolithic period is the production of polished stone tools. Although some of these tools are clearly aesthetic objects, it is well known that polishing the working edge of a flint axe strengthens it (by removing the flake scars, it is less likely that the axe edge will continue to flake against the timber that it is working) and prolongs the lifespan of the tool. Our task over the next few weeks is to use these tools, polish some and haft others using traditional techniques. It will also be interesting to see how the volunteers take to the dramatic differences of flint tools when compared to steel.
Today the volunteers are continuing with the digging of post holes for the last 12 wall posts. Our aim is to put 10 posts in the ground this week if we can. Work is also continuing with splitting rafters (another 24 are needed), and stripping the bark from the large pile of logs that remain on site.

Six post holes have been dug today and 3 posts erected which is a great effort for one day. Along with this, the rafter splitting team, although having encountered a tricky log, have persevered and made it work – splitting 4 rafters. Six logs from the never ending log pile (it will end one day I promise!) have also been debarked.
Derek has begun using wooden wedges and a flint axe to prepare a birch haft for the largest flint axe head. His aim is to produce an entirely authentic haft using only traditional methods – a great mini project squeezed around the other tasks he does everyday!
Tuesday 13th June 2017
The weather is bright and warm and calm. The birds are singing and the world is generally a brighter place! Today, work continues on digging the remaining post holes for the wall posts. Rosie, Bill and Christopher have taken this task on. The fine loess soil is “easy” to dig but also compacts really well when the posts are backfilled.

Derek has split a length of silver birch with wooden wedges and is now using a flint axe to rough out a new haft. He has left a knot in the birch in an attempt to prevent the eventual mortise that will house the flint axe head from splitting out during use. It will be interesting to see how this mini project goes over the next few days.
Rafter splitting resumes with Tim, Astra and Doug today. Yesterday’s log was tricky – with a twisted grain that slowed the whole process down and produced sore arms!
Today also saw the arrival of the interpretation posters from Jersey Heritage. These posters bring together the ideas behind the project, some of the available evidence, the volunteer workforce and some great images of the progress so far. They are a real addition to the project and will help visitors to understand what they are looking at when we are busy building!


The final Mortise post has been placed – a team effort from Rosie (mortise), Daryl (Tenon) and Harvey (fitting).
Wednesday 14th June 2017
The sun is shining again at La Hougue Bie and our volunteer teams are finding shade to work in.
Only two post holes remain to be dug and once again Edward is putting in 100% effort to get them done.

The enormous amount of timber processing over the last few visit weeks has left the site generally untidy. Today we have re-organised the prepared timbers and cleared areas for the next batch. We are rapidly approaching the point when we will start to lay out the timbers that will form the wall plates (the timber that links all of the wall post tops). This series of timbers will then be jointed together and with the post tops to make a strong framework.
Bark stripping is continuing (will it ever end!) and the pile of timber is reducing steadily.
Thought must be given at this stage to the erection of the internal posts. I am preparing a plan and method that will be safe and as authentic as we can make it. Some of those posts are 5 metres long and will be heavy, so safety is paramount. I expect the first of these posts to be placed in during our July work weeks. It is clear even at this stage that an A frame will be needed to give some assistance to the lifting process, so our first job will be to build that using split timbers from our growing pile!

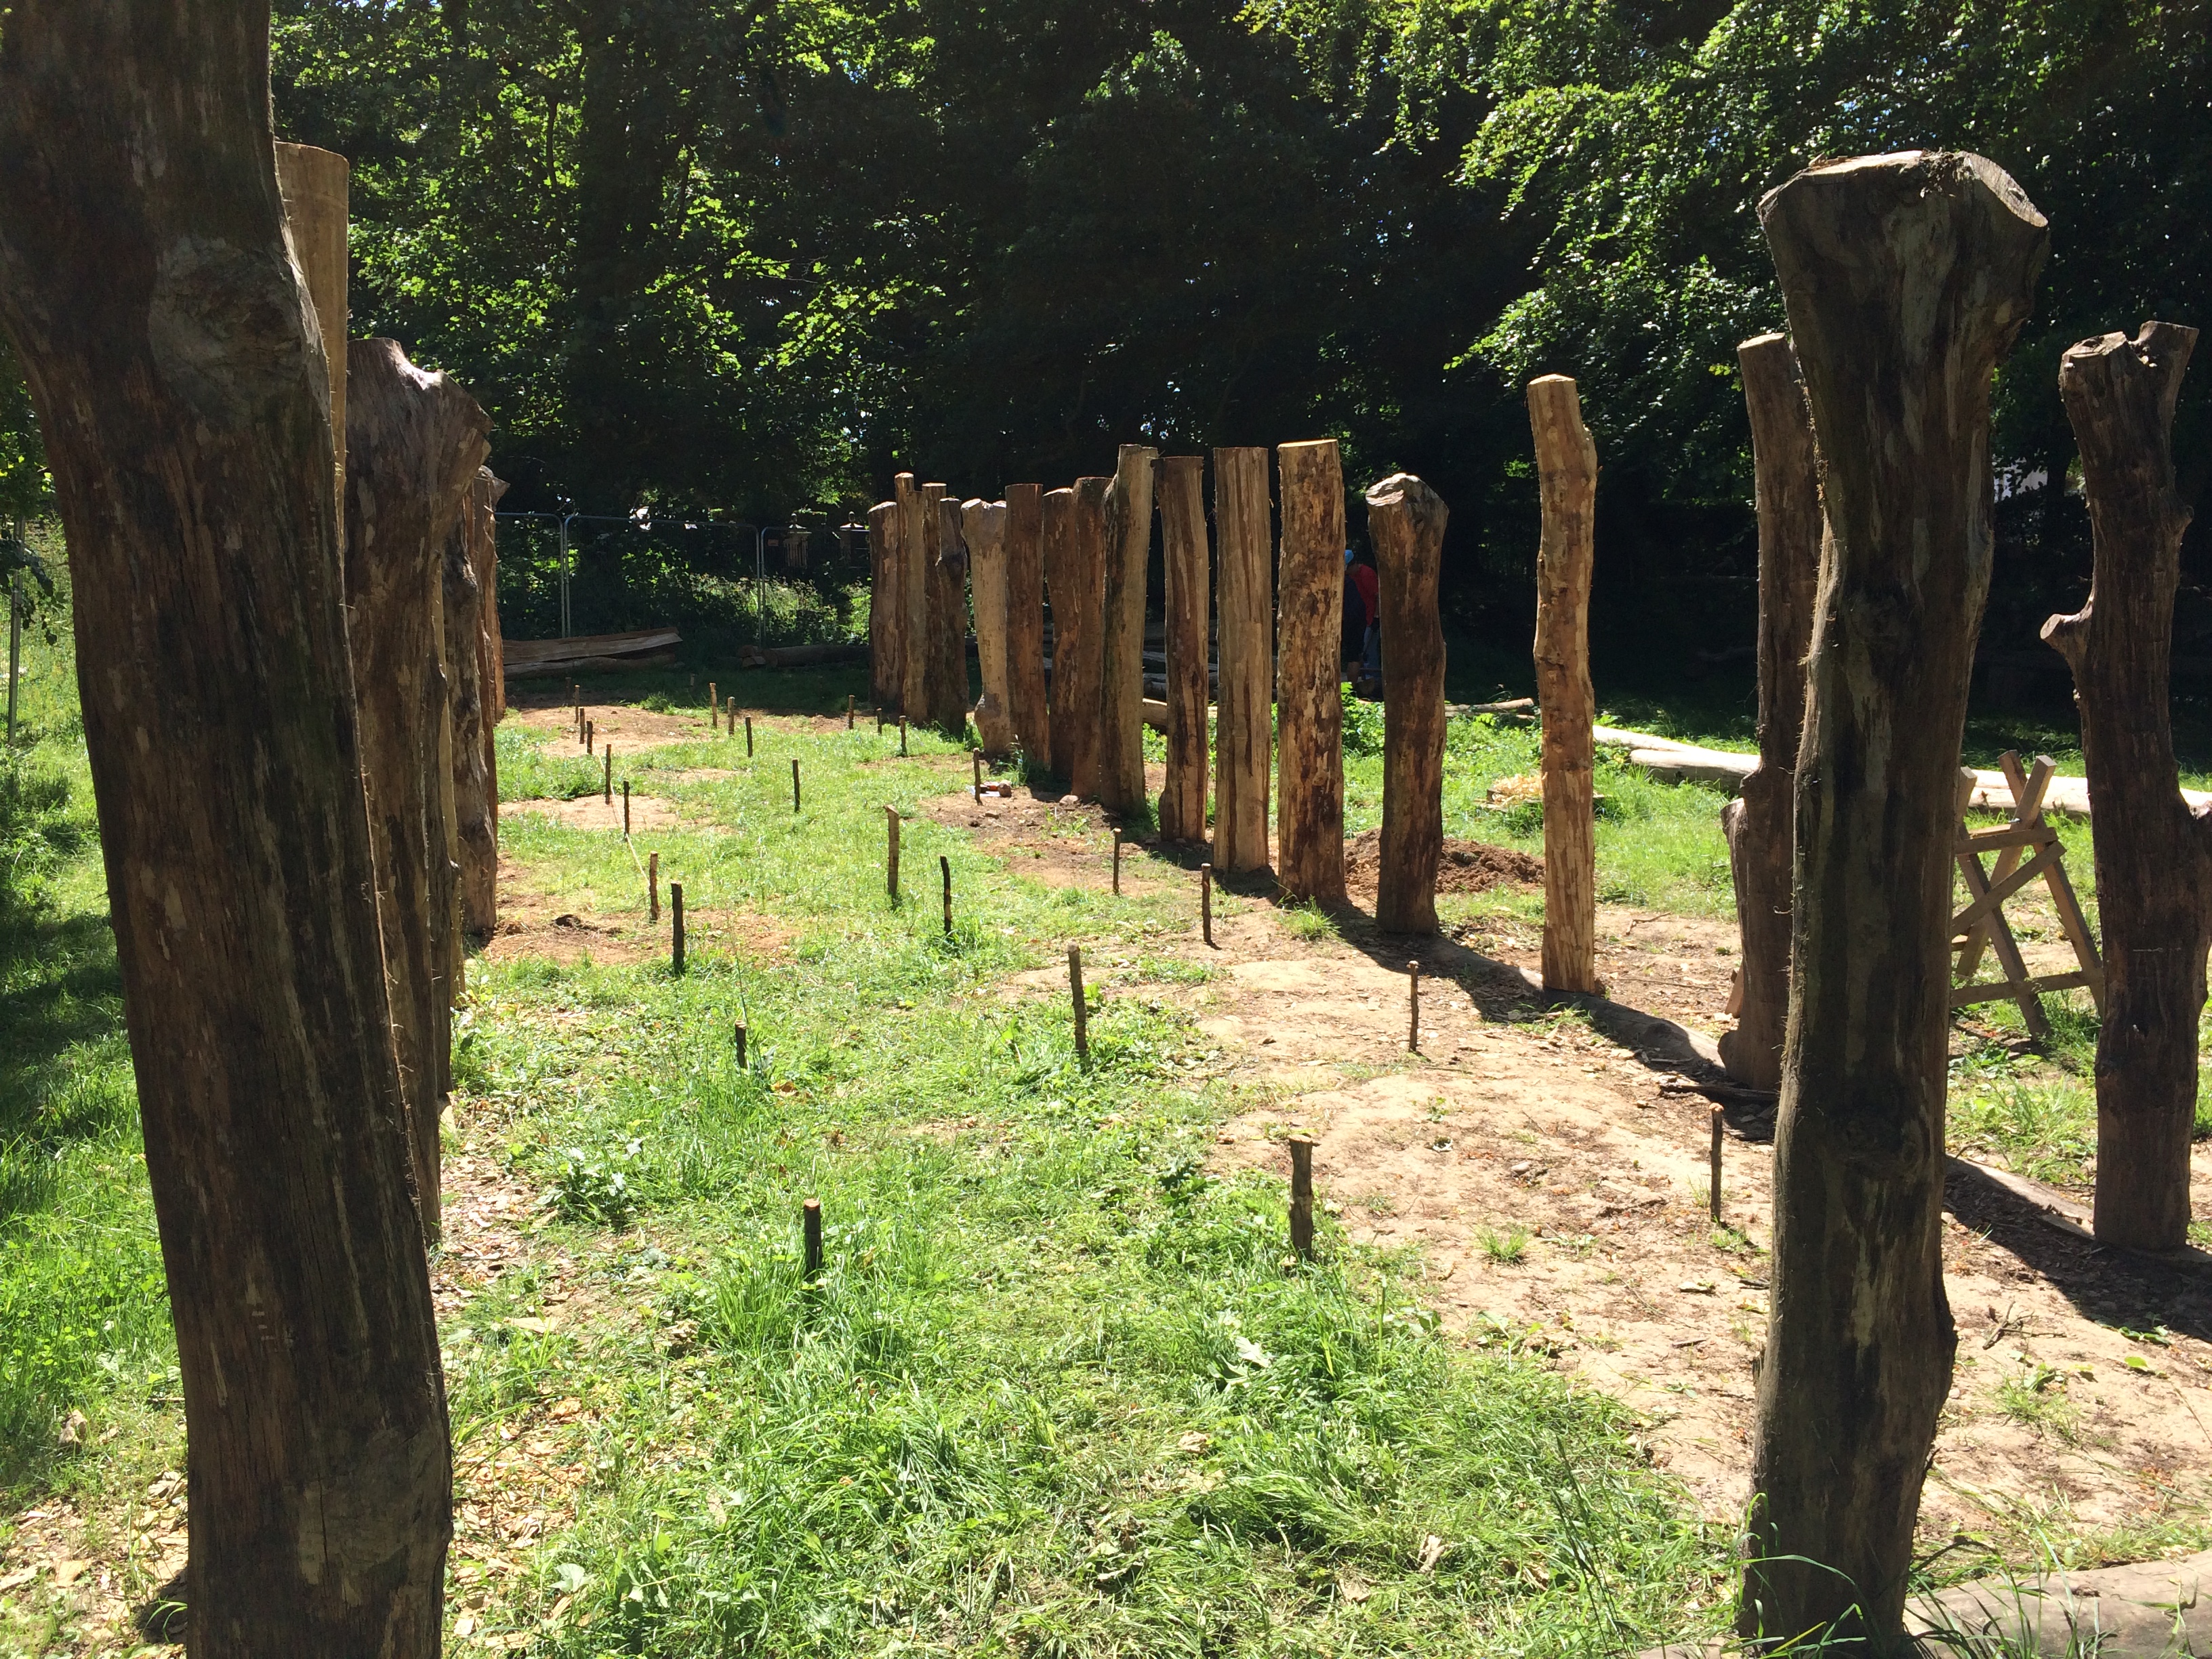
This afternoon saw an incredible achievement. The remaining 4 earthbound posts were placed in their post holes and tamped back. The basic wall shape and upright structure is finished and a stands as testament to several weeks of hard work and commitment by a great team of volunteers – well done everyone!
Thursday 15th June 2017
The building really feels like it is progressing now with the completion of the wall posts. Today we are turning our attention to the preparation required for the next phases of construction, namely the erection of the taller internal posts and the construction of the wall plate that will tie all of the wall post tops together.
In order to reach this stage we have to continue with the splitting of timbers, some of which will form rafters for the roof, others will become the wall plate timbers and yet more will be used for the construction of internal framing such as floor joists, bed platforms, door and window frames.


The first part of this next stage is to accurately mark out the position of the internal posts.
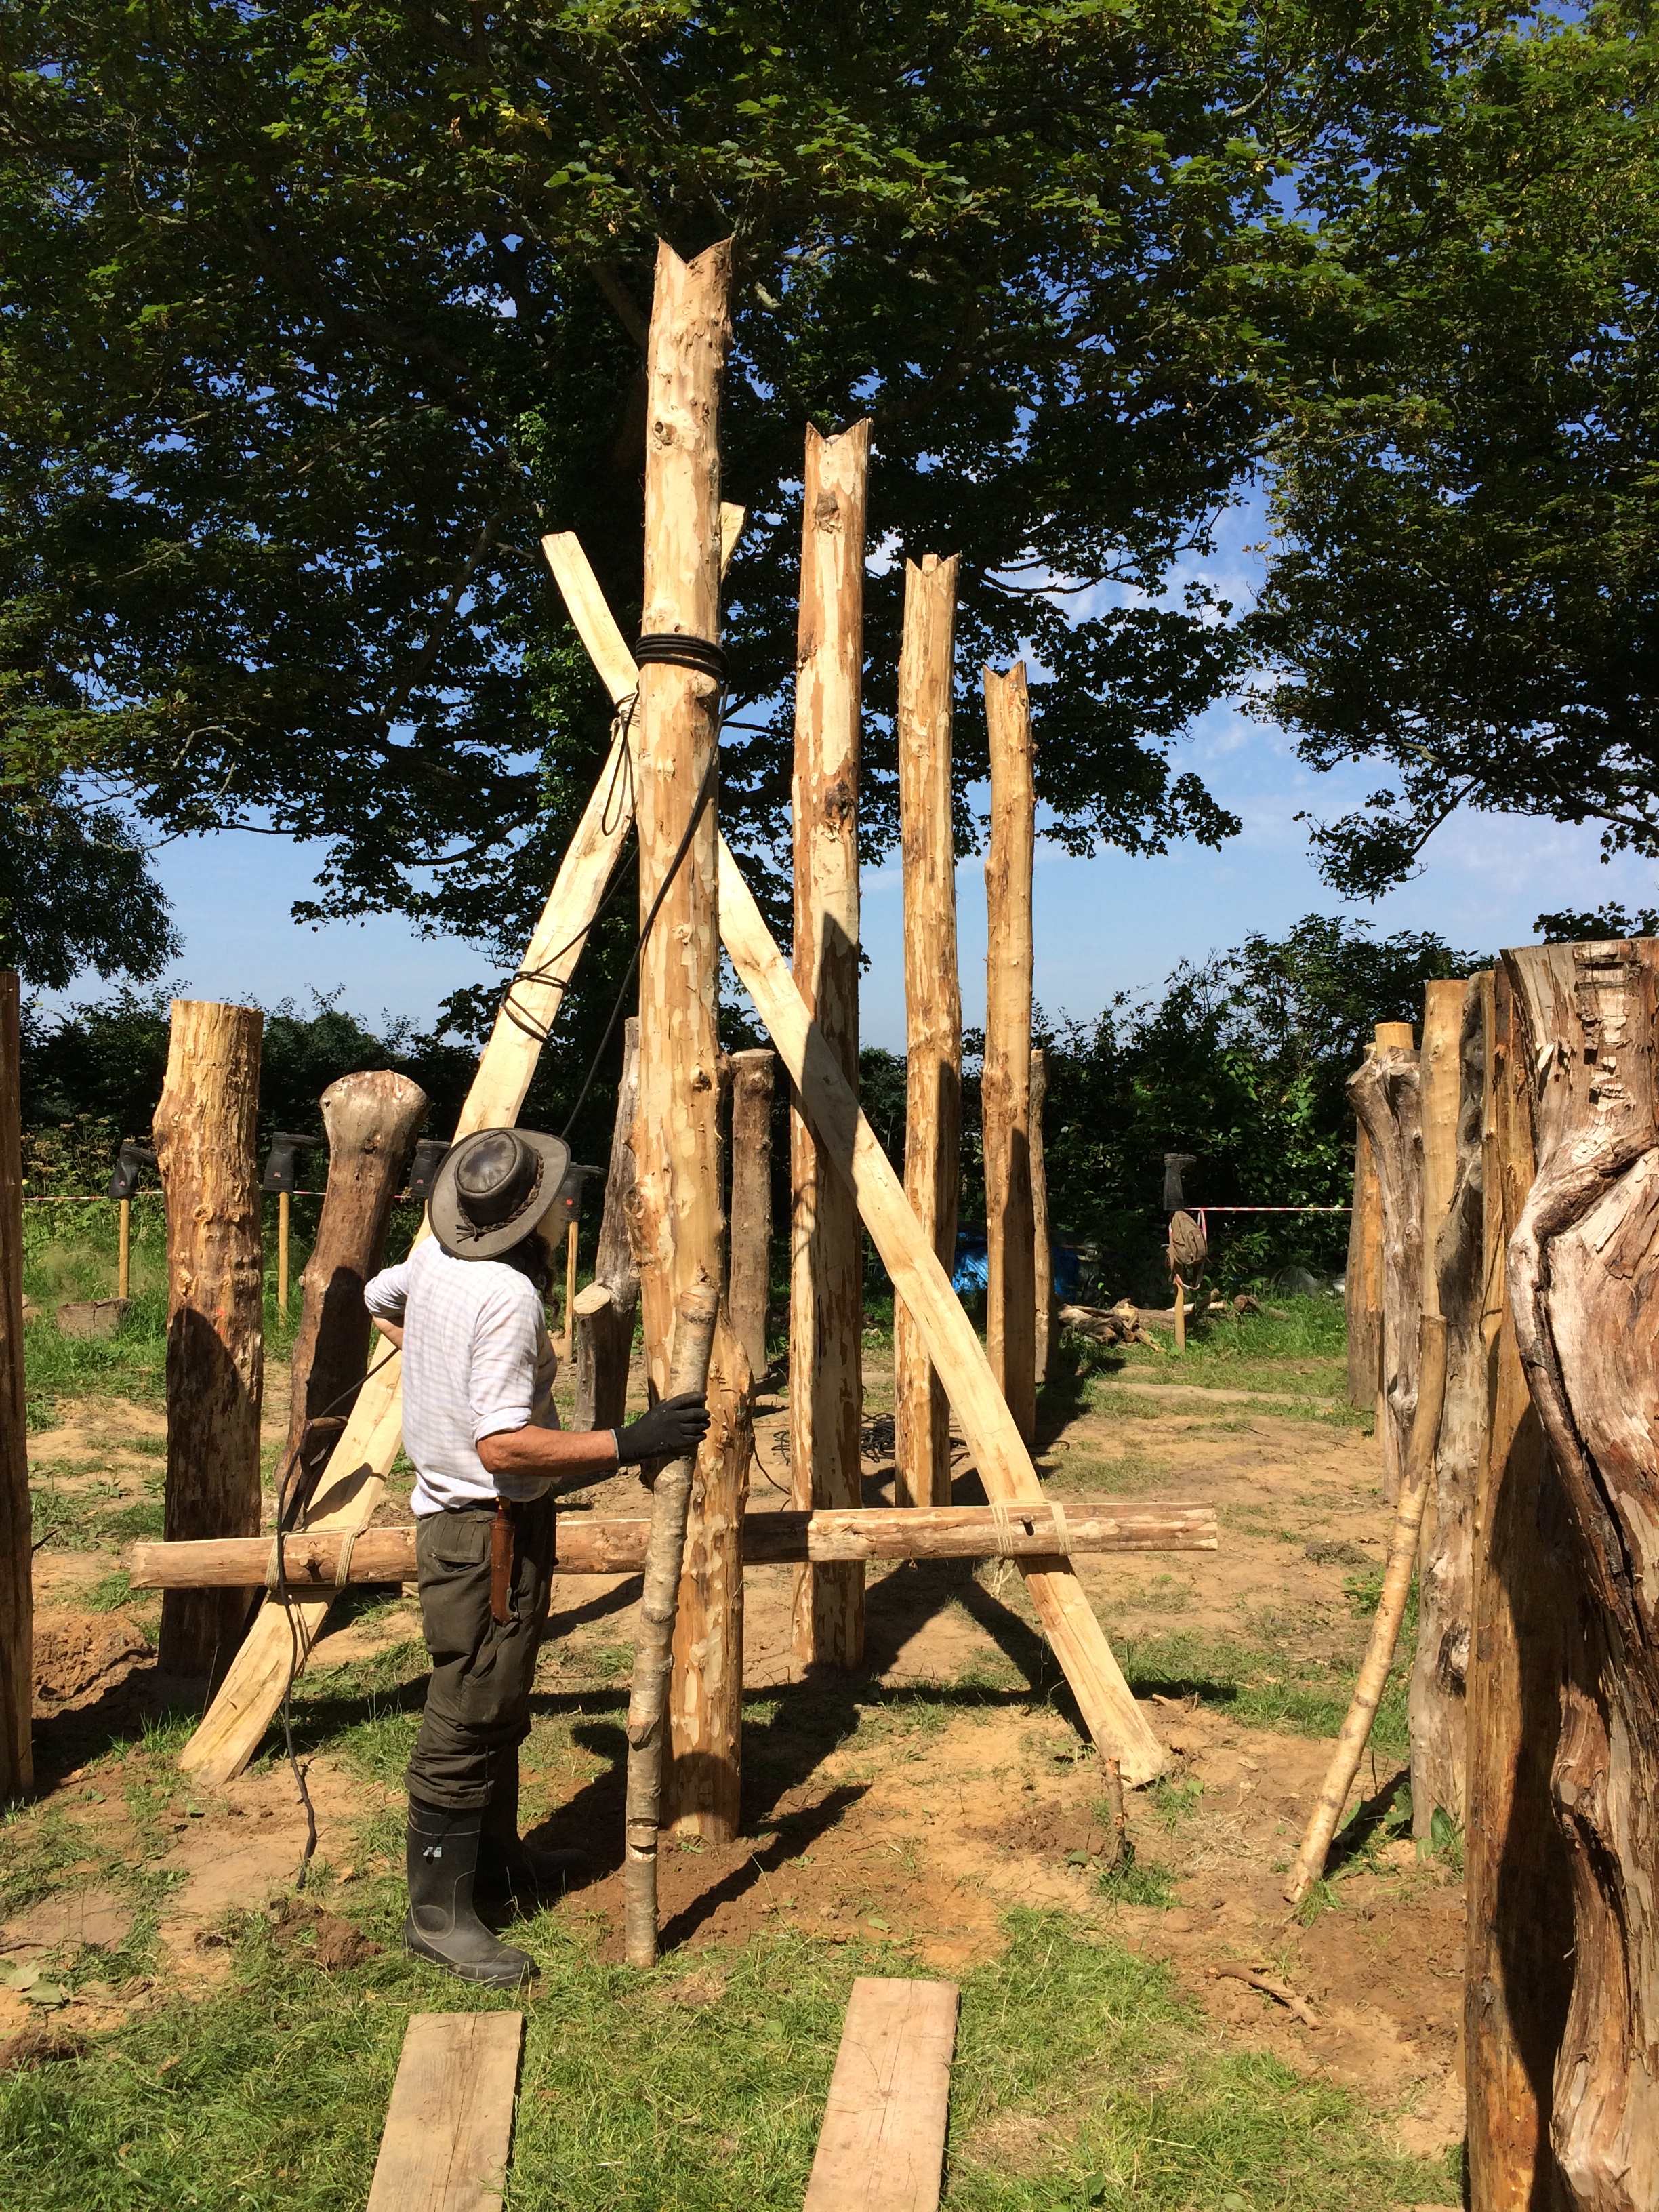
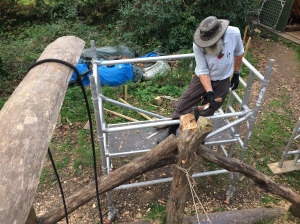
The second part is to construct a sturdy A frame that will help to raise these tall posts into position (with a lot of volunteer power!). The A frame will be critical in stabilising the long timbers as they are pulled upright – but also (and critically) it will redirect the angle of pull to enable the timber to be lifted at all!


The key to building an A frame is to minimise the actual weight of the timber frame while maximising its strength. To that end we are trimming up the timbers to reduce unnecessary weight and to create flat surfaces that will assist in the pegging and lashing of the joints.

Friday 16th June 2017
The end of another productive week on the Longhouse project has arrived and the weather is bright and breezy and ideal for working..
Last night I tested the weight of the constructed A frame and discovered it to be unnecessarily heavy! So today, Carol, Rosie and Doug are reducing the weight of each timber using an adze. Adzes are horizontal cutting tools that are usually used by swinging through the legs. It is a new technique to most volunteers on the project and requires high levels of skill and concentration to ensure neat and safe work! Once the fine art of adzing is acquired, it is possible to produce a very high quality finish in timber.
Long splitting is continuing today to produce more ¼ split rafters and ½ split structural timbers for general use internally. The splitting team (Bill, Edward and Mike) have decided that many small wedges are preferable to a few large wedges when it comes to dictating and controlling the splitting of timber. We have now split over 40 rafters and require only 10 more to meet our requirements for the roof.

Derek has begun the long process of trying to authentically mortise an axe haft to fit a flint axe head. He started using flint and a small antler chisel but has decided to attempt burning through with small embers and a carefully directed air stream. Although difficult to control, the speed of this method is much faster than boring a hole using flint tools – it will be interested to see how this mini project develops!


All in all this has been another amazing week. The volunteers have accomplished a huge amount and the projects is now well underway and rapidly approaching the stage where we start to build upwards! Well done all!
Visit Week July 3rd – 7th 2017
Monday 3rd July 2017
Summer continues and so does our work at Hougue Bie. This week sees a change in our focus. Phase 1 saw the marking out of the building, the preparation of timbers and the erection of wall posts. Phase 2 now moves toward the erection of the tall internal posts that will support the ridge beam and purlins.
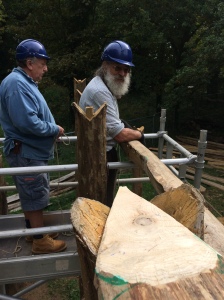
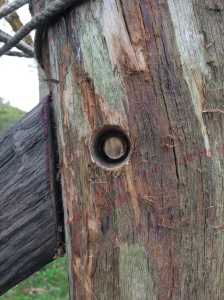
This week will focus on the selection of the ridge and purlin posts, their preparation and erection. We aim to pick out the 9 ridge posts and cut joints into their tops to cradle the ridge beam that will run the full length of the building (in sections). These joints are known as “cup joints” which accurately describes their shape and purpose.
In order to achieve this, it is necessary to sort through all of the remaining timbers, select and mark them. We also need to select the timbers that will form the ridge and purlin beams so we can cut the joints precisely to match the posts.
Today the task of selecting timbers has begun. A team is also starting to split some 6000mm timbers into ¼ to create the wall plate timbers. As always, bark stripping is an ever present job that simply has to be done.

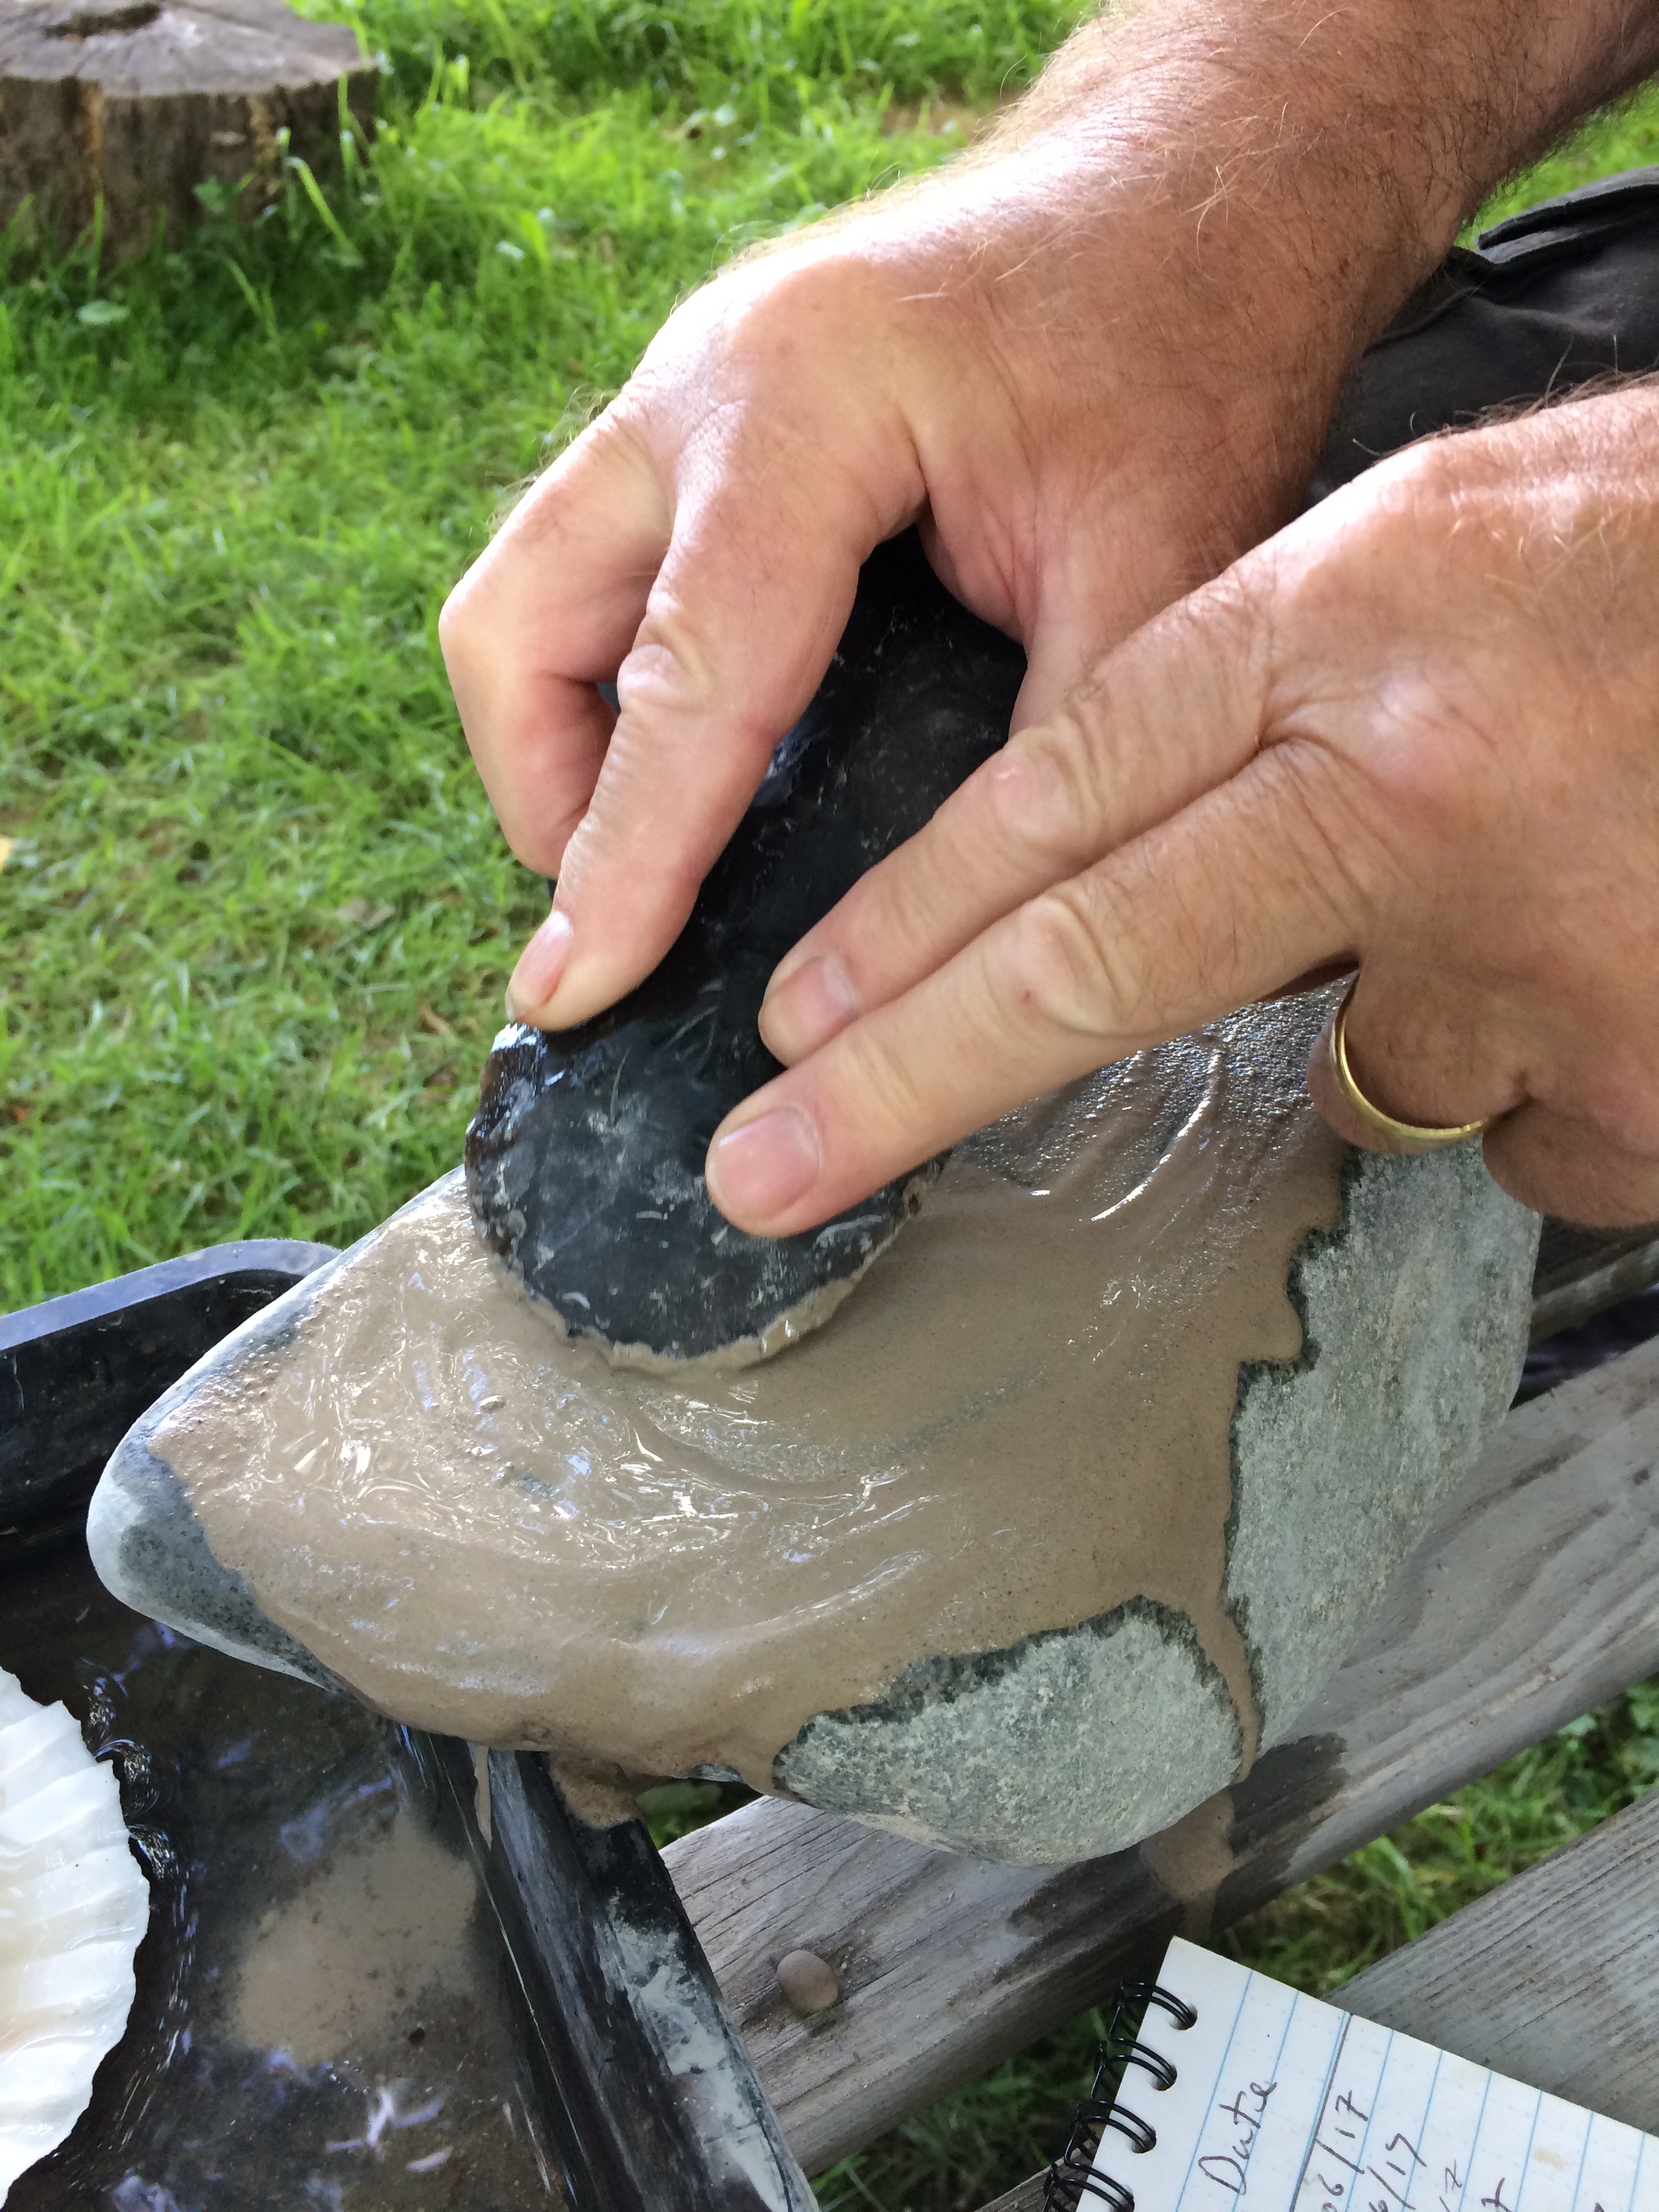
Our flint axe polishing is also going well. The addition of sand to the process has made a noticeable difference to the speed and efficiency of this project. So far we have spent 10 hours on polishing on one side. The effect is noticeable and really gives an insight this epic process!


Tuesday 4th July 2017
The weather is bright and warm and calm. This morning saw 14 keen volunteers arrive at site, all with the goal of preparing the tall Ridge Posts that will eventually support the highest part of the roof structure.
Danny, Derek and Doug have cut their posts to length and are working on the joints that will support and secure the ridge pole that will eventually run the full 20 metre length of the building. These joints were originally going to be “Cup Joints” – designed to support a round timber or pole, but we have changed plans and are now intending on using ¼ split timbers to form the ridge, purlins and wall plates of the structure. This means we are now looking to locate timbers with triangular cross sections and two split faces. The “V” Joints (practically inverted birdsmouth joints) are simpler to cut. Some “V” joints will also have tenons in their shape to stop horizontal and lateral movement.
The first Ridge Post Hole is being dug in preparation for the lifting process – the tension builds!


Just after lunch the team gathered together for the raising of the first Ridge Post. Danny’s prepared post was brought over to the post hole dug by Nikki and Ruth. It was positioned so its foot was hovering over the post hole and in line with the angle of pull. The “A” frame was then carried into position and laid over the post with its feet located in divots either side of the post hole. The next stage was to ensure the “A” frame would re-direct the pull of the team to a more efficient angle (in this case 45 degrees) to the post. This involved a few adjustments and technical “faffing” to get right. There is always a difference in any project between planning and doing and with very heavy timber things, it is always best to take things steadily and above all safely.

After a couple of dry runs – where errors were encountered and adjusted, we were ready for a serious attempt. The “A” frame was lifted to 45 degrees and held in position by the pulling crew, then on my command, the whole team committed to a pull in earnest and the post swung up to a near vertical position and slid safely into the base of the hole! The added weight of the “A” frame finally acted on the post and pulled it into alignment with the building – a great achievement using brain and muscle power.

So, the first Ridge Post is in, and there are 8 more to do, but the method is now tried and as with any new method, we will speed up dramatically from here on.
A great day!
Wednesday 5th July 2017
Work continues on Ridge post placement. The second Ridge Post has been prepared by Derek and now has a “V” cut with tenon in its top. After yesterday, we have more confidence at raising tall and heavy posts by hand. It requires careful preparation and organisation followed by a strong and committed pull from the volunteers!

However, our first attempt to raise Derek’s post failed. This was because the post hole was slightly narrow and the base of the post dug into the side of it as it came to vertical. Instead of sliding into the hole it stood on end – refused to locate and finally fell (safely) to one side. We reassessed, moved the “A” frame and post and reset the rig having first widened the post hole and held a narrow plank against its face (to stop the post base from digging into the post hole side).

The second attempt went very smoothly with only 8 people pulling on the rope.
We are now confident we have ironed out any further potential issues.
The afternoon is progressing with the digging of Post Hole R3 which will take the third tall Ridge post. The sun is up and very warm and people are retreating to the shadier spots on site – apart from Mike and Doug who have draw the short straw of digging a metre deep hole in full sun!

It’s amazing how everyone’s skills just keep improving as the project continues. What would have been tricky challenges at the start (cutting cup joints into post ends) are now just taken in people’s strides and they get faster and more precise each time they do another.
At the end of today, the team came together for one last effort and raised Ridge Post 3 into position. Three posts now stand 4 metres above ground and are really changing the feel of the whole build! – There is height and permanence to the whole project and with a bit of imagination it is possible to see the eventual thatched roof with smoke filtering through it!


Thursday 6th July 2017
There are two days remaining in this project week and the team have a sense of urgency about them to try and put in all 9 Ridge Posts before we finish. Derek and Edward worked their socks off in the last hour of the day yesterday to prepare the post hole for Ridge Post 4.
This morning, all hands are working on cutting the “V” joints (our modified cup joints) into the tops of the remaining Ridge Posts to be erected.


This part of the construction is necessarily sequential – it is impossible to dig lots of post holes as this would impede our access to the lifting area. Each ridge post requires space and time to organise the “A” frame and lashings – numerous post holes would simply get in the way!
Just before lunch we pulled Ridge post R4 into position.
All work on site is energy sapping today. The sun is out and burning strongly and most people are finding shade beneath the trees. The digging team is working in the full heat of the early afternoon sun in order to keep the post holes coming!
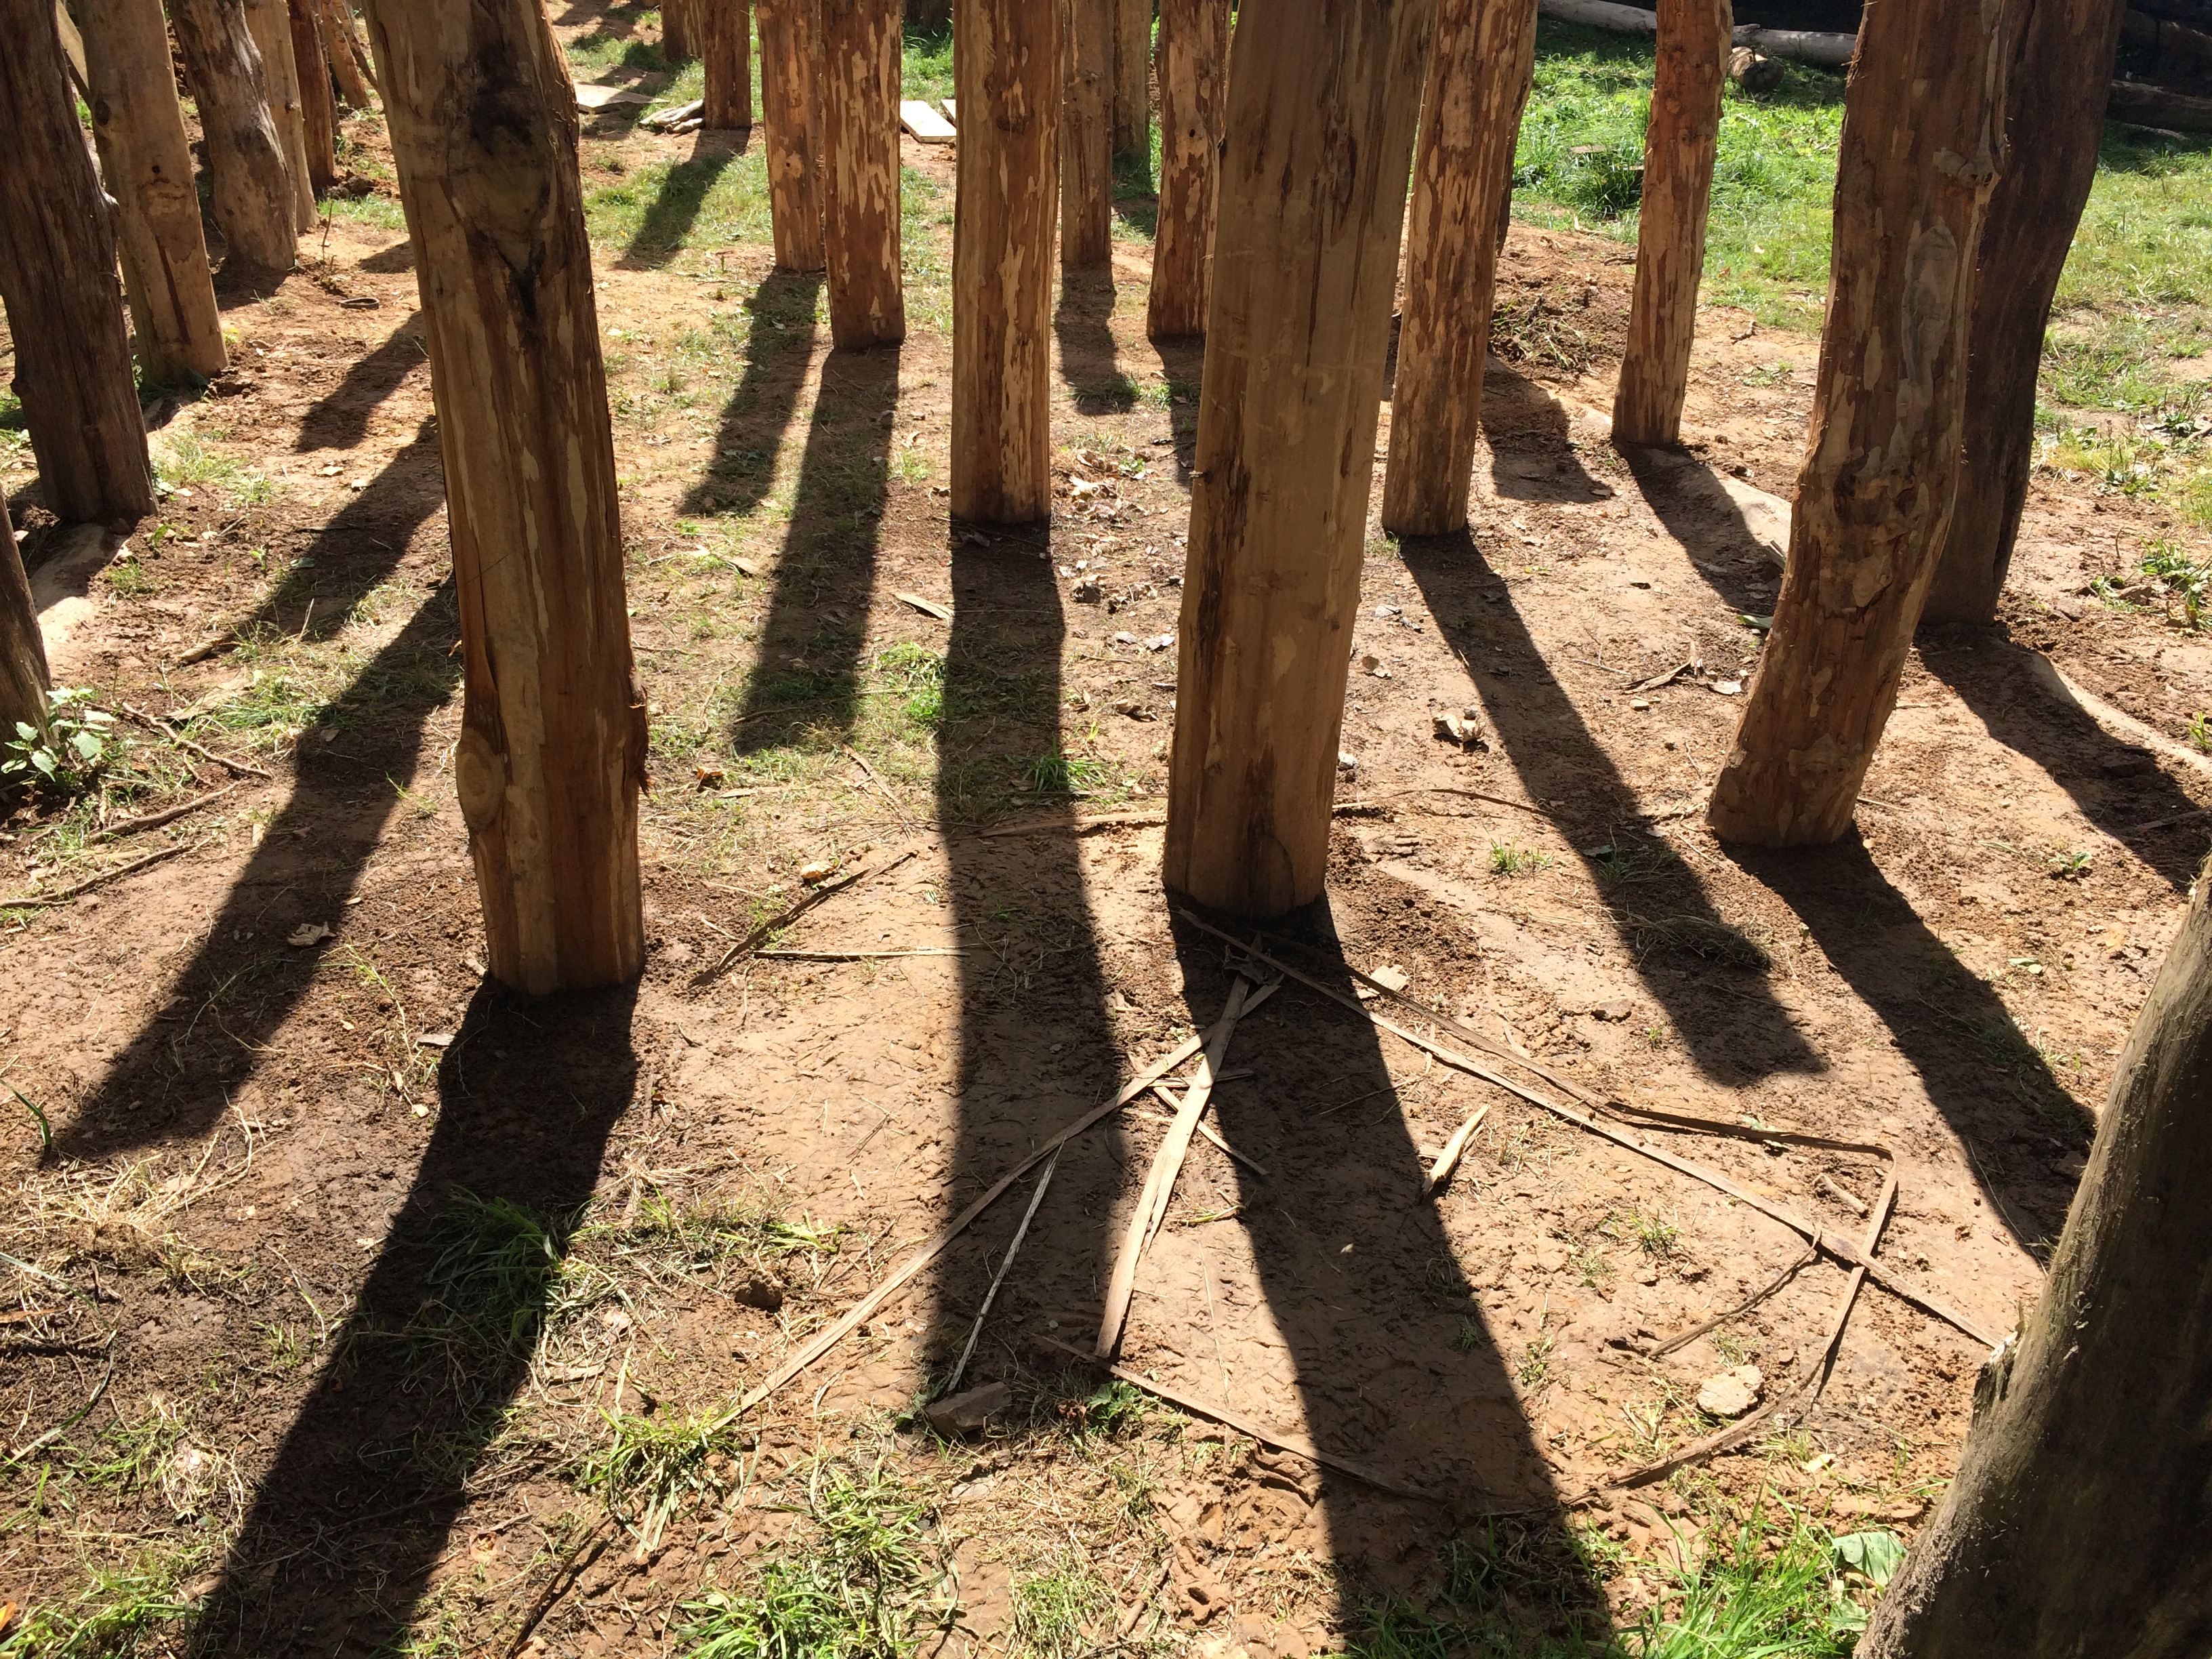
The afternoon saw a concerted effort to get two more Ridge posts in the ground. Holes were dug in the blazing heat and the team successfully raised Ridge Posts 5 and 6. The positioning of these posts is revealing the symmetry of the building. A single post marks the centre of the building and the supposed “living area” while on either side 4 posts stand in close proximity to each other, showing structural density of building ends.


Friday 7th July 2017
The end of another fantastically productive week on the Longhouse project has arrived. This stage of the construction was always going to be one of the technically hardest. The raising of large timbers into a vertical position is never an easy thing to do, but the team have followed the initial method statement, refined and improved it and are now proficient in the use of “A” frames and the detailed preparation of rigging and lifting. This phase is a great example of how volunteers with little or no experience in traditional construction methods can take on knowledge and skill very rapidly.

These tall posts now form the basic skeleton of the building and hint at what is to come. Once again, it is fantastic and so rewarding to see what a small team of enthusiastic and dedicated team of people can do with little more that brain power and strength (and the mechanical advantage of a well positioned “A” frame!


Monday 17th July 2017
And so begins the last project week before the Summer break. There will be no work on site during August as many volunteers (including myself) will be taking holidays.
This week continues the theme of putting large posts in the ground. We have the final Ridge Post (R9) to be positioned today ready for filming tomorrow. The other main tasks this week are digging the post holes to house the Purlin Posts. These posts flank the Ridge Posts in both end bays of the building and will eventually support the purlins of the roof but also potentially a floor that will create a mezzanine level for storage.

Teams today are digging post holes, stripping the final few logs, cutting purlin posts to length and producing the cup joints in the ends of the purlin posts (there are 19 to do in total!).

Now that the post holes are being dug for the Purlin Posts, the debate concerning the number of posts in each end of the building continues. There are various ideas that keep surfacing. One involves the “posts” as not running full height to the roof, but stopping to support a low level raised floor and an upper level floor. Another involves the posts running to the roof and supporting an upper floor. Yet another idea sees the “extra posts” as simple vertical supports for screens or walls (to create animal pens and storage areas). What is clear is that the original builders could construct a roof (the central bay) without many internal supports, and therefore, the “extra” post holes are not required solely for the support of the roof weight alone.

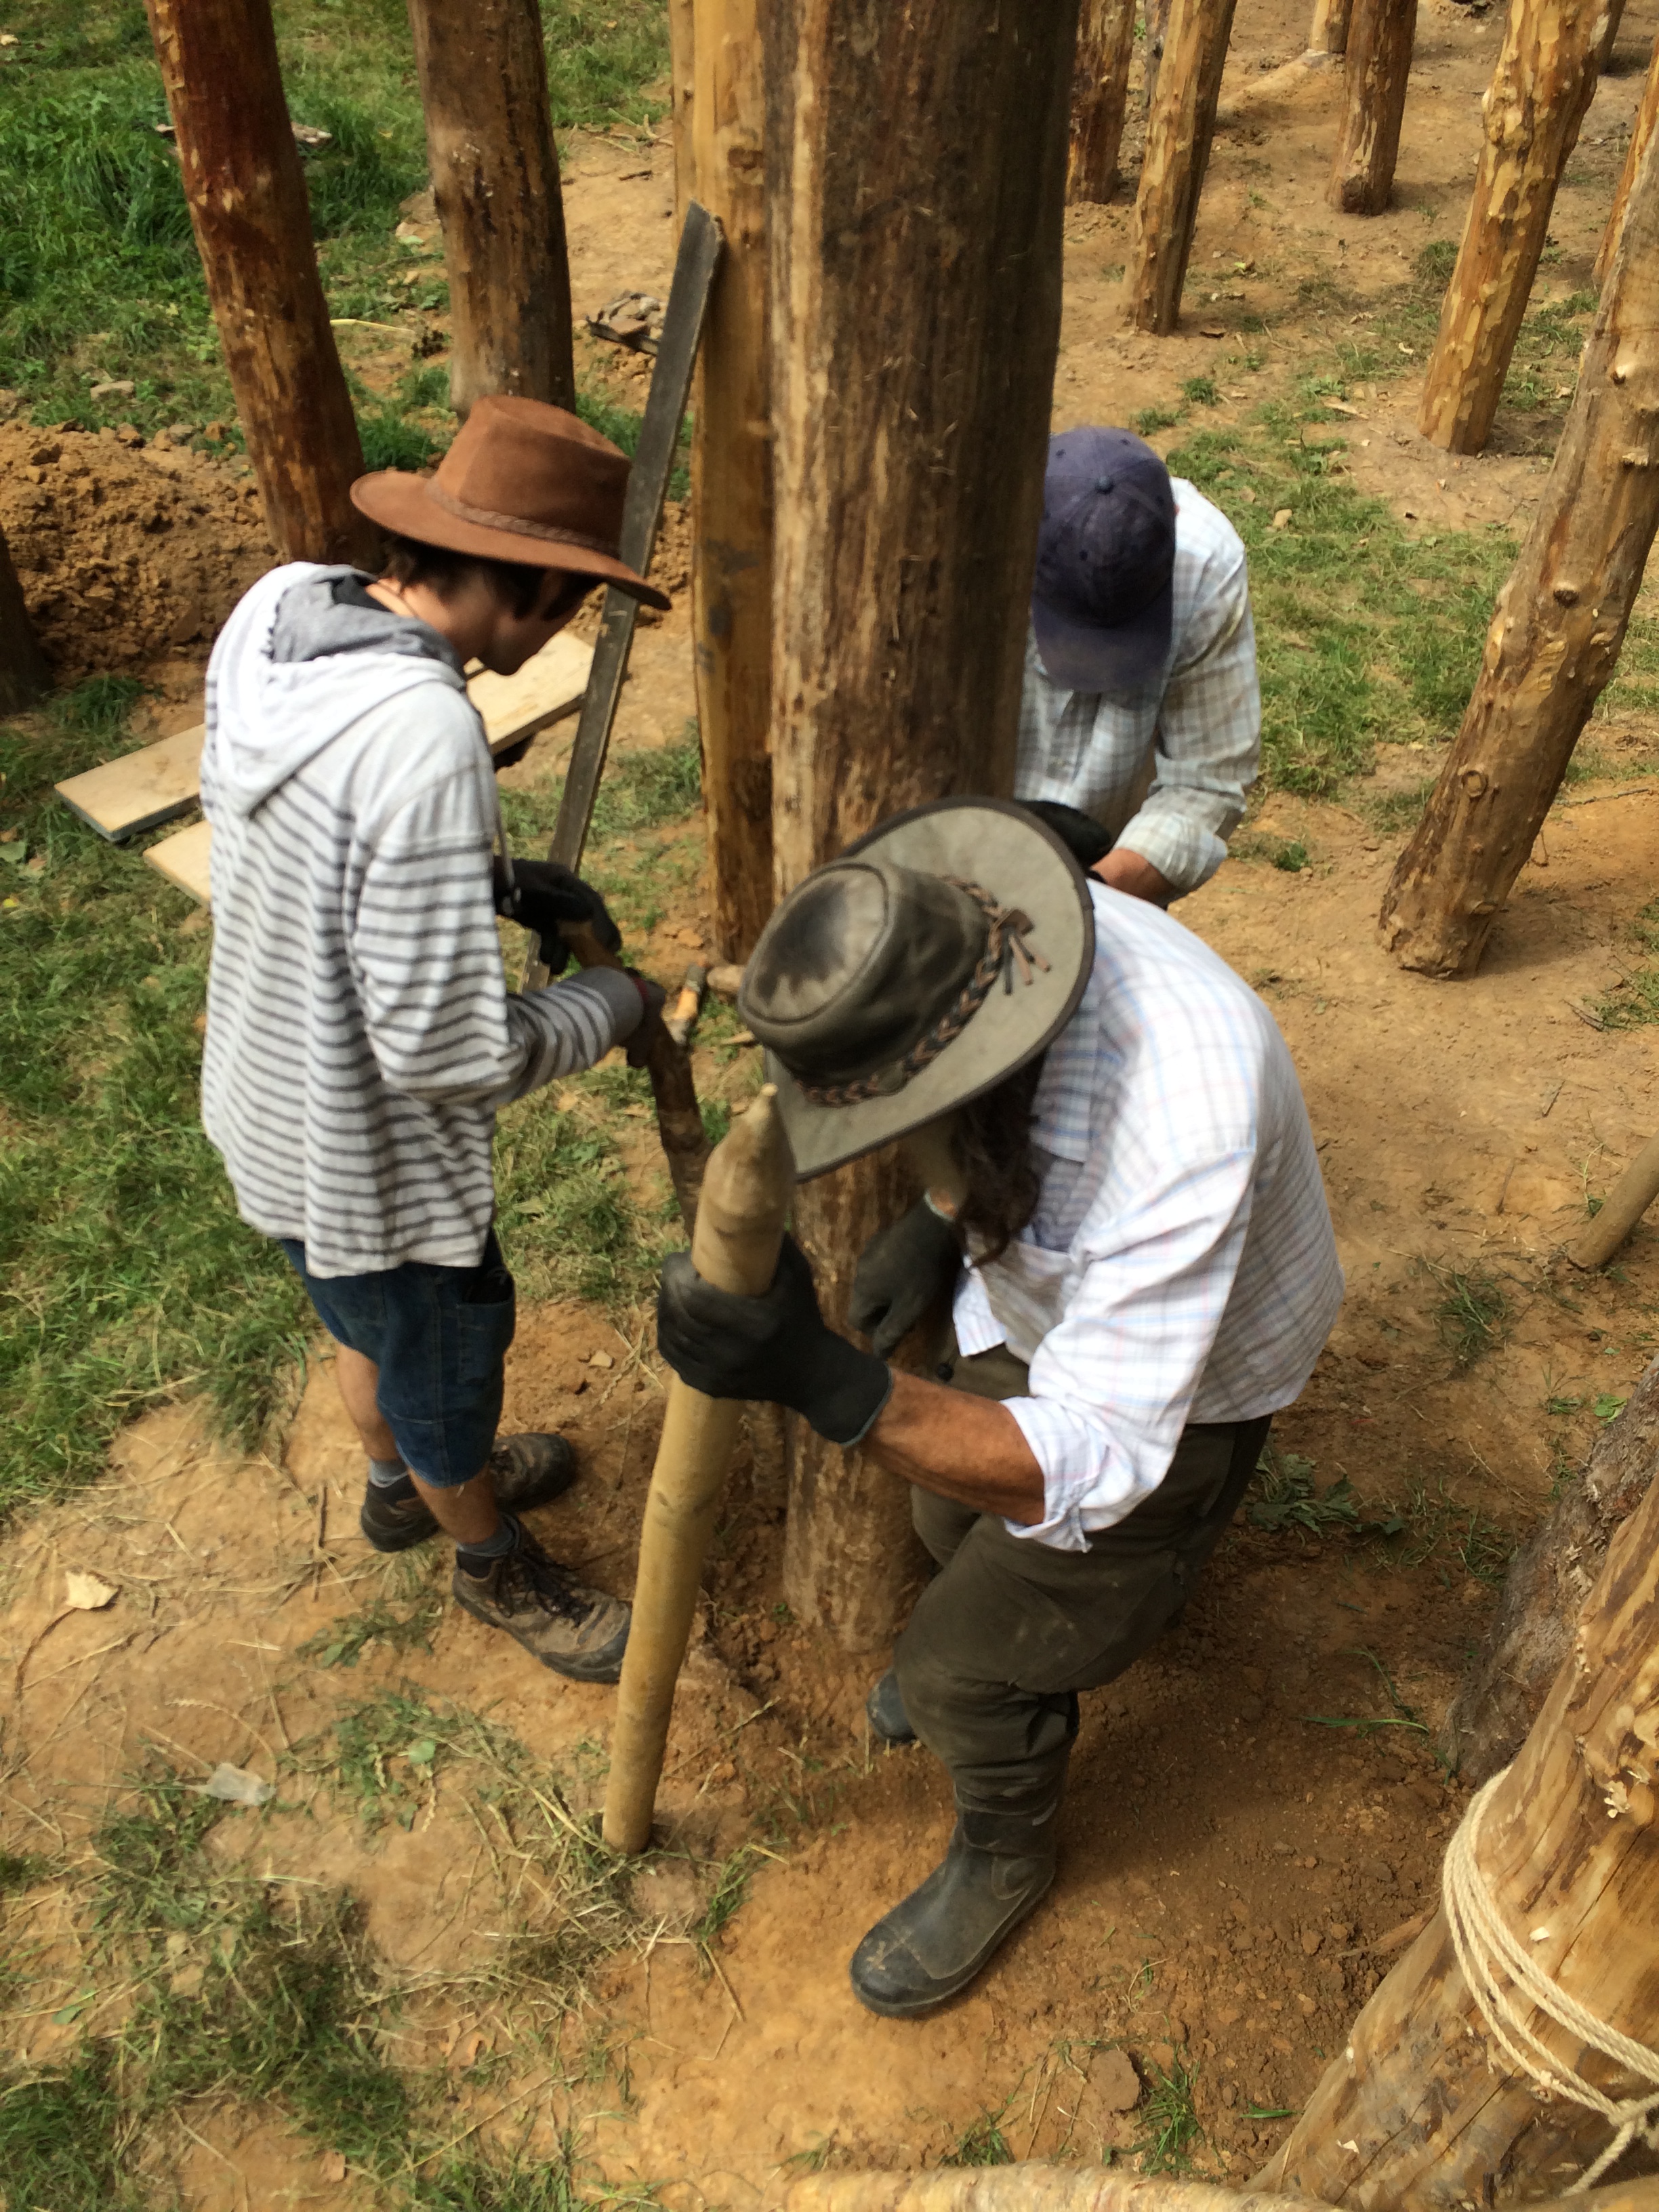
The first two Purlin Posts were put in place today. Derek’s and Tim’s cup joints were chosen to enable the end of the eventual purlin to be firmly located. The system for putting them in the ground is different to the “A” frame used for the tall Ridge Posts. We have decided to use the existing (and rapidly growing) frame to help us get the Purlin Posts upright. A split beam is lashed to existing wall posts to provide a prop. Each post is then carried into position using our Spanish windlass handles and 4 – 6 people. The jointed end is then lifted onto the lashed beam and shunted until the post nears a 45 degree angle and its base can be dropped in the prepared post hole. At this point, a rope is hitched to the top end of the post and all volunteers clear the area between the post hole and the lashed beam. With a concerted effort, the rope team pulls while the post team pushes (from behind the safety of the lashed beam) and the post raises and drops into the hole. As before, the post is then orientated and positioned into the centre of the hole and finally tamped in using thin layers of well compacted soil.
Tuesday 18th July 2017
The weather is bright and warm and calm.

Today the last Ridge Post (R9) will be filmed going into the ground.
This timber will finish the roof line of the eventual building and show off the symmetry of the central post configuration. The “living” space can now be clearly seen as the gap either side of the central post, while both ends of the building show a set of 3 evenly spaced posts and a fourth set much closer (“passages”). The erection of Ridge Post R9 also marks the end of the “A”Frame use in this project. Time will tell if we keep it as a relic or reuse the timbers for a task in the building.

Two more Purlin Posts have been placed by the team. These are now being lifted in by hand using temporarily lashed cross beams as props to get the posts over the prepared holes at the right angle for pulling. The system is working smoothly and uses the best properties of the existing frame to aid in the construction of the next.
The next post holes have been dug and we now await the cutting of two further tenoned cup joints before we can place the next pair of posts.
This afternoon saw a heavy downpour and thunderstorm that swept across the island. We wisely took a tea break during the worst, but work continued promptly before the rain had finished! – nothing like motivated people to make a project work!


Wednesday 19th July 2017
The weather is cloudy but still warm today.
Work continues on placing more of the 19 Purlin Posts that fit within the building footprint. We are also starting work with flint axes, attempting to gather data on their efficiency and potential. The aim today is to cross cut a Purlin Post to length and then to set about the cutting of a cup joint. The information from this mini project will enable us to extrapolate the time required to process all of the posts we have currently placed in the ground. At each future stage of the building, flint tools will be employed again to build a general picture of effort and time required to achieve our goals and to confirm that the joints we are using can be replicated using flint and bone tools. From the start, this project sought to combine steel and flint hand tools in order to maintain momentum and motivation!


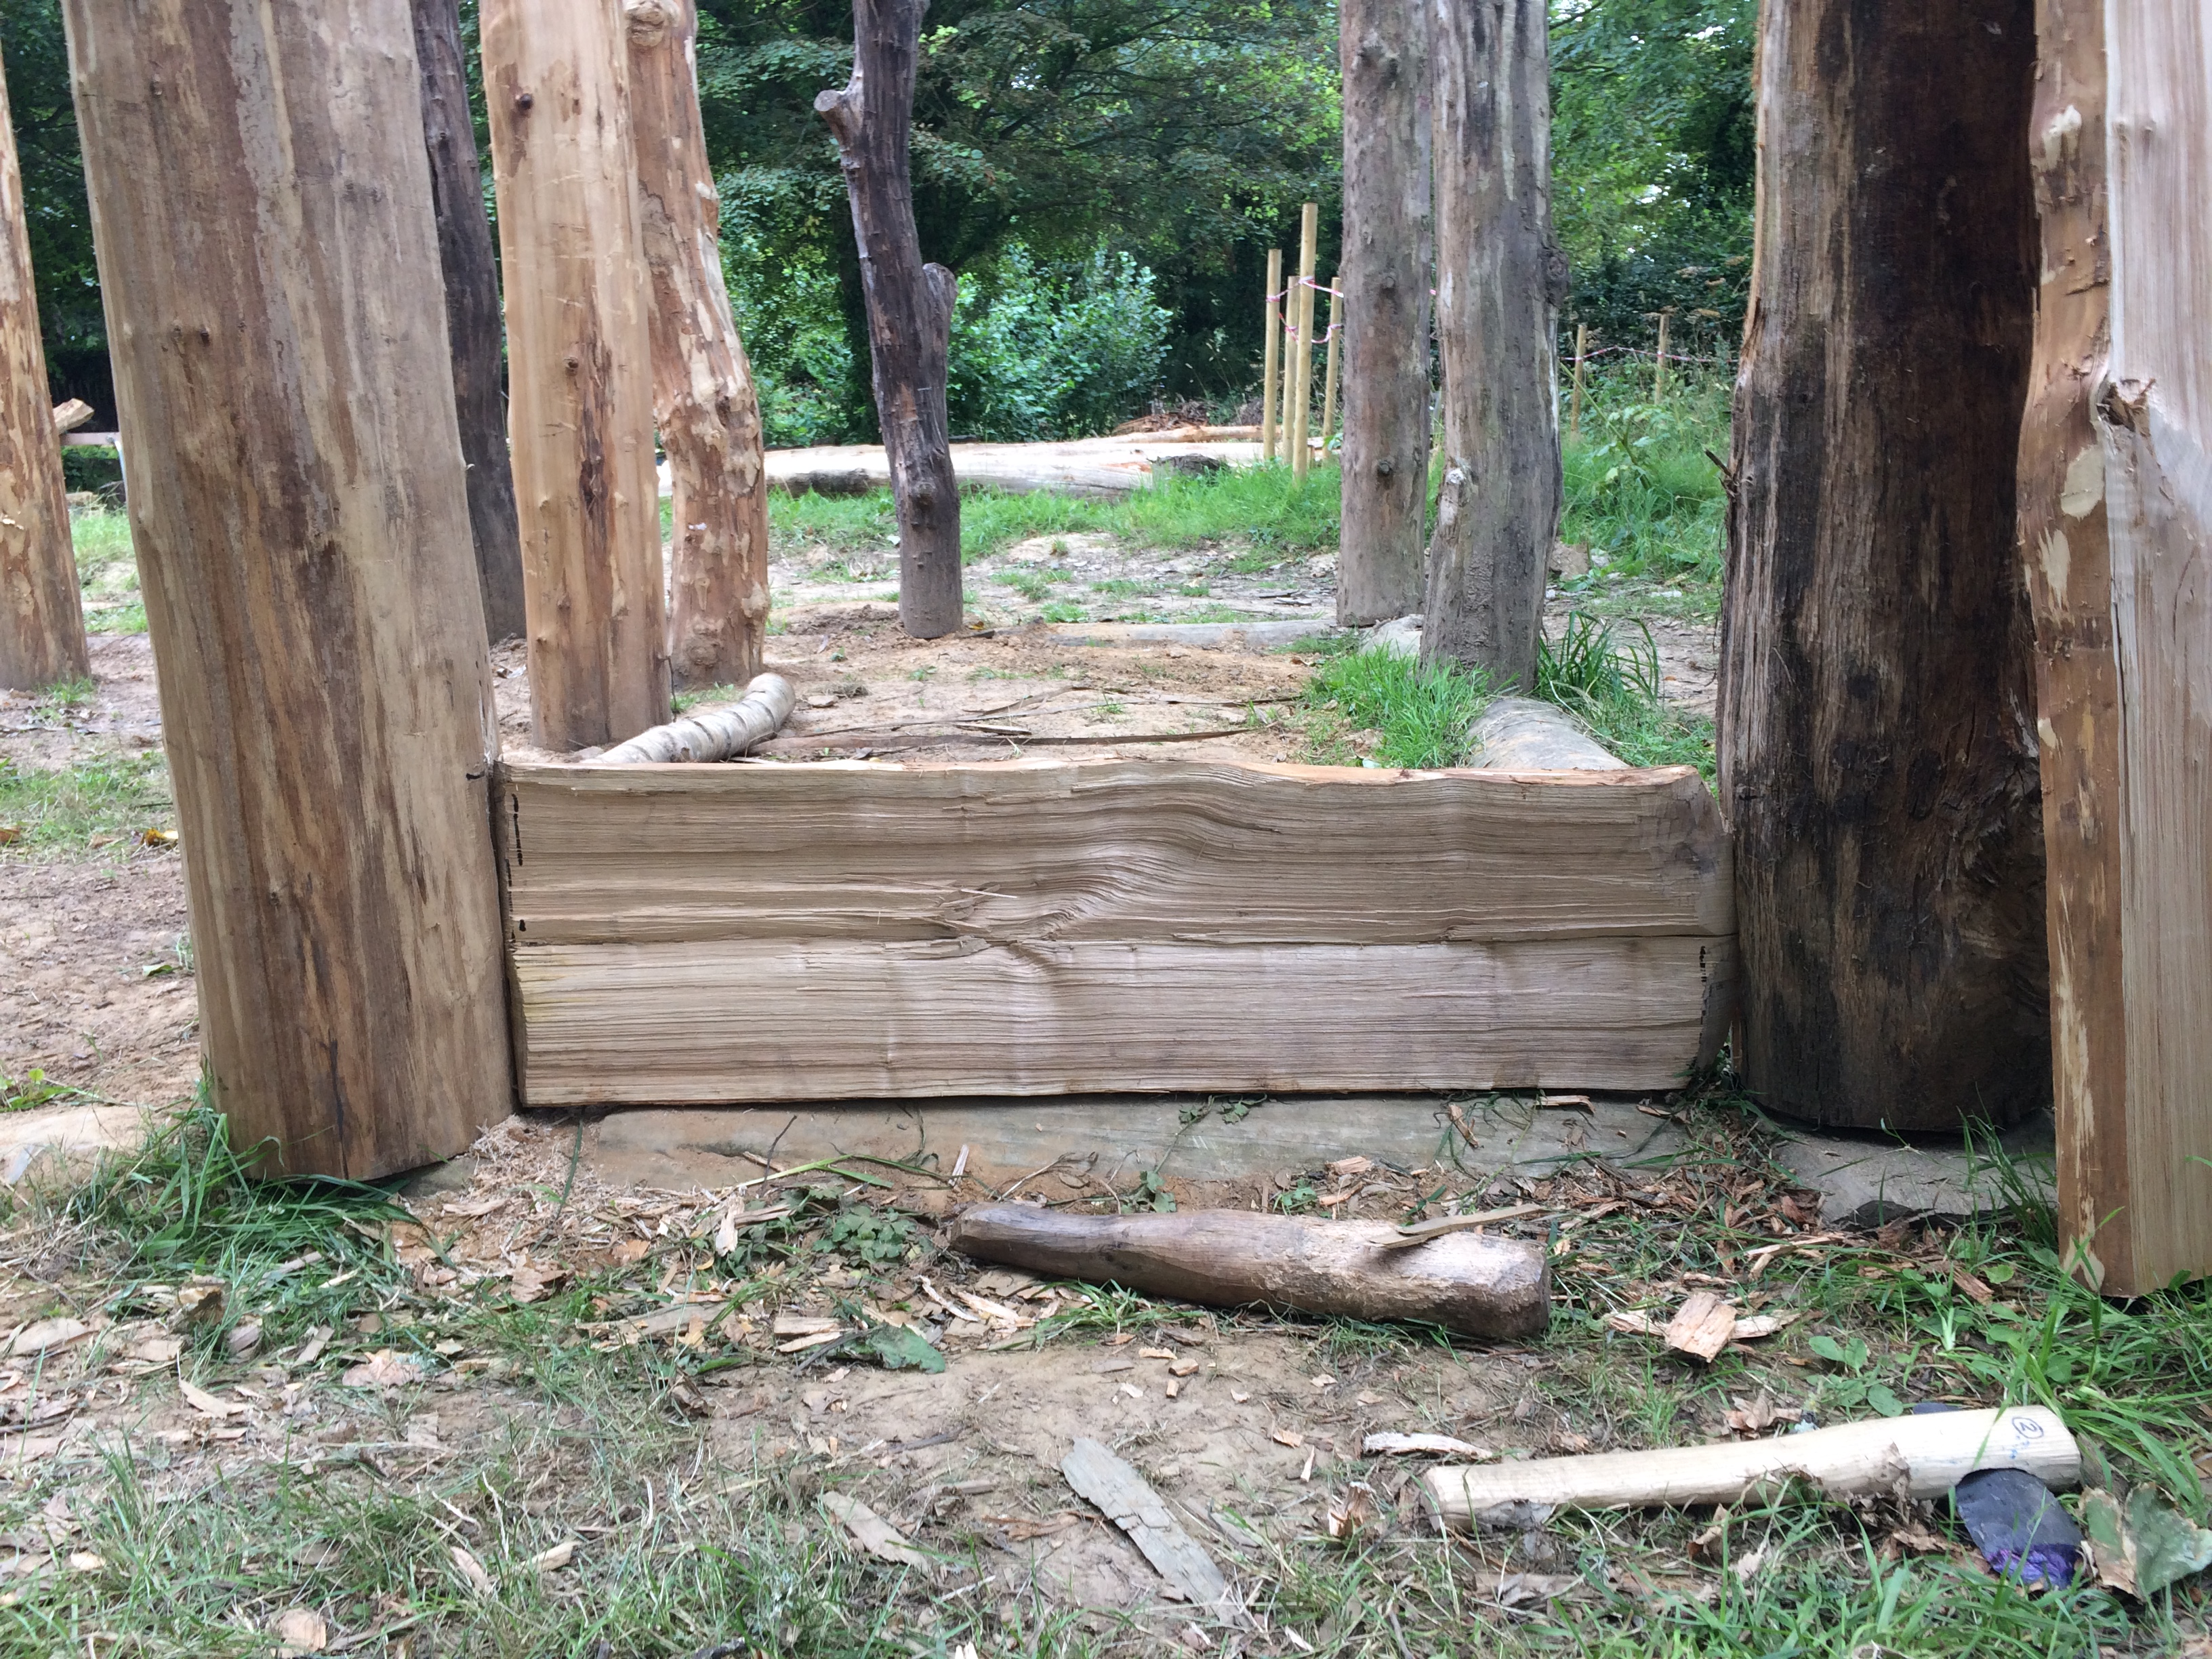
A second mini project that begins today is the splitting of short planks to create a structural wall base in the sill beam end of the building. Our interpretation so far is based on the housing of domesticated animals in this section and the control of their digging and rooting by the use of a sill beam construction. The logic continues that to build a woven wall above that sill beam simply creates weakness at a higher level and so the manufacture and installation of planks between the sill beam posts will create a robust structure that will contain animals.


Today we put four purlin posts in the ground and as a last effort, Bill and Derek dug a metre deep post hole in record time (somewhere less than half an hour!).
Thursday 20th July 2017
A weather system blew through last night and brought fresher air and showers. Today is breezy and much cooler.
The mission continues to place our 10 purlin posts this week. Bill and Ed are digging post holes 10 and 11 which bodes well for exceeding 10 posts in the ground!
Derek, Rosie and Tim are working on Purlin Post cup joints, some simple and some with integral tenons.
The flint axe is still in use – cross cutting a Purlin Post to length. It is noticeable that the cut has to be much wider to allow the flint axe head to get into the heart of the log. This is due mainly to the wider timber hafting of the axe compared to the wooden handle of a steel axe. The flint axe is actually performing well (despite some initial reservations).


Pippa finished the crosscutting of the purlin post using the flint axe before lunch – having put in 2000 blows! The finished cut is very different in texture and has a beauty all of its own.
The final figures for the flint axe use are actually surprising. The timber had a circumference of 780mm. Eight individuals were involved with the work, ranging from 150 blows to 2000! The combined number of blows required to cut the log was 7800 with a total cutting time of 90 minutes and 44 seconds. This equates to an incredible 16.3 blows to remove each cubic centimetre of wood. Of course, this process was entirely new to many volunteers and so I would expect efficiency rates to improve. The other factor worth considering is the issue of damage to the working edge of the tool. An unpolished flint axe – although initially sharp, is prone to damage during use as the fine flint edge continues to knap against the timber it is cutting. Knapped felling tools have a limited lifespan according to the species and hardness of timber being felled, the skill of the user and the specific flaking pattern remaining on the tool. This figure can now be refined and applied to the frame of the building to estimate the total effort required using flint tools.
Purlin posts 9, 10 and 11 were erected today. These three posts form the main supports of the roof in the “living” area of the building.
Friday 21st July 2017
The weather today is fine and sunny but with high winds and rain forecast for later this afternoon.
Work is feverishly continuing with the preparation of Purlin posts. Incredibly, we have exceeded my target of 10 posts in the ground this week and the method of placing them using lashed props on the existing frame has now been refined and is even more efficient.
We have 8 remaining Purlin posts to place before we reach phase 3 of the build – the installation of longitudinal beams that will eventually link all of the uprights and create the shape of the roof.


Until that point, work continues on the cutting of cup joints, cross cutting timbers to length, preparing fibres for cordage making, and digging more post holes.
Work also continues with splitting short planks. These planks will slot between the wall posts at the sill beam end of the building and will make the “animal” section of the building robust.

Splitting planks can be achieved radially or horizontally. Radial planks are more stable (in terms of seasoning and warping) but require a very large diameter tree in order to get planks of any reasonable width. Horizontal planks are less stable but can be broader with a smaller diameter tree.
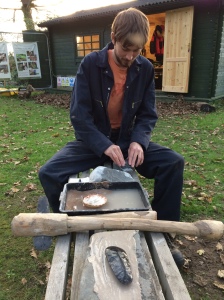
We are trying a honed bone chisel for cutting the plank retaining grooves into the posts. The cow bone was brought by Derek and Astra and we honed a working edge on it with the same stone and sand method we have been using to polish the flint axe. Although rustic, the bone chisel is performing well – even against dense and dry Holm Oak and makes the awkward task of narrow cuts in cramped places far more feasible than a hafted flint tool.


Saturday 22nd July 2017
The end of another productive week is here. The rainstorm of last night has passed and although cloudy, the weather is holding for now.
Today the team are trying to dig more post holes for the Purlin Posts. The remaining 8 are nearly finished (they have been cut to length and their cup joints cut into their tops. The mission is to try and get some in the ground before the forecast rain hits us later.
Astra is teaching the art of making cordage from bramble to those volunteers who haven’t yet experienced this joy. The time is rapidly approaching when cordage making will be a daily and essential part of this build. The number of lashings required in the roof is daunting – but like all epic tasks, it has to start somewhere!

Last night, we had a BBQ under the threat (and eventual materialisation) of heavy rain. Ed managed to make the longest marshmallow toasting stick in the Northern Hemisphere, and Derek managed to burn through and widen the mortise for his flint axe handle. The process works well and certainly saves time.


So another great week comes to an end. Despite good and bad weather, the team have exceeded my targets of 10 Purlin Posts in the ground, placing an impressive 14! Work has also begun on the plank carpentry of the Sill Beam end of the building – and we have fully tested the flint axe!
The project now takes a summer break and will restart in September.
Monday 11th September 2017
Work continues after our Summer break. The weather is unseasonably wet and windy and it feels more like late autumn than early September. High winds and rain may hinder us this week.
Ed was busy over the summer break and made a range of mallets and a new member of the team! His name is Bark.

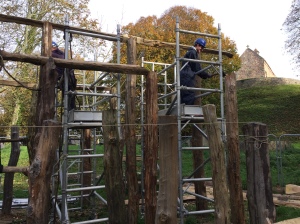
This week will see the start of working at height. Scaffold towers have been delivered to site and will be be used to access the tops of the purlin and ridge posts.

The aim over the next few weeks will be to put the ridge poles and purlin poles in position. These timbers will be mainly ¼ split logs that locate in “V” notches at the top of each post.
This week we also aim to put in the final 5 Purlin Posts to complete the earthbound structural elements of the building.
Today, the volunteers worked through the wind and rain and managed to dig three Purlin Post holes, erect one post and tamp another into position, and strip bark from some of the last remaining logs.


Tuesday 12th September 2017
The weather is breezy but dry. Today work begins on selecting the ¼ split timbers to act as ridge beams. We will require 6 of varying lengths to complete the ridge – each one being scarf jointed and pegged at a post top.
This morning has gone well with the placement of 2 Purlin Posts and the digging of the last post hole.
The first ridge section (1) is being prepared by Rosie, Pippa and Ruth. This stage of the construction will require working at the top of the ridge posts on tower scaffolds. Although a modern convenience, the scaffold takes the place (and meets the safety requirements of a building site) of a lashed scaffold that would enable neolithic builders to get to the post tops.
Each ridge section will be selected, marked, cut to an approximate size, offerred to the post tops, marked, adjusted and offered up again until they fit. A time consuming and detailed process. This effort is worthwhile to ensure the ridge is straight and structurally sound.


A practice scarf joint is being produced. Traditionally seen as a simple joint, the matching of two angled faces to an accurate fit using axes is anything but simple! We also have the issue of joining ¼ split timbers that are not regular or even straight.
Wednesday 13th September 2017
The day has started with high winds from the West after a stormy night! Work on the tower scaffolds is postponed until the winds drop later this morning.
The use of ¼ split timbers as ridge beams and purlins requires us to produce more from the remaining 4500mm timbers we have. It’s a while since we split any long timbers so this morning will be spent revisiting this dark art.

The second ridge beam section is being prepared to match section one. Matching these ¼ split timbers at height also has to take into account the undulations of the post tops. This Ridge section will have a scarf joint at either end and a mortise in its centre to locate with Ridge Posts 2, 3 and 4.
Dave has clamped and whipped a split wall post today. The whipping will prevent the worst of the crack from reopening.


Thursday 14th September 2017
Another windy day has dawned, although the sunny spells make it feel less autumnal than it could.
Work continues today on the splitting of 4500mm timbers to replace those we are using for the ridge and purlins.

The second ridge beam section has been positioned by Rosie and Pippa. The scarf joint is joined using a peg that is augered through both scarfed sections of Ridge beam 1 and 2 and into the post beneath.. The whole joint is then stabilised using lashings (whipping) at either side of the post. This system requires an eye for detail to ensure the best fit between scarf joints. The irregularities of the ¼ split Ridge Beam sections also requires continual standing back and judgement to ensure an overall “straight” ridge pole.
For me, this aspect of building in round and split timber is what brings character to the structure, showing the natural undulations and shape of the original tree – beautiful!!

The third section of Ridge Beam is now being prepared by Rosie and Doug

This timber will bridge the widest span in the building. To avoid the need to fit a mortise and a scarf joint above the central Ridge Post and run the risk of weakening the ridge beam itself, we are going to be cunning and move the scarf joint to the side of the post – effectively hanging it in space (cantilevered). This method has worked well on previous structures I have designed but requires the cantilevered scarf joint to be perfect as it receives indirect support from the post beneath. The chosen ¼ split Ridge Beam is wide and straight – perfect for the job!

Friday 15th September 2017
Today, the wind has eased at last. Sunny spells and light showers are forecast. The aim today is to finish and install Ridge Beam 3 – this will involve the cutting of the cantilevered scarf joint. This joint has to perfectly match the scarf on Ridge Beam 4 to ensure good strength. The lack of direct support from the Ridge Post (5) beneath will test our skills with adze and axe to create a functional and beautiful joint.


Mike has taken up the challenge of cutting the cantilevered scarf joint having nicely adjusted the previous scarf to fit. 
Iris and Ed are working on splitting ¼ timbers that will eventually be used as rafters.
Given the complexity of the tasks (complex measuring, working at height and joint cutting and fitting) this week and the unseasonably windy and wet weather, the team have once again managed to produce some great work and we have completed half the ridge beam!


Each new week of work sees the transformation of this project into something more and more house like, and now the ridge offers us a glimpse of the eventual roof line and an idea of the height inside the main hall.
Well done all!
Monday 25th September 2017
The early onset of Autumn/Winter continues. This week sees the continuation of Ridge Beam preparation and fitting. The selection, splitting and fitting of horizontal wall planks also continues at the end of the building that has a Sill Beam construction.

Section 4 of the Ridge Beam joins to the cantilevered scarf joint at the central Ridge Post.
Edward is adzing this critical joint to ensure a near perfect fit. Once we are satisfied with this joint, we will then adze the scarf at the other end (sitting over Ridge Post 6) and finish the joint with pegs and whipping.

The finished joint has turned out to be very good. Both timbers meet along their 370mm sloping surfaces – making sure the roof load is transferred evenly across the timber surfaces.
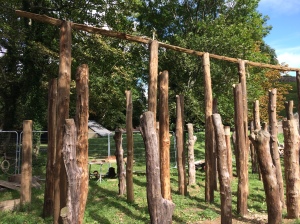
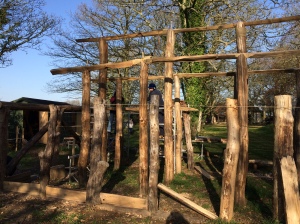
Today marked the end of us placing posts in the ground! Over the last year of work (admittedly only one week in three) the team have dug 66 post holes, stripped the bark from 66 trees and used a combination of “A” frame, ropes and brute force to place the 66 posts in the ground. Each post has been tamped back with thin layers of soil. 28 of those 66 posts have simple “V” notches, or more complex tenons (cup joints) in their tops. A great and momentous project milestone!
Tuesday 26th September 2017
The weather is is beautifully calm and settled. A bright morning has given way to grey cloud cover.


Today Tim is marking out an fitting Ridge Beam 5. This ¼ split timber has to take into account two scarf joints and a mortise and tenon. It also has to accommodate a slight error in the positioning of Ridge post 8. Given the placement of all the posts has been by eye, we have got eight of the nine in to within 20mm of each other in height and line – except for the eighth! For some reason, this post is 5 cm off line and slightly twisted. The solution is the installation of a more irregular Ridge Beam that will fit this misalignment.
It’s interesting to see the development of the Ridge Beam. The natural wave and curve of each timber are spliced together to effectively make a 20 metre sinuous and continuous length. At first glance, our “modern” eyes are slightly shocked by something that isn’t perfectly straight. But after a while, the beauty of the line makes itself known to us and mirrors the shapes and lines in the surrounding trees. There is something unique about working with timber and not imposing our will entirely upon it, but rather seeing its shape and natural strength as a benefit.
This approach is visible in the Neolithic well linings discovered in Germany a few years ago. Planks had been radially split and jointed together, but in general, the minimum of working had been done, allowing the natural strength of the timber to do its job.
Work is also continuing on shaving the corners off the ¼ split rafters. Peg making has also begun again in earnest. This hasn’t been seen since the very beginning of the project, but now, as more and more timbers are jointed together, pegs become an essential part of that structural work.


The final position of wall posts heights are also being marked today. The roof pitch will be somewhere around 45 degrees. Strings are being stretched along the wall posts and adjusted by sight. A sight line is then taken from the string – through the Purlin Post tops to the Ridge Beam. Any major differences in height on the Purlin Posts (in relation to the ridge and wall posts) are then marked and will be trimmed. This process has highlighted 3 Purlin Posts that need some adjustment to ensure the rafters lay on the roof at around 45 degrees. Like the Ridge Beam fitting, we are purposefully not using modern survey equipment or even levels to find “true” vertical or horizontals. Although there are Neolithic monuments that would seem to suggest the use of basic surveying tools such as levels and plumb lines, I wonder if day to day housing would require precision beyond the accuracy of the human eye?

Wednesday 27th September 2017
Another calm day begins at Hougue Bie. Thin cloud, little wind and warmth makes today’s tasks a little easier.
Doug continues on the Ridge Beam with the shaping and fitting of section 6. When installed, this section will complete the ridge line of the building. This last section also has a metre of timber cantilevered beyond the last Ridge Post (9) that will eventually support an eave over the main doors of the building.

Again, this timber requires the cutting of a good quality scarf joint above Ridge Post 8 and a mortise that will sit over the last Ridge Post and prevent longitudinal movement.
Phil is back and working on a replacement for Post 11. This post came up too short after my final calculations for the fitting of the wall plate over the wall posts. Phil will select a new timber, cut it to length, cut a tenon in its end and re-erect it ready for work to start on the wall plate.
Teams are continuing with peg making and shaving the ¼ split timbers. We are also pressing on with more ¼ splitting of 4500mm timbers. Although we are reaching the end of our straightest timbers, this is a worthwhile task as we will simple select the straightest sections of these ¼ beams to act as wall plates.


The Ridge Beam was completed today! This marks a crucial stage in the build. The scaffold has been repositioned to enable us to work on both purlins at once.
The Purlins have been selected – ensuring the widest spans (in the central bay – or Living Area) receive the thickest timbers. The Purlins will have to deal with more roof load than the Ridge Beam so they must be able to withstand it if we want the roof to last.


Thursday 28th September 2017
Today work begins on the Purlins. Like the Ridge Beams, these timbers require precise fitting to ensure good joints along the length of the roof. Ed has started work on Section 1 – cutting a mortise and a scarf joint that will sit over the posts.
Tim has taken on the unenviable task of cutting 20 cm of a Purlin Post. Most of our Post placements were accurate in terms of height out of the ground, but this post somehow escaped our notice.
Derek is beginning to adjust and fit the first diagonal brace – a tricky operation that, like everything else at this stage, requires offering up and adjustment to achieve best results.

The first two purlin sections have been shaped and installed today. They are going in well as we are able to work on two simultaneously with a central scaffold tower. The installation of the purlins is highlighting some of the asymmetry of the building. We have built according to the original positions of post holes and this is now reflected in the uprights and connecting timbers. Initially this can be almost offensive to the modern eye, accustomed to the sawn edged and surveyed nature of modern buildings, but there is a natural grace to the shapes we are creating. They reflect the irregularities of the natural world and teach us that our modern visual understanding of architecture based on measured straight lines is a very recent thing indeed.

Friday 29th September 2017
After a wet night, today is forecast with rain and cloud.
The end of another week has arrived and we have done well…. The Ridge Beam is in place and we are well into the installation of the Purlin sections.


Today the team are continuing with the the installation of more Purlins (sections 2 and 2a, the splitting of broad planks to fit the sill beam wall posts and the fitting of the first diagonal brace into the end of the building.
The use of diagonal bracing has been suggested by our engineer to give some lateral stability to the building. The question is “did Neolithic builders use them?” This is one of the many questions that haunt experimental archaeologists and that, until direct evidence is found, we simply cannot know. My logic on this matter is based on what else is happening in the Neolithic World. The construction of large scale monuments using individual pieces of stone or timber weighing many tonnes would be very difficult without diagonal bracing of some sort – whether it be in possible “A” frame used to raise the objects or diagonal bracing in the scaffolds that must have been need to work at the significant heights some of these monuments require. Even the use of rafters on any pitched roof is effectively the use of diagonal bracing. We know that diagonals were an important tradition in the decoration of some Neolithic ceramics. The issue for us is one of preservation and finding any surviving timber building elements that demonstrate it!
What is clear to me is the capability of Neolithic people to solve complex engineering problems using both timber and stone. I suspect (but cannot prove) that if their buildings distorted or collapsed due to lateral movement, Their replacement would very quickly demonstrate a diagonal solution to it!


Monday 9th October 2017
If we were to give this week a title, it would undoubtedly be called “Purlin Week” – “Clash of the Purlins” – “The Purlin Adventure”.
As you may have guessed, the mission for this week is to install as many Purlin sections as possible. We are currently fitting section 2b and have decided to replace section 1b due to a shake (split) that we found in our finished timber that reduces its strength significantly. We would rather replace now than have to come back to it later.


Today Mike is finishing the mortise on Purlin 2b to enable a snug fit over Purlin Post 6. Purlin section 2a is being lashed, augered and pegged to lock it in position.


Purlin 2b will require some effort to fit correctly. It sits nicely on two of the three post tops – but will require bending to shape on the third post. The key to this operation is to ensure everything else is pegged and lashed correctly in position before we apply Spanish windlasses to the end that needs shaping.
We have chosen and marked out the replacement for Purlin section 1b. It is a more substantial piece of ¼ split timber.
Astra and Ed have split several rafters today to replenish our stocks used for the Ridge and Purlin.
Tuesday 26th September 2017
The weather is grey but settled today with occasional drizzle.
This morning we welcomed one of 4 school visits this week. We take a practical approach to education on this project, allowing children to handle and use flint axes, polish a flint axe head and understand how Neolithic people lived – along with an explanation of the projects and how we’re doing! Ed and Paul were naturals at engaging this morning’s 6 year old children who all went away very happy and with their brains stuffed full of experience and knowledge.

The project continues with the shaping and mortising of three Purlin sections (1b, 3a and 3b). Pippa, Ed and Rosie are working on those timbers and getting them to a stage where we can hoist them into position for their first fitting.
Astra, Mike and Franco are organising the many piles of ¼ split rafters – ready for lashing onto the roof once the purlins and wall plates are completed.


Derek has successfully fitted the first diagonal brace into the end of the building (what a great job!) and is now calculating the position of the second based on the piece of timber he has chosen.


The selection and fitting of Purlin beam 3a is proving difficult. It spans three posts and needs a relatively straight length of 4600mm. The only remaining timber that matches our need is straight in one plane but has a significant arch (about 8cm offline). We have decided to install it and make it fit – but it will definitely add a sinuous line to otherwise pretty straight purlins.
Purlin Section 3b was placed and pegged after lunch today. Ruth finished the process with some good lashings. The finished purlin joins section 2b with a scarf joint. To keep this joint in position over the post we employed a new method – human weight! We put a timber hitch over both parts of the scarf and a big loop on the other end. Mike then sat in the loop which pulled the scarf joint together and into the base of the “V” notch while it was augered and pegged. The method worked well, is now referred to as “Doing a Mike”, and is sure to be used again on the project.

Wednesday 11th October 2017
A grey and damp day at Hougue Bie has dawned. We are hoping for the forecast sunny spells in the afternoon.
Today work continues on the installation of Purlin sections. As always, getting this right is a tricky operation and requires several fittings at height. Daryl is beginning to process the timber for the remaining Purlins on side b of the building while Rosie finishes the scarf joint started by Astra yesterday so we can hoist Purlin 3a into position.

Ed is continuing to Split rafters from our pile of “irregular” timbers while Doug is processing some of those “irregular” timbers into usable lengths.
Derek is working on the precision mortise and tenon joints that will form the hold the second diagonal brace in position.
After a first fitting of Purlin Section 3a we have decided to invert this 4600

mm timber to try and make a better fit. This means the middle post it will sit on needs to be reduced in height by 80mm to accommodate its curve. The work is tricky at height but will hopefully solve the problems of this long irregular timber. All hands are now shaping the remaining three Purlin Sections on side b of the building, once this tricky purlin is finally fitted, things should speed up a little. The good news is that the sun has finally broken through the clouds!
The difficulties we are beginning to experience at this point of the build raise interesting questions regarding the original method of building. The main issue for us has been to ensure the Purlin Posts are at the correct height in relation to the Ridge Posts to ensure the roof pitch we require (in this specific case, around 45 degrees). The problems arise when dealing with timber length, irregular timber from a finite resource (rather than selecting specific trees from a forest), and a general inability to work at height with flint tools. Having looked again at the post hole evidence for these buildings – with a view to the problems we have encountered, I am beginning to think that perhaps these buildings were constructed using “sets” of three posts that were joined using lateral bracing (with some temporary bracing to allow lifting into position) and prepared on the ground to get the spacing, angles and joints correct. Each frame could then be raised into position (over pre dug post holes of the right depths) which would ensure less issues when installing the Purlins and Ridge Beams.

Thursday 12th October 2017
The sun is out and the birds are chirping with gusto!

Late yesterday, Phil and Derek practically finished shaping the problematic Purlin Section 3a. With a tiny adjustment this morning, this timber is now ready to be lashed and pegged. Daryl is augering a 1 inch peg hole to secure the scarf joint while Derek has rigged up a windlass to pull the purlin into exact position over the middle post – ready to be pegged.


The scaffolds will now be re-positioned to enable the fitting of Purlin Sections 4b, 5b and 6b.
Teams today are splitting rafters, shaping Purlin Sections, lashing and pegging scarf joints, and working on the second diagonal brace for the end of the building.
Astra’s Purlin Section (4b) has been shaped and offered up – a few finishing touches and it will be there!


We had our third school visit of the week today, – great to see children getting to grips with flint axes and cordage making – a project like this really brings the past to life!
Friday 29th September 2017
A fine morning has dawned after a wet evening and night.
Today sees the end of another week. Our progress on Purlins has been steady – due mainly to the problematic section 3a! We now have a couple of Purlin Posts to reduce in height by a few centimetres before the remaining Purlin Sections can be lifted and fitted.

Daryl has begun the process of reducing Purlin Post 15. Rosie is axing the top of Purlin Post 14. Iris is adzing a tricky scarf joint to finish Purlin Section 4a – the Purlin twists along its length requiring the second scarf joint to be offset from the apparent line of the timber.
Tim and Astra are ¼ splitting a chestnut timber to make 4 shorter rafters.
The need to reduce the height of some Purlins, despite our careful initial placement, may well be due to undulations in ground level aross the footprint of the building. It raises an obvious question regarding Neolithic house builders, “Was the building plot surveyed and levelled before construction began?”
This would certainly remove some of the issues we currently face, and is demonstrated in some Neolithic constructions, but would it be necessary if timber choice was broader and if three post sets were raised at once to ensure correct angles? As always, one question in experimental archaeology leads to 5 more!


Monday 30th October 2017
Fine, crisp weather has welcomed us to the first of two weeks on the project this month. These two sessions will mark the end of our labours for 2017. December and January will see no work on site as we enjoy the festive season and avoid the worst of the inevitably poor weather!
This week sees a concerted drive to install all of the remaining Purlin Sections in the building. This requires the shortening of some Purlin Posts to ensure the Purlins sit at the correct height to ensure a roof pitch of around 45 degrees (never an exact science with round timber!).
Today, Daryl and Pippa are reducing Purlin Post heights while other team members continue with the processing of our ¼ split off-cuts into usable structural timbers.
Purlin Section 4a is sitting proud of its tenon at the moment, so a Spanish Windlass is being employed to try and bring it into position. As always, the stored energy within a tight windlass can be hazardous if suddenly released – so caution is needed when setting up and using it.

Purlin Section 5b is being fitted by Mike – making small adjustments on the mortise and tenon.

Derek is very close to fitting both diagonal braces in the end wall of the building. This has been a difficult process involving the cutting and fitting of joints in 5 separate timbers. Derek’s hard work is paying off – it’s going to look great and perform a vital function in stabilising the building.


Tuesday 31st October 2017
The weather remains calm but with patches of light cloud.
Rosie brought some of the Halloween spirit to site today!

Work continues with Purlin Sections 5a and 5b. These timbers require shaping and fitting to their corresponding posts. As always, this “Dark Art” relies on a good eye for matching angles and twists within a piece of timber!
Tim is finishing the Purlin that Daryl started yesterday (5a) and it’s looking good. Today we have pegged and lashed purlin 5b in position.

Comment of the day was unleashed by Tim today upon seeing a saw on site! “Put it away and do it properly!” As the weeks and months have progressed on this project, the team have come to an unofficial agreement that this project will not employ saws in any form – regardless of them being hand tools. The logic being that no Neolithic saw (a denticulated flint edge) would have the capacity of “sawing” through anything bigger than a small branch (when using a flint saw – probably better described as a serrated knife, the user usually cuts around the circumference of a branch and then snaps out the core). Today, a saw found its way on site and was promptly dismissed by the team in no uncertain terms….


Derek is experiencing problems with installing the second diagonal brace. However he adjusts the tenon or mortise, it seems unwilling to slip the last inch into its housing to completed the task!
Multiple fittings and trimmings have been tried to very little effect and we seem to be missing the critical piece of detail that will yield success…
Wednesday 1st November 2017
A clear bright day has dawned at Hougue Bie. The calm weather continues to hold!

Today work continues on the installation of Purlin sections 6a and 6b. Both of these final sections will cantilever beyond the end posts of the building by a metre to form a subsantial eave over the main entrance to the house. Both Purlin Posts require taking down a few inches to keep some kind of roof line intact.


The issue of yesterday’s ill fitting diagonal brace is resolved – at least theoretically!! Last night I worked out why the two tenons are not fitting. Today we shall modify according to my drawings and see if the theory actually works!

Today I have also worked out the start of the Wall Plate. The Wall plate is a series of split timbers that will run along the top of the wall posts and seamlessly link them all. There are around 40 wall posts to link – each one requiring a notch in its top to accommodate the split timbers. We are hoping to complete this using longer lengths of split timbers to avoid the need for lots of scarf joints and hopefully save some time. This stage will be the final bout of technical timber work and the need for fitting and shaping at height. After this stage we will be able to move swiftly onto the installation of rafters and the construction of the roof!
In the end, the diagonal brace issues were solved by Derek’s perseverance and skill. Both diagonal braces are now in position and looking fantastic!

Mike and Ruth have pegged and lashed Purlin Sections 6a and 6b after a team effort from Daryl and Ed to fit them! Well done… a great effort today!


Thursday 2nd November 2017
The clear blue skies of the last three days are gone. But the rain has not yet reached us!
Today we move onto the Wall Plate at the gable end of the building. Derek, Daryl and Astra are starting the first of 3 “V” notches that will accommodate a 4000 mm timber that links the three end posts of the building.


Rosie is refitting Purlin 1b (the replacement for the original Purlin that was discovered to have a serious shake in it).

Daryl is attempting to skew peg the windlassed Purlin (Section 4a) to keep it in position over its tenon. There are huge pressures keeping it in position at the moment and a peg solution will need to withstand those pressures until the weight of the roof frame and thatch keeps in in control in a few months time.


Friday 3rd November 2017
Another fine morning has dawned – what an amazing November week of weather!
Today, work continues on installing the first Wall Plate Section to link the three posts at the end of the building.


Today, Daryl is finishing the “V” cut in the third end Wall Post to allow the fitting of Wall Plate Section 1.
Derek and Ed are splitting planks from a nice straight grained piece of timber to fill the wall spaces at the Sill Beam end of the building.

Astra, Mike and Sophie are making 1” pegs for the many joints that will need securing in the Wall Plate and Pippa and Iris are turning our ¼ split off-cuts into useable timbers for the building interior.

The plank splitting has gone well today. We sacrificed one of our straight grained logs for the purpose and the results speak for themselves!

The first Wall Plate (Section 1) has been offered up for fitting – it’s amazing how a single piece of timber can make such a difference to the appearance of the build. Suddenly, there is a permanence to the end wall that wasn’t there this morning!!
Saturday 4th November 2017
Heavy rain fell last night and is forecast until mid afternoon today.
Today we had a visit from the Young Archaeologists Club who came and had a tour of the building and used flint axes! a nice visit with 24 very keen children, some of whom may go on to become archaeologists in the future!
I had to confess to them that I was once young….. and had been a YAC myself, and cut my teeth on some of the excavations I had attended when I was 13 and 14, but I got the distinct impression that they disbelieved that I was ever young all all!!

The last day of the week. Today. Derek and Daryl are working on Wall Plate 1 in an attempt to fit this 4 metre round timber permanently in position over the three end posts of the building. We have calculated the angle of joint that is required to lock this timber into the existing “V” cups of the posts.


Pippa is fitting the second vertical brace into the end wall. This small uprights will eventually be grooved to accommodate split planks on either side. The fit has to be pretty exact to create a strong wall – but involves the cutting of a reasonable narrow and deep mortise into the underside of the hard Holm Oak of the diagonal brace.
Pippa has made a lovely job of the vertical brace that will eventually support planks in a groove on either side.


The team are also continuing work on splitting and shaving sweet chestnut timber down to 1” pegs.

Teams are also processing our ¼ split off-cuts into usable timbers for the interior.
The first Wall Plate was finished just before the end of play of today. The end wall is now complete and stands as testament to all of the volunteers involved in its construction from the bark strippers, slot diggers, mortise makers, tenon cutters, post raisers, diagonal brace fitter, vertical brace fitters, “V” joint cutters, peg makers, hole makers, and lifters who made it possible!

This marks the end of the penultimate week for this year……


Monday 20th November 2017
So, the last project week of 2017 has begun. This marks the end of a productive first year of work. The volunteers have continued to come through rain and shine and the building now looks like the giant skeleton of some long extinct leviathan!
Only those involved in the project know the true story behind each visible timber. The hours spent digging and splitting and hewing and fitting. Each timber represents something unique to each person and forms a story in our minds. It is this story, the process of building and preparing, the relationships and interactions, that are invisible to Archaeology. We know they must have existed – but we will never know their detail. Projects like this give a unique perspective on the unseen aspects of ancient lives.


The work continues today. The first ¼ split Wall Plate section (2a) is being selected and fitted. This 4500mm timber will span 4 Wall Posts and lead the way for the eventual shape and height of the walls. Fitting this section will involve the shaping of “V” joints into 4 post tops that match the profiles of the Wall Plate at those points.
Volunteers are also shaping and fitting split planks between posts at the Sill Beam end of the building. These will form the strong wall sections that would prevent our theoretical Neolithic livestock from destroying the walls at this end of the building.

Teams are also ¼ splitting the final 4500mm timbers to provide Rafters, Wall Plates and Joists for the next stage of the build.


Tuesday 21st November 2017
The weather is grey but settled today.
Work continues on the installation of split planks between the Wall Posts at the Sill Beam end of the building. There are now six planks being worked on. Each one needing a shaped end, and a corresponding groove cut into the Wall Post. The plank must be cut to length and shaped to match the sill beam and a recess cut into the other Wall Post. All in all, a precise task using our precious planks!


Wall Plate 2a continues. The tenon of the second Wall Post has been trimmed to allow the post to move into line with the other 3. The final “V” cut can now be made in the second post to enable the fitting of the Wall Plate section.

1” pegs are in production again – this stage will require a peg at the top of each post – so precision draw knifing skills are required!

The afternoon brought a welcome break – marshmallows and an open fire! One of the perks of winter tidying with fire.


The light fades so rapidly from 3.00pm onward. The Wall Plate is ready to peg, once we have cut a scarf joint into it.
Wednesday 22nd November 2017
A clear bright day has dawned at Hougue Bie – although the wind is bracing!
Today work continues on the installation of Wall Plate sections. Bill is cutting the scarf joint into the end of Wall Plate section 2a so we can finally peg it into position. This will clear the way for us to re-position the scaffold towers and start on the “V” cuts in the tops of the next 4 Wall Posts to accommodate the next Wall Plate section (3a).
Split planks are still being fitted at the Sill Beam end of the building. There are some fine examples of axe and chisel carpentry going on here… with a definite air of competitive spirit between each plank fitter. These planks form the foundation of our “livestock proof” walls – so they have to be solid!


Wall Plate section 2a has been fitted today – it looks fantastic in position! Mike is marking the next 4 posts for cutting to take Wall Plate section 3a. Ruth and Doug are working on the “V” cuts, while Bill is cutting the scarf joint on section 3a ready for fitting. We know the system now, the rest is just hard work and time!


Thursday 22nd November 2017
The heavy rain and high winds of last night have largely passed. Sun is forecast this afternoon and the winds are supposed to drop!
Derek and Bill are finishing the “V” cuts in the posts to try an initial fit of Wall Plate section 3a. After an initial fit, some small adjustments are required to help the Wall Plate fit just right.


The split plank team are working to finish their respective planks. Daryl and Pippa, having both done fantastic jobs on their first planks are moving onto their second. The process remains fiddly, with precision required, but the steep learning curve of the first is over. Astra is working on her second fitted split plank- unfortunately for her, it is the plank we are installing with only Neolithic tools. She is learning the way of the bone chisel!


Gaynor is cross cutting a log to produce a length that will hopefully give us more split planks.
Today I began thinking about internal doorways and the heights of lintels. This raises an interesting point regarding the day to day use of the building. The average height of a person in the UK is 5’9” (Men) and 5’3” (Women). Standard door heights are set at 6’6” – being 9” over the average height. Neolithic average heights are interesting and currently stand at around 5’6” which is within the modern range. However, this average is less than the 5’10” figure we have for the Upper Palaeolithic/Mesolithic. This is a clear indicator of a significant height reduction in human populations that occurs alongside the adoption of agriculture. The arguments for this are varied, but include a narrowing of diet and reduction in nutritional value, along with increasing population and corresponding increases in disease and food competition. Either way, agriculture shortens our stature from our hunter gatherer ancestors.
So, the question is simple. Do we set the door lintels on this project at a modern or Neolithic height? Do we want to show people how it was and run the risk of banged heads and warning signs! Or do we make the doorways fit the population that will be using it everyday? As a team, our instinct is to put the lintels somewhere close to average Neolithic height – apart from raising interesting questions from the visiting public, a height of around 5’6” – 8” seems to create the right proportions within the existing timber frame.


Friday 24th November 2017
Heavy rain overnight has left the site waterlogged. Today is forecast as heavy showers and sunny spells, although we don’t seem to have had any sunny spells!
This is the last working day of the year and we aim to finish off some of the tasks started earlier in the week.

Bill, Mike, Derek and Tim are working on the next Wall Plate section (4a). Bill and Mike are using a bevel to transfer the profile of the ¼ split Wall Plate to each post top it has to fit. The profile is then cut into the post top – leaving 20mm shy to allow for later adjustments. We have now started using some of the shorter length ¼ split beams we processed recently to span 3 or 4 posts at a time.
Astra, Daryl, Pippa, Ed, Iris and Heather are fitting planks between the Wall Posts at the Sill Beam end of the building.

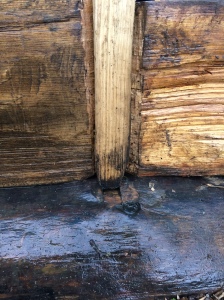
It’s wet and muddy, but spirits are not dampened!
We dismantled the tower scaffolds at the end of the working day to reveal our year’s work. The results are beautiful. What is impressive, apart from the stunning frame, is the sheer volume of labour and effort that is unseen. All of the excavated post holes, the slot trench, the countless stripped logs, the split timbers and cut timbers. Hours and hours of work that contributes to the rapidly progressing longhouse.


There is already a beauty in it, a beauty that is taken directly from nature. We haven’t so much imposed our will on the timber, but rather, worked with its natural shape and grain to produce what we have. There is not a single straight line in the structure, it reflects the forest from which it came, and the sweat, enthusiasm and endurance of those who built it.

Well done all! A great year!


