
Monday 1st October 2018
The mornings are darker and the evenings are drawing in. Winter is coming! The project enters its final stage with a dual focus this week.
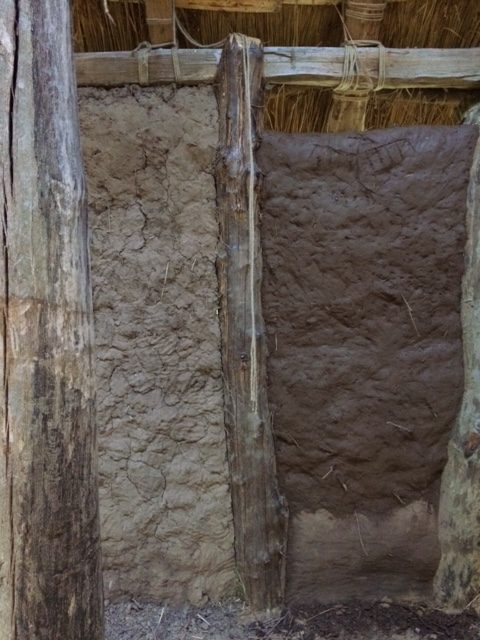
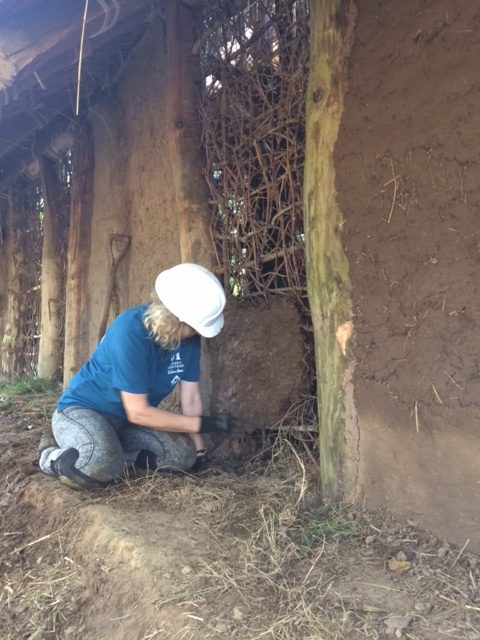
Daubing is now a race against time. It it important to get the walls covered in order to protect the building from the inevitable wind and rain that will come with the onset of winter. Today our trusty volunteers are carrying on with this task. Daubing is a labour intensive job that involves the digging, mixing, and applying daub of just the right consistency to the willow and hazel wattle panels. Issues and questions of colour can come later; but for now we have to push on with covering the walls.
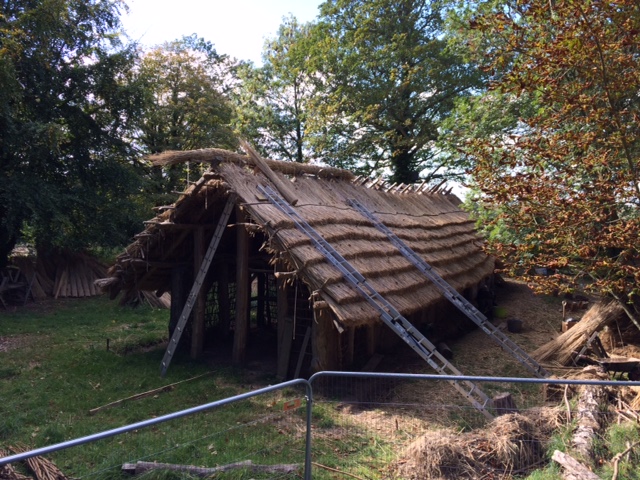
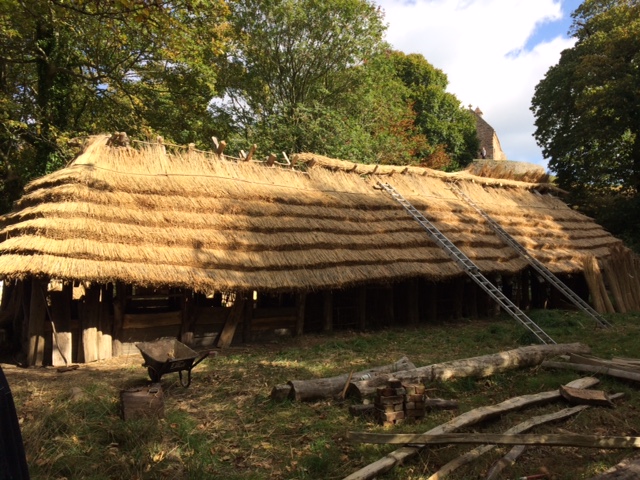
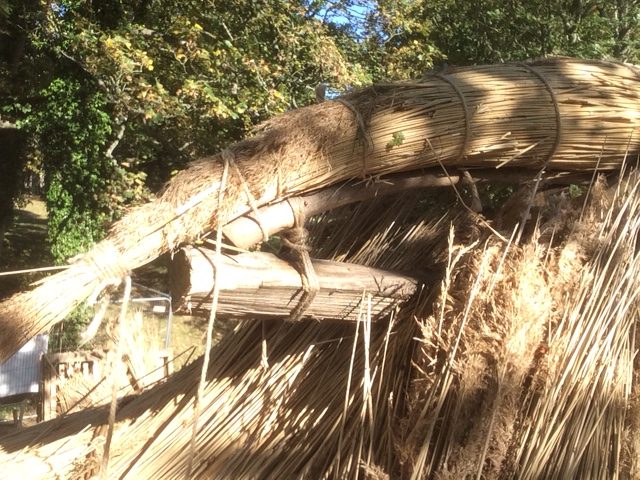
The roof also enters a final stage. Thatching layers 1-6 are complete and we now turn our attention to the ridge. Volunteers are creating thatch rolls to fit between the crucks of the rafters. This roll will support the final ridge and create a mass of reed that will stop any wayward drips from entering the hall itself. It will also give us a mass of material to peg or tie the final ridge covering to.
Tuesday 2nd October 2018
The first section of 6 metre thatch roll has been placed at the top of the ridge. This forms a depth of thatch to stop any wayward drips, but crucially creates a high point that increases the pitch if the thatch that overlies it. The ridge of the rood must shed water as quickly as possible to minimise its ingress into the building. Thatch layer seven has begun, This is the first of two layers that will rest on the thatch roll. The ridge is now being worked in 6 metre sections to allow us to problem solve as we go. There are any number of ways to create a weather proof ridge, but each one requires skill and care to do properly.

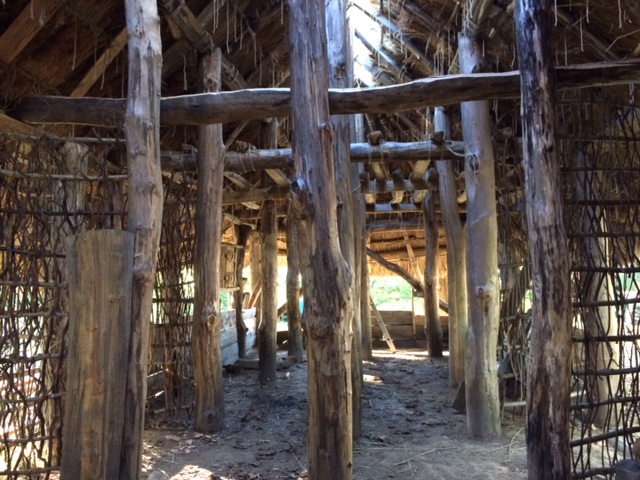
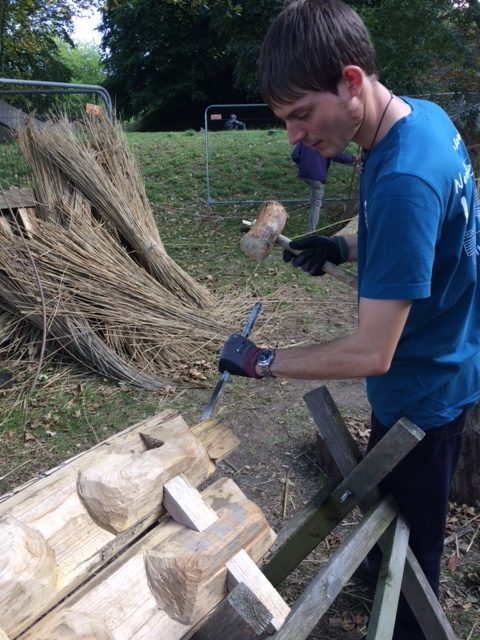
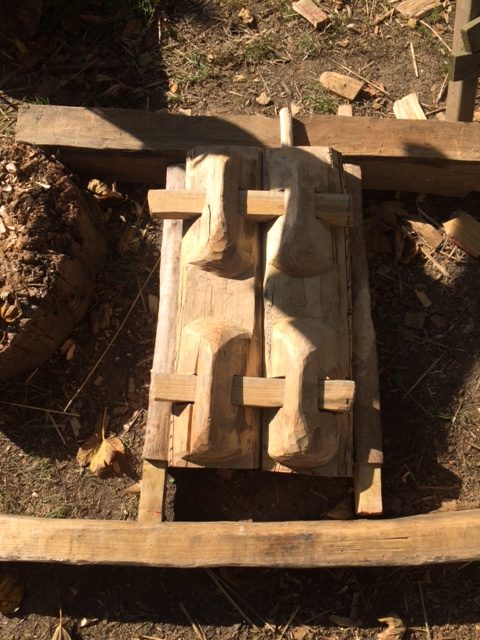
Elsewhere on the building, Derek is working on fitting a latch to his beautiful shutter. Edward is working on fitting window frame 2 in the livestock end of the building while Franco is doing the same with frame 4 in the main hall. The last “tie beam” is in place in the building and the livestock mezzanine floor can now be extended over the passageway.
Wednesday 3rd October 2018
Today sees the thatching of layer 8 on the first section of roof. The reed is now shooting beyond the thatch roll at the top and creating good coverage at the peak.
We have extra volunteers today to help with our daubing challenge! We still have many panels left to do – but even two panels a day (which is a good amount of work for 6 people) adds up to an important contribution to the project.

Window frame 4 is being fitted and Edward is nearing the completion of his shutter.
We are also taking the opportunity in this fine weather, to have a good site tidy. The thatching process tends to leave a fair bit of waste material around the building, but a carefully controlled fire deals with it pretty rapidly.
We have decided to proceed with thatch layer 9 on the north side of the building. The idea is to create a thickness of reed at the ridge on the lee side of the prevailing weather. This can then be trimmed close to the thatch roll and over lapped by three layers of thatch on the south side of the roof.
Thursday 4th October 2018
This morning we have two thatching teams on the roof. Team 1 (Astra, Iris and Tim) are working on layer 9, while Team 2 (Pippa, Mike and Bill) are working on layer 7 in the middle section of the roof.
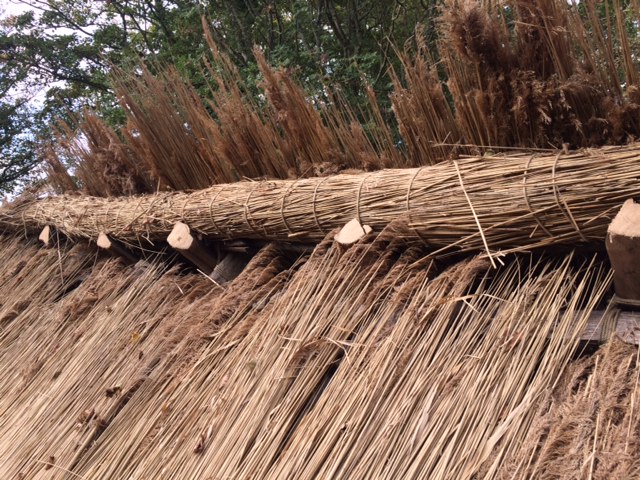
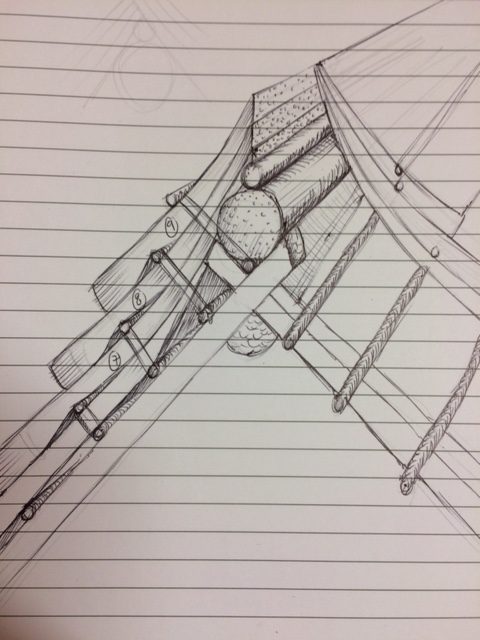
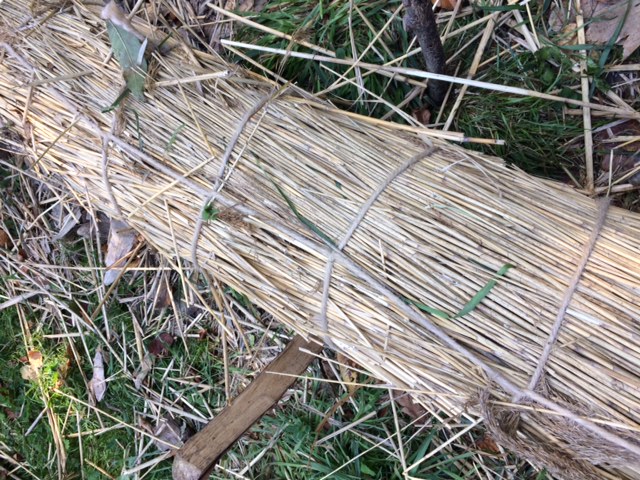
The last thatch roll is made and ready for positioning at the top of the roof. The rolls are made by estimating the thickness required (in this case, thick enough to fill the cruck between the overlapping rafters at the top of the roof), and then measuring out the length required on the ground.
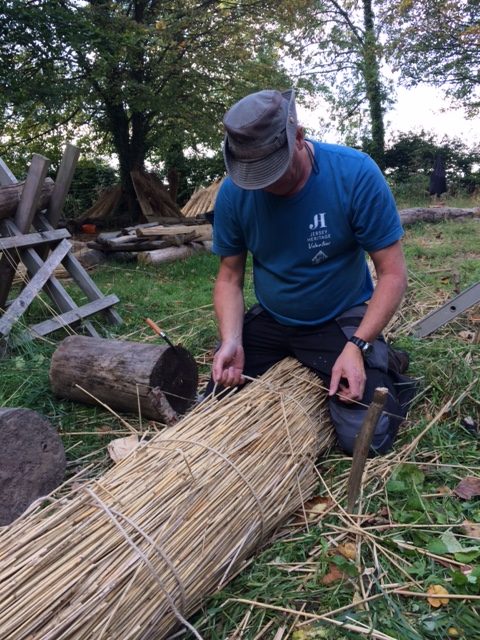
Pairs of pegs are then tapped into the ground to contain the thatch as it is sorted. The ridge roll has 1 ½ bundles of reed per metre of its length. The bundles are laid out between the pegs and overlapped to provide the correct volume. Their ties are then cut and the reed sorted to avoid abrupt joins. The thickness of the potential roll is continually confirmed during this process to avoid the roll being excessively thick or tin along its length. Once we are happy, the bundle is lashed (I prefer a blanket stitch) to maintain its shape and enable it to be carried up onto the roof.
The third 6 metre thatch roll forms the ridge shape at the livestock end of the building. This end of the roof is relatively complicated, simply because we don’t yet know if we will need a smoke hole in this position or not. From the start this build has had to change at times as each new stage unveils questions and answers that were impossible to foresee at the design and model stage. One of the more obvious questions concerning houses like these is “Did they have smoke holes in the roof?” The short answer is that we simply don’t know! But before we leave it at that, why don’t we ask “what do we know?” Experimental archaeology has tried many options for ventilating smoke in replica buildings. My own experience in the construction and use of many different “traditionally” built houses is that smoke holes are sometimes required and sometimes not. The type of roof covering, size and shape of building, surrounding vegetation, orientation of building, the type of fire used in the structure and even the species of timber being burned, all have critical influence on the decision for, or against, smoke holes. This building is being thatched with water reed, and in relatively light layers (compared to modern thatched roofs).
The goal is to allow the smoke particles from a cooking/heating fire to percolate through the thatch layers (driven from beneath by the heat of the fire). My experience tells me that we “shouldn’t” need a vent in the roof. However, this is a longhouse – and my experience of building Viking Age longhouses with shingle roofs and central vents tells be that any smoke from the fire that misses the smoke hole cools and lingers in both ends of the building unless there is some kind of vent in the apex of the gable ends. Returning to our Neolithic Longhouse; given its length, if all the smoke is not driven through the central portion of the roof by the fire beneath, I suspect it may linger – especially in the entirely enclosed “livestock” end of the building. Our solution to this currently unknown issue is to create the potential for having a smoke hole in this end of the roof. When we eventually test the fire, we will have to option of opening a smoke hole without the need for retro-engineering. Of course, ancient builders would not have had this issue as their experience in seeing and building successful houses would have answered these questions before they started building. This entire discussion is a product of trying to re-invent the process of Neolithic house building.
Friday 5th October 2018
Another fine and warm day has dawned at la Hougue Bie. The teams are in for the last session of the week. Work continues with two thatching teams. Team one is working on layer 7 while team 2 works on layer 8. Today works also starts on a rough levelling of the floors in the house. The house frame has been built “by eye” with no use of levels. What has become noticeable as the frame has been finished, is the unevenness of the floors in places. The floor still has to be constructed properly – but at this stage we have begun to remove soil from the high point and deposit it in the low points.
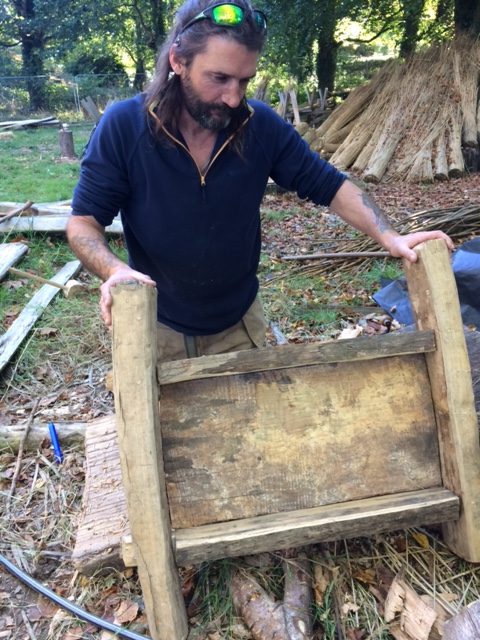
More shutters are being made to finish the window frames. Steadily, the building is beginning to reveal some of its beautiful detail!
A week of unseasonably warm weather has come to an end and we have cracked the technical detail of the roof ridge.
Well done to the team!