29th April – 3rd May 2019
Phase 2 Construction Week 6
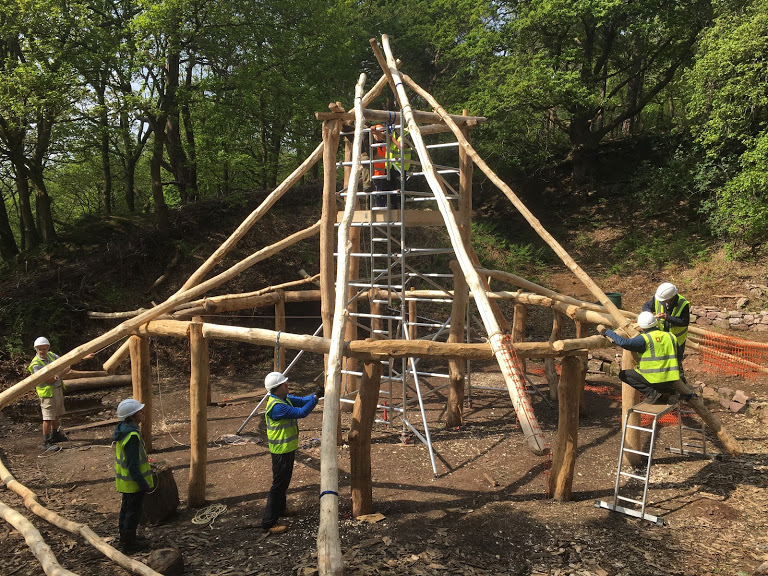
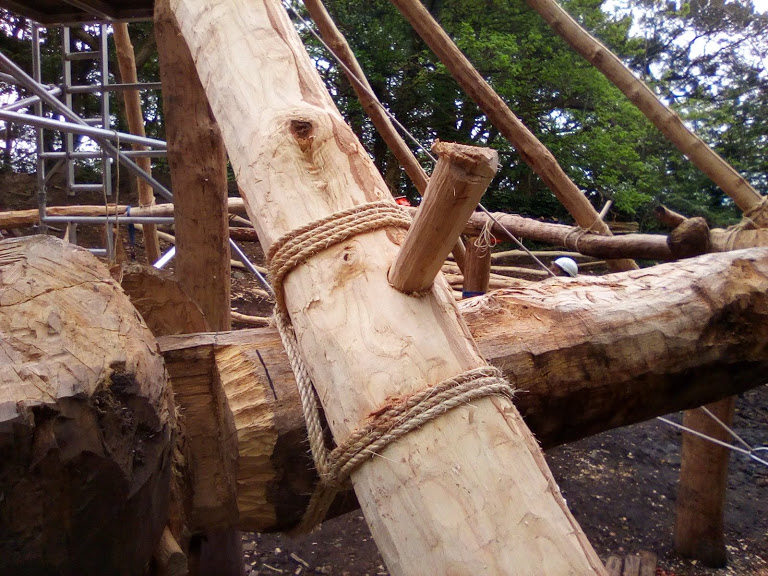
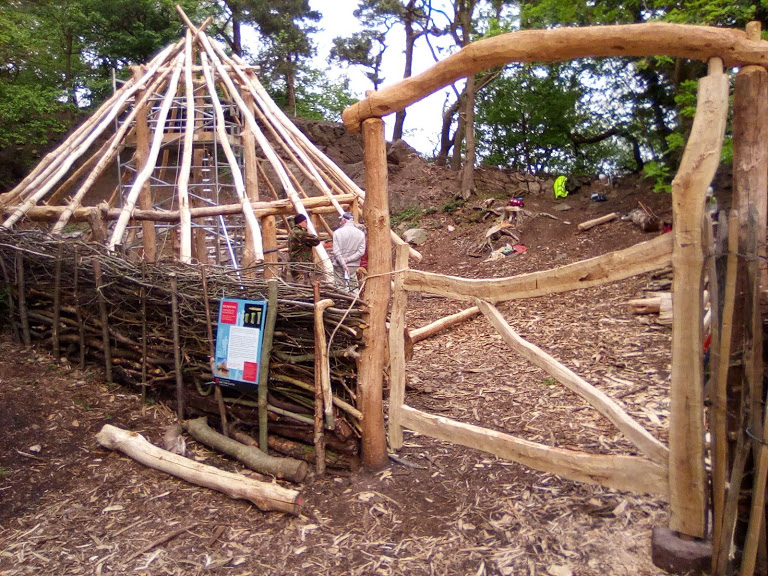
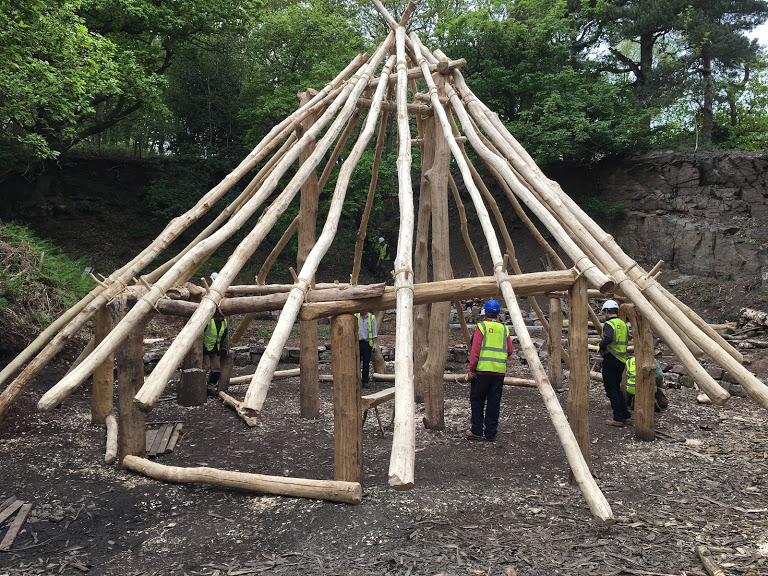
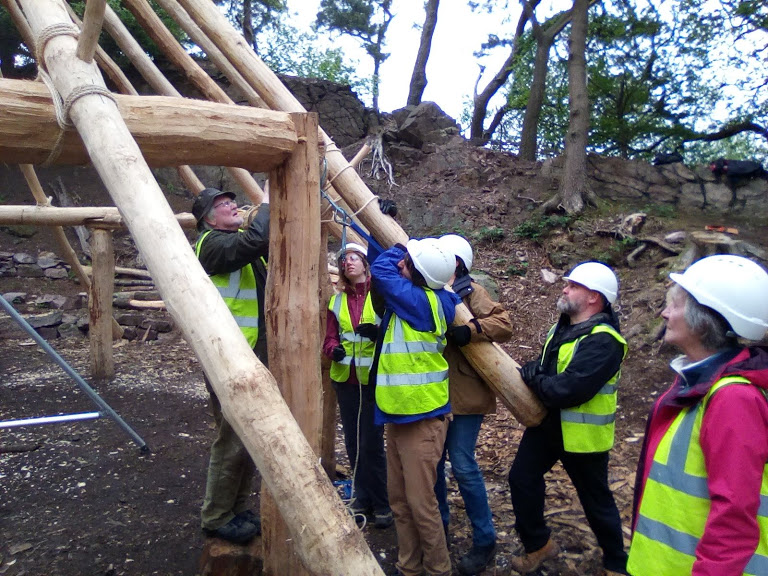
This week sees the installation of the rafters to form the main roof structure. The volunteers have spent many days stripping the bark from 24 Ash poles in preparation. The process of fitting rafters involves the hauling up of the poles onto the timber frame of the building, marking each rafter where it touches the wall plate and purlin, cutting curved notches that match the profile of the wall plate and purlin, then positioning and lashing the rafter in both locations with natural fibre rope. The process is completed by augering a hole through the rafter and wall plate, and tapping in a perfectly fitting peg to prevent the rafter from twisting.
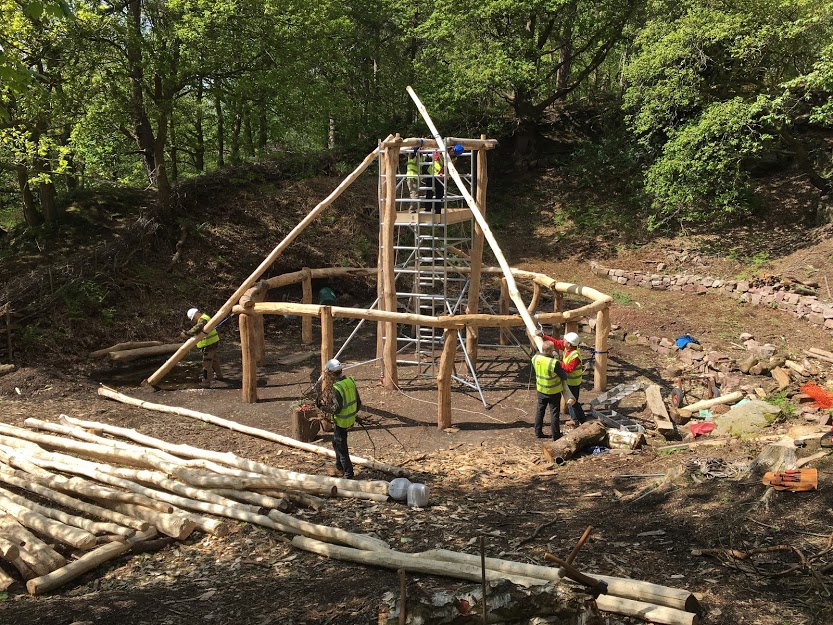
Day one saw the construction of the tower scaffold and the installation of the first three rafters that sit in the middle of each purlin. The volunteers did well, having to learn a new process and method while working at heights.
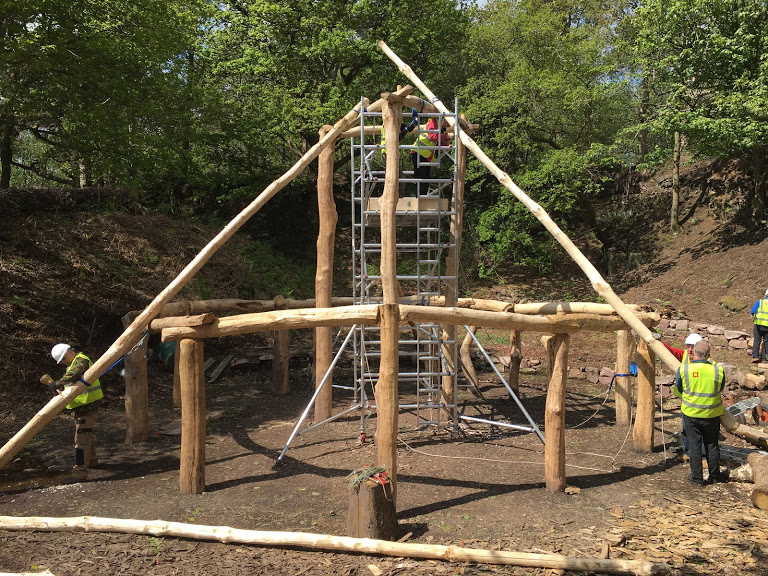
Day two saw another 7 rafters installed and the roof really begins to take shape now!
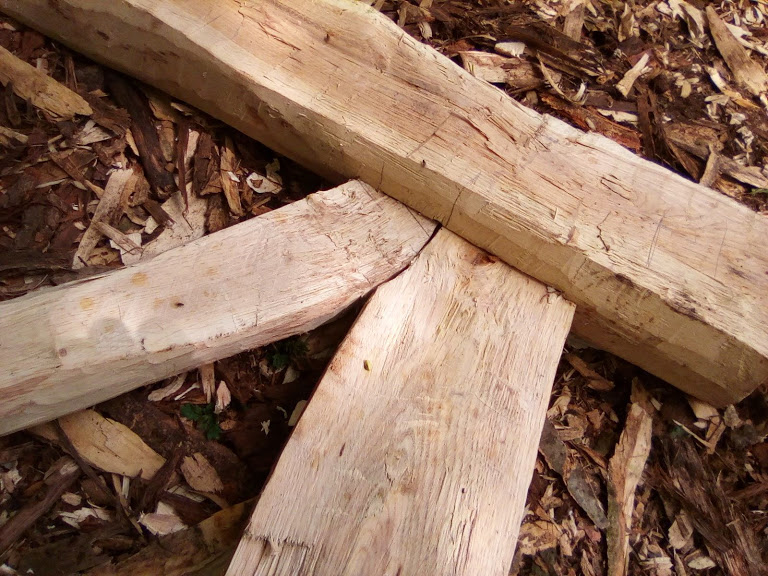
One of the main issues with this roof is the transition in shape, from a roughly circular wall plan to a triangular apex. The corners of the triangular purlins project beyond the natural 45 degree roof line. We are attempting to solve this using the natural irregularities found in our available rafters, placing those with a natural dogleg on the corners to ride over the purlins. When these are positioned, we may well have to trim the projecting purlin ends to bring them closer to the roof line.
While all this has been going on, the unseen heroes of this process have been shaping and refining the pegs that hold the rafters in position. It sounds easy doesn’t it – peg making? But the making of a finely tuned peg that will drive into a hole, gripping the timber tightly without splitting it out, is a difficult and lengthy job that requires precision, an eye for detail and patience!

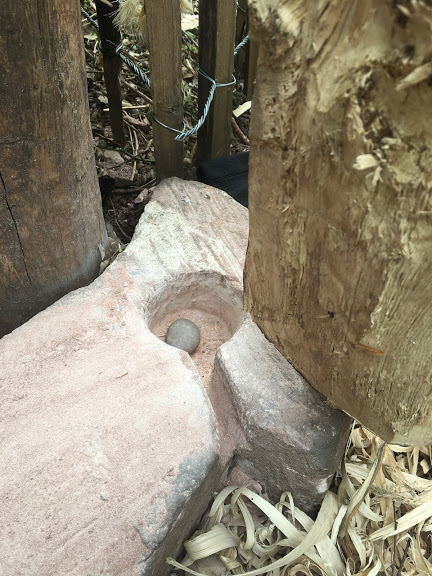
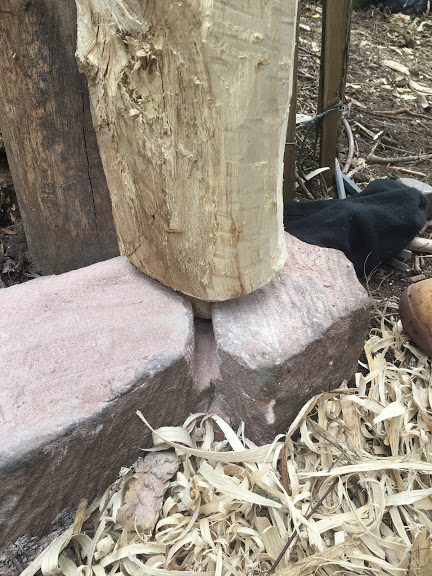
Away from the roof, Edwin has designed a split oak gate to to form a more fitting to the enclosure. Along with others, they are shaping oak elements that will come together to complete the project. The first phase involves the making of a pivot block in sandstone to house the hinge member of the gate. Once again, Edwin is showing his skill and talent in the most remarkable way!
The volunteers are also learning new lashings (Square lashings) that lock the rafters together with the purlins and wall plates. Once learned this neat and strong lashing will be employed hundreds of times in the roof to secure the rafters and ring beams (circular battens that form a conical “ladder” on the roof). A square lashing requires good techniques to do its job…..
Wednesday saw another 7 rafters pegged into position and it looks fantastic!
The interesting central three post structure that has caused such intense thought in the design and construction of this building continues to throw up suggestions in my mind. Today, while watching the volunteer teams fitting the rafters from the modern access solution of a scaffold tower (fitted awkwardly within the confines of the inner triangle), I wondered if this triangular structure would have served exactly the same purpose in the past. It would make a very stable tiered working platform – or staging for the installation of rafters during the construction phase. Post construction, the internal staging could be removed, leaving the post and purlin configuration we have built, to serve a range of structural and other purposes. I know this is a very functional explanation, and I have no doubt that the triangle may have represented some kind of lost meaning, but it would solve the issue of lifting and managing timbers at height.
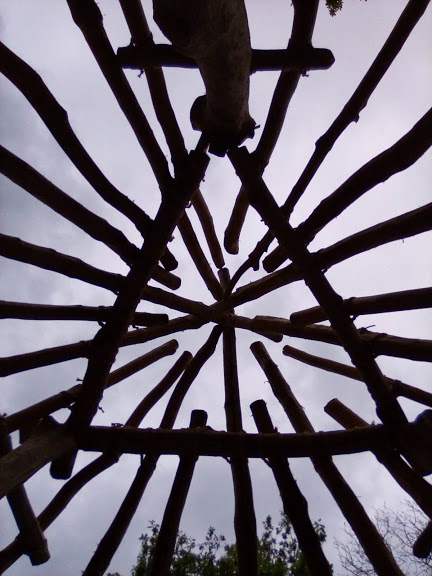
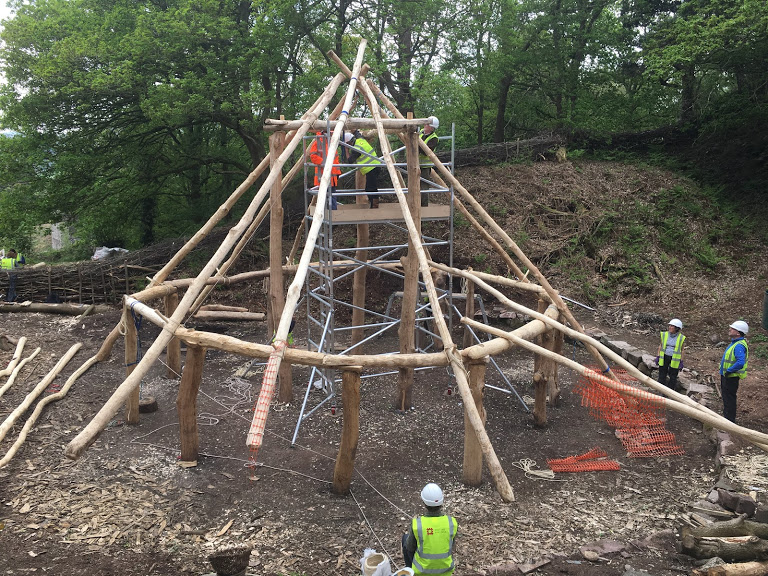
Thursday saw the last straightforward rafters positioned and work starting on the final three. These three rafters run from the wall plate to the very points of the triangular purlins. The temptation here would be to simply drop a rafter into the natural cruck formed by the crossing purlins, however, this would cause serious problems in the pitch of the roof at these positions and cause a real headache during the thatching stage.
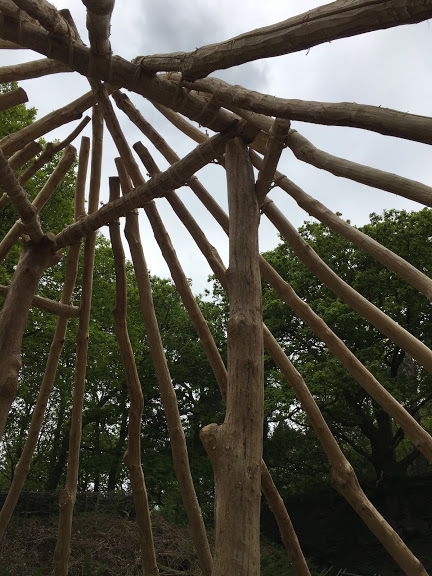
In order to prevent this, there are many possible solutions, but the volunteers have suggested a neat and practical method. The aim is to run the final rafters up to the tops of the inner posts without disrupting the roof line by lashing in short purlins that join the two rafters at either side of the proposed location. This forms a platform for the tricky rafters to rest, and be lashed onto. However, it is important structurally that these rafters don’t just float and rely on the suspended lashings for strength, so the ends of the last rafters will be cut at 45 degrees in order for them to butt up against the inner posts so the roof weight is transferred directly to the main structure of the building.
The result is quite neat and relatively straightforward to achieve.
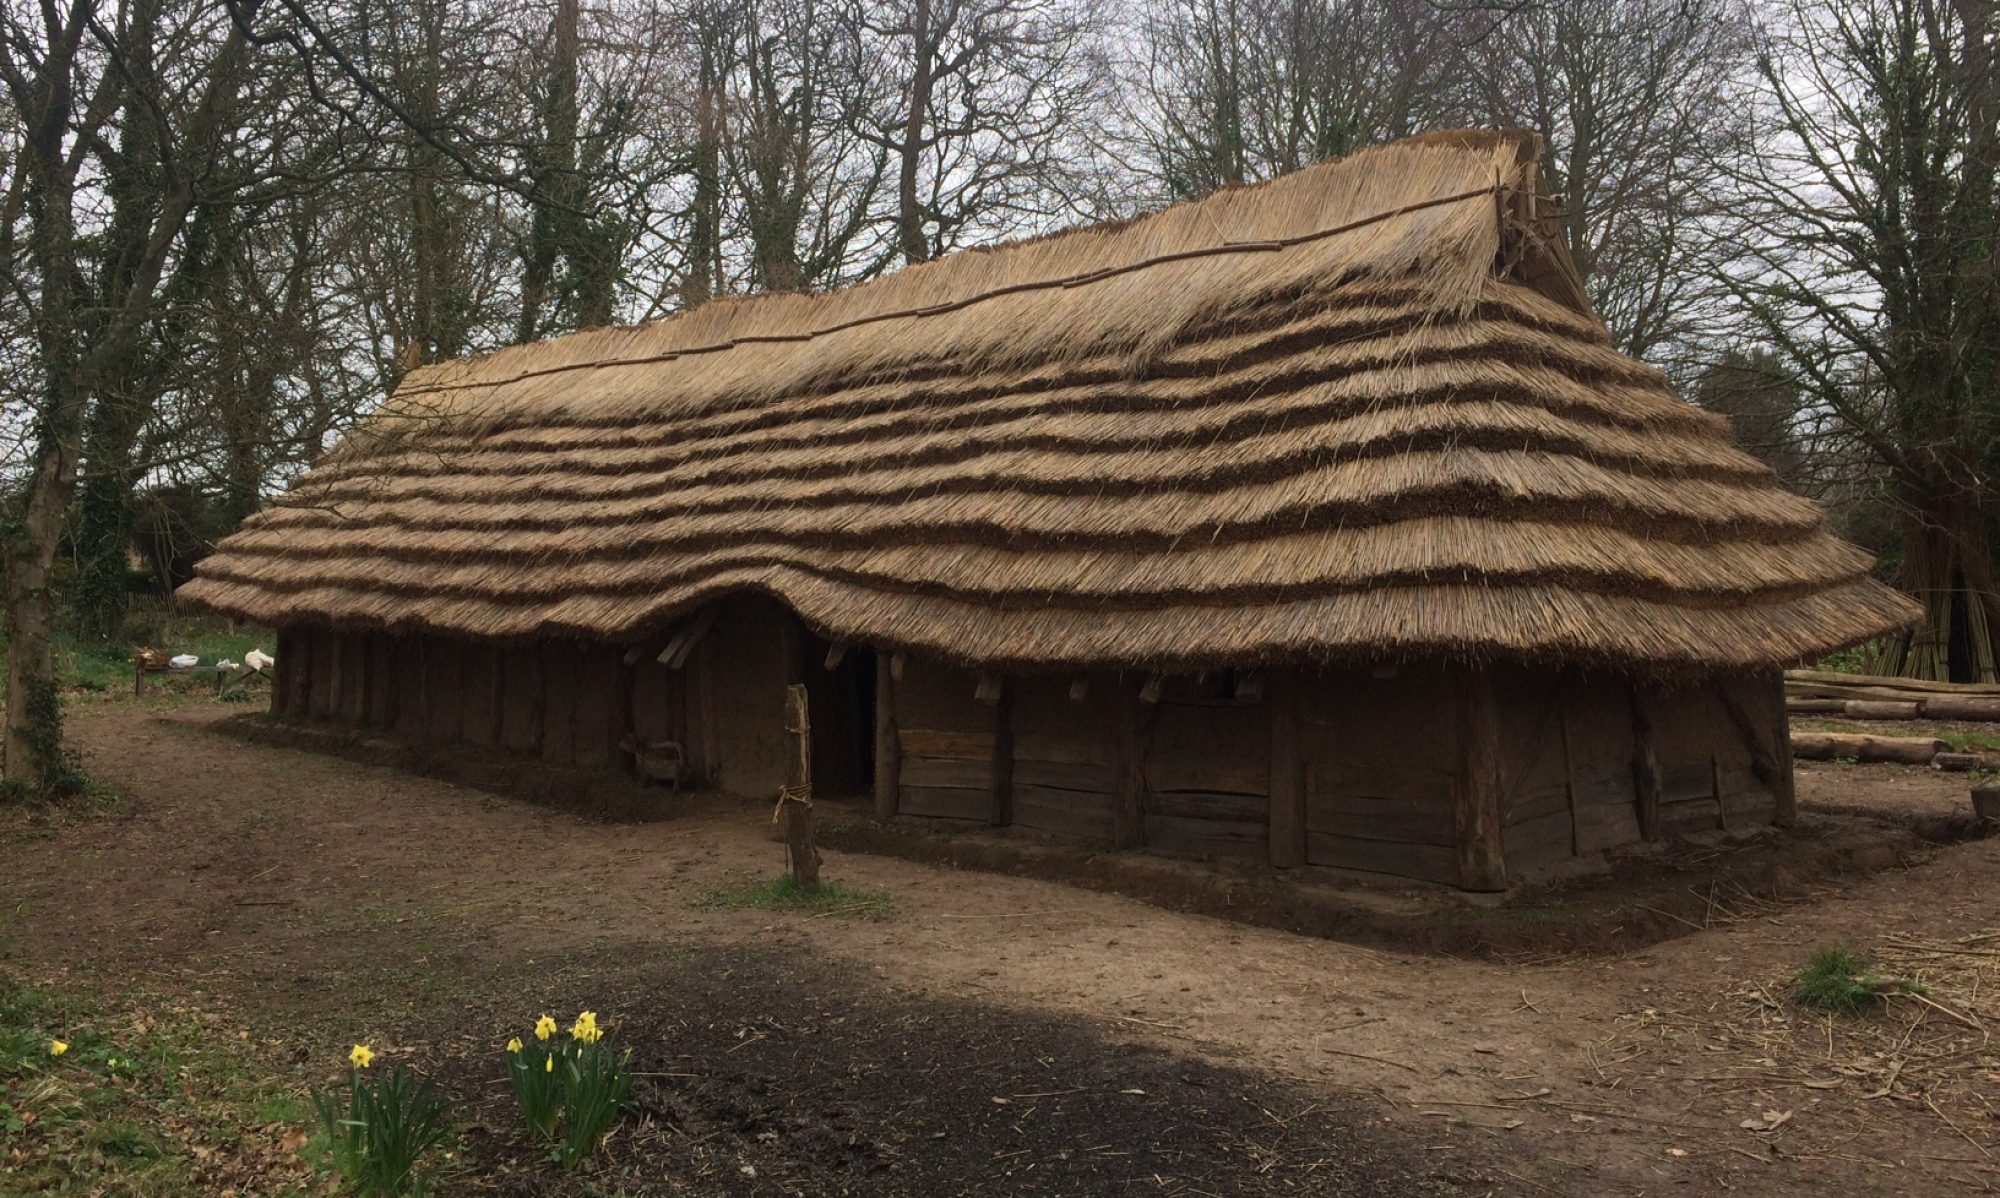
Friday saw the completion of the rafters, and the removal of the very modern tower scaffold to reveal the glory of this fine building!
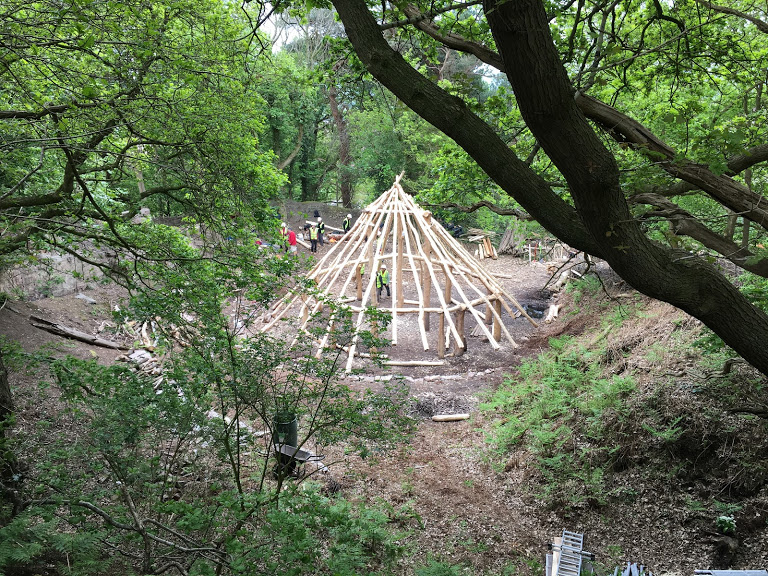
The main structural timbers are now positioned, and we head inevitably toward the lighter framework that will support the thatched roof!
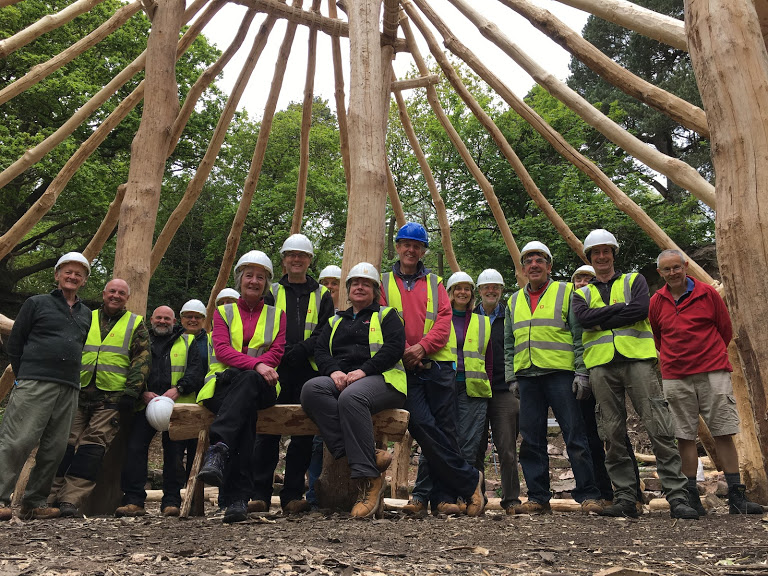
Well done everyone – a great week!