The last week of my regular involvement in this project has arrived. From beginning to end, this project will have taken 14 weeks to “finish” – pretty good given that very few of the volunteer involved had any previous experience in working on this type of structure. I use the term “finish” loosely, as really the ending of my involvement only marks the beginning of the long and fascinating journey that will see this building improve and flourish over the coming years.
There are many new and interesting tasks to embark on to turn this building from a structure into a home or workshop and each one will bring a new and interesting aspect to the building for visitors and volunteers alike.
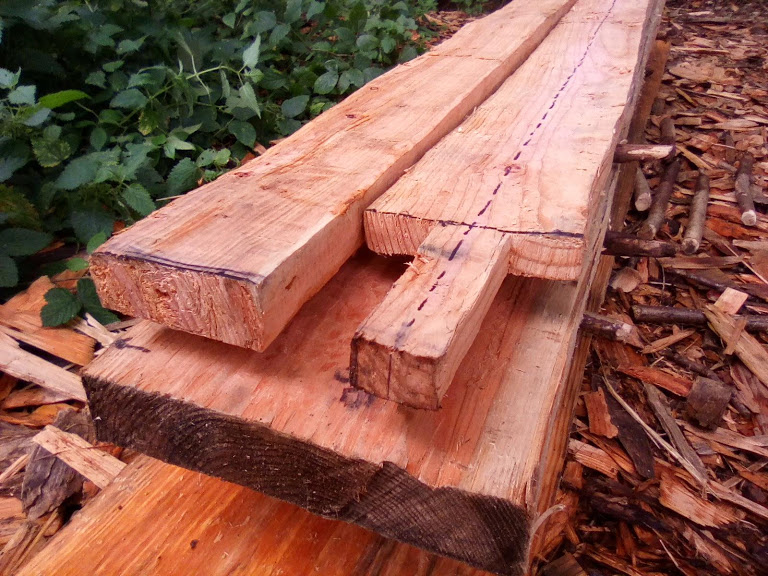
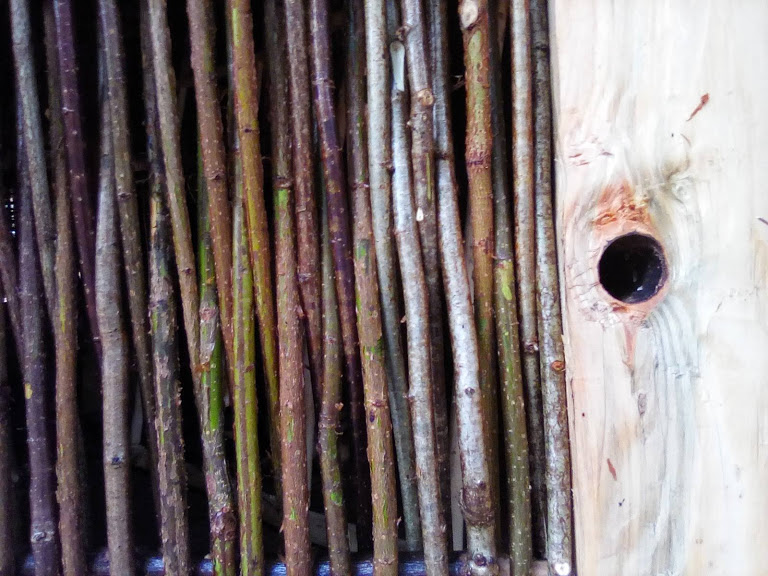
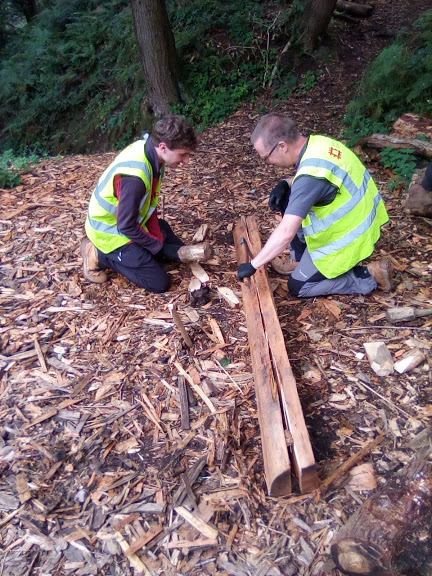
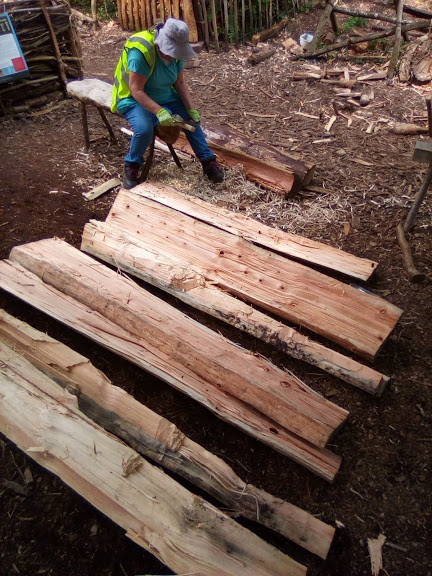
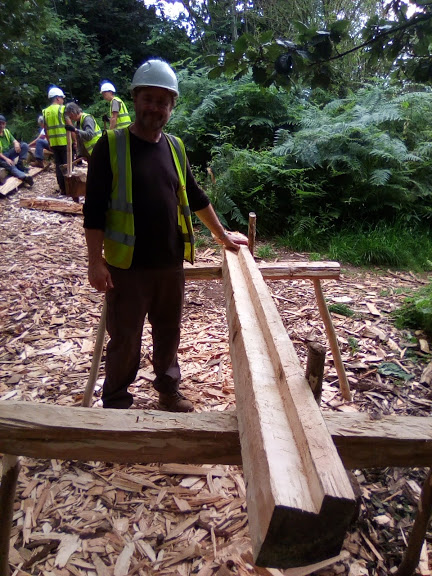
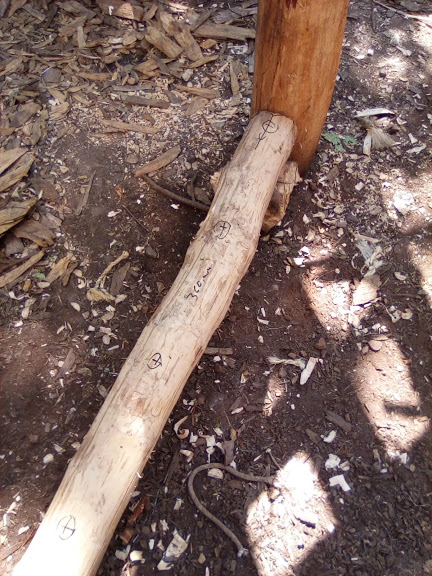
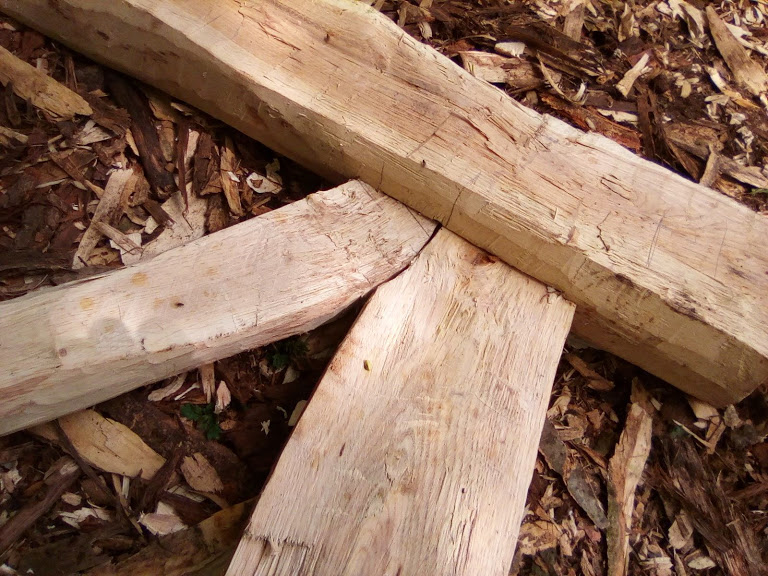
These planks – destined to be a bed frame, represent many many hours of work, splitting, adzing and shaping. In terms of labour, they are probably the most “valuable” elements of the building.
Part of this week will involve me talking to each core volunteer to assess their skill set and knowledge. It sounds scarier than it is, but it is an important part of this process. The building and its future will now rely on those enthusiastic volunteers who wish to remain with the project. They have learned and mastered many different tasks during this project, from the practical skills of tool use and construction, to the equally important skills of safety and team work. All of these things will be needed to make a success of the building into the coming years. Each volunteer will be assessed by me in terms of skills and competency – and this will form a working plan for future tasks.
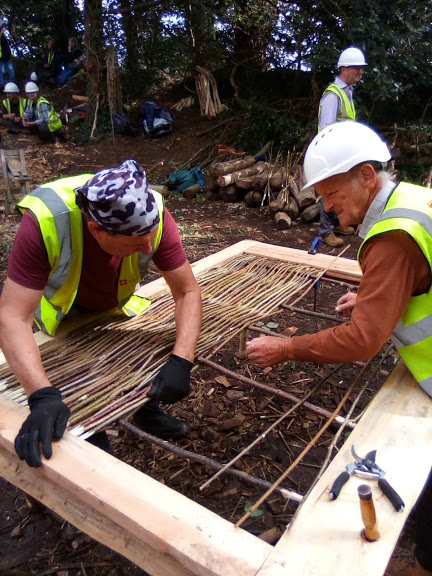
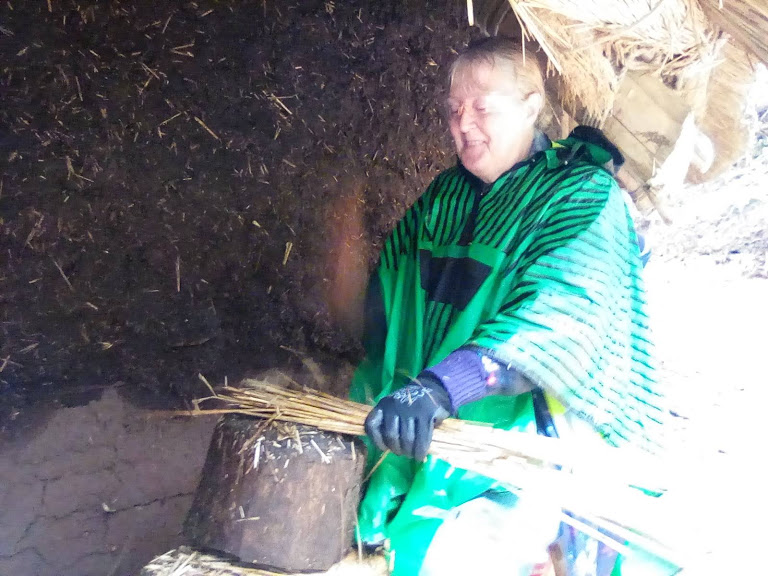
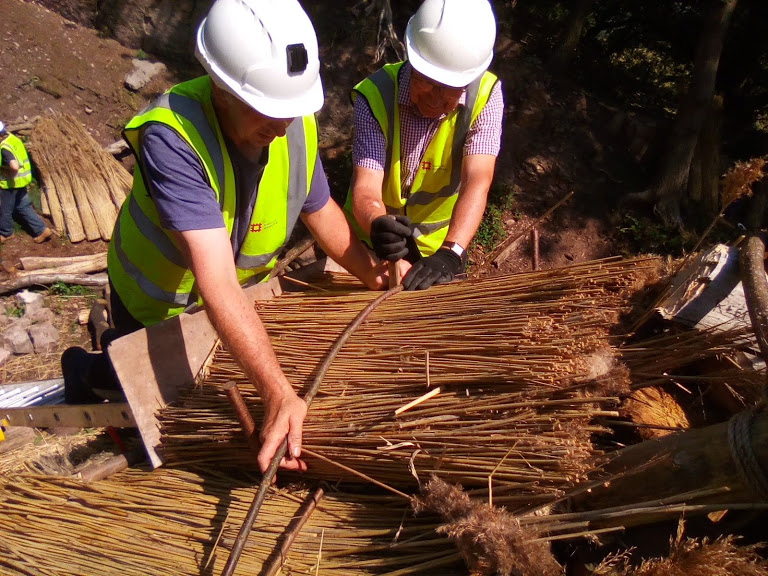
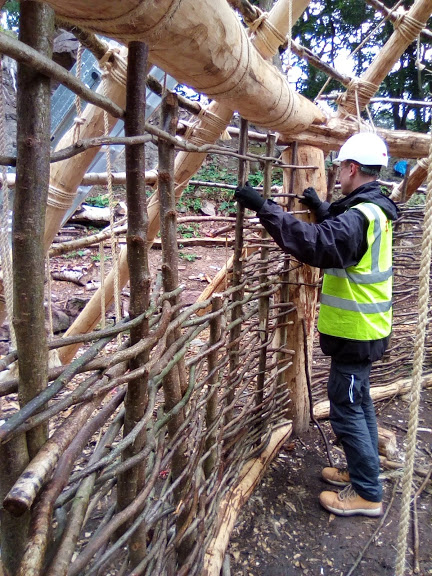
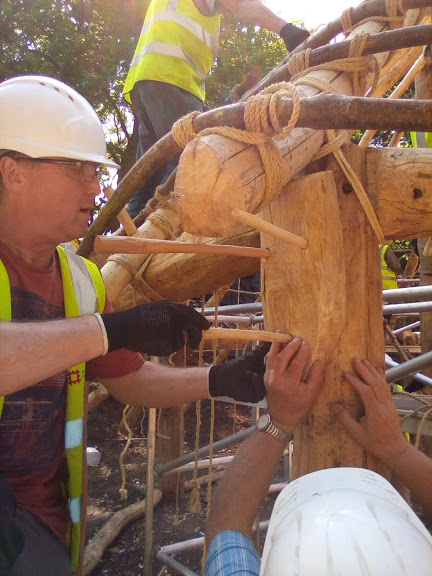
Mike and Edwin weaving the panel of Door 2.
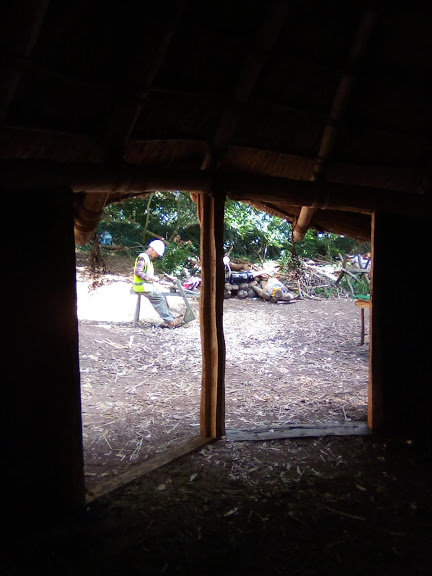
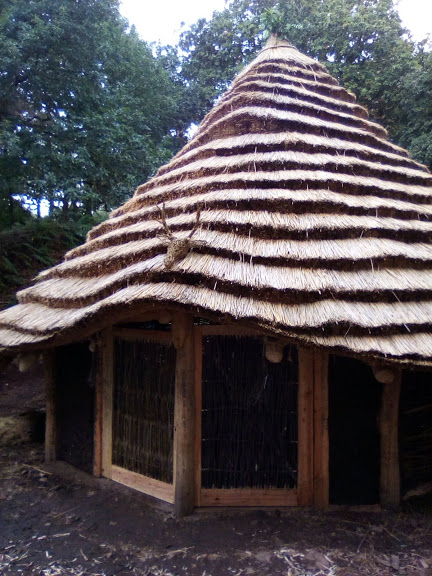
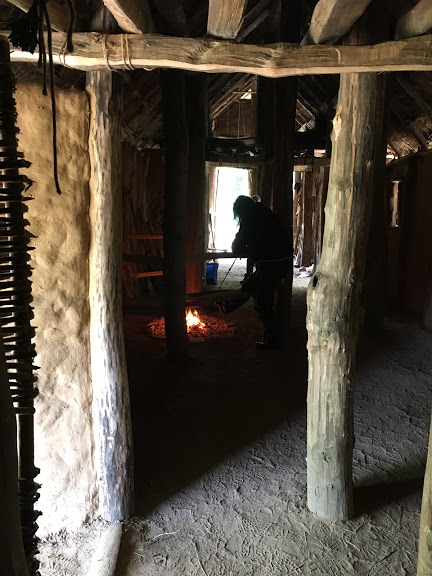
The main tasks this week are to complete the daub walls, hang the doors and fit any furniture that is completed. The building is becoming darker hour by hour as the walls become solid. The logic of large front doors and wall openings (windows) now starts to make sense. What also becomes clear, is the need for colour and brightness (reflected light) within the building. I have encouraged the volunteers to think beyond the white washing that is somehow the accepted norm in these houses – to think about colour and design. It will be fascinating to see how this develops over time.
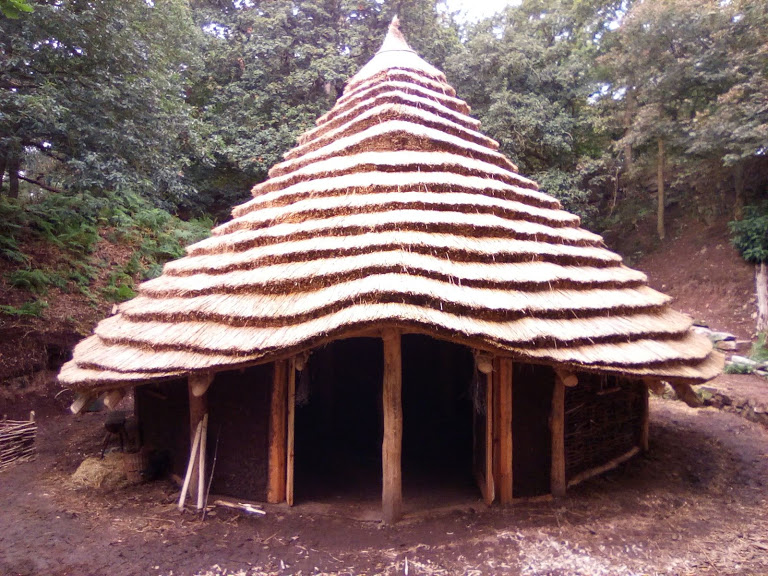
Wide doorways allow free light into the building – an important aspect of any building.
The best way to see this building now is as a canvas. It is the basic, beautiful framework and weatherproof building (a “new build” if you like) that only awaits a loving “family” to move in and make it their own. The potential is huge. The volunteers have skills and knowledge and opinions of their own, and I think my constant reminders about sophistication in the past have definitely had an effect. It will be their challenge to seek evidence from wherever they can find it (across the Bronze Age world) and interpret that evidence within the framework of their available materials to produce a valid interior.
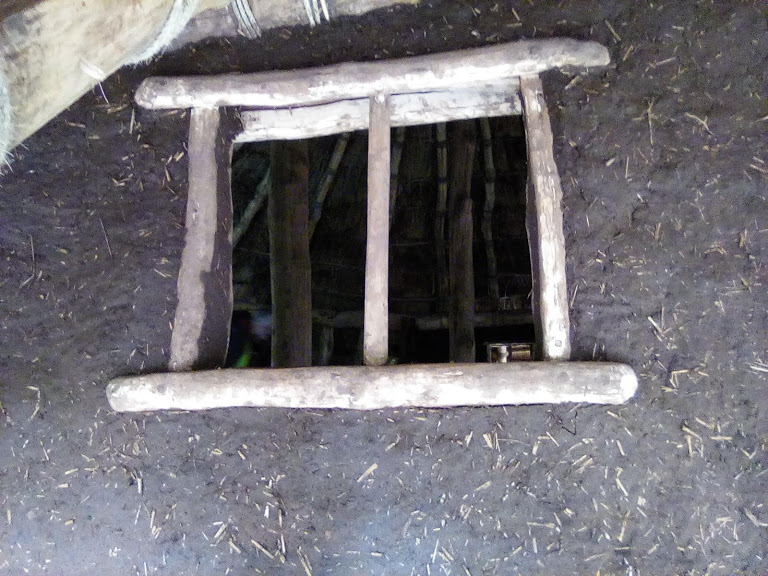
The first interpretation of a window in a finished daub wall.
It has been an incredible journey. Every volunteer giving 100% effort and enthusiasm has produced something quite special. What is especially interesting to me are those elements of the project that are archaeologically invisible. These invisible aspects include the tangible and intangible elements of the build.
The finished “Temporary” front doors. Plank doors are on the list of volunteer tasks for the coming year. It will be interesting to see how these beautiful doors are re-purposed in the building when they are replaced.
The tangible elements are represented by those things that are under represented in the archaeological record. Doors, walls, windows?!, furniture, thatching methods, floor types and construction.
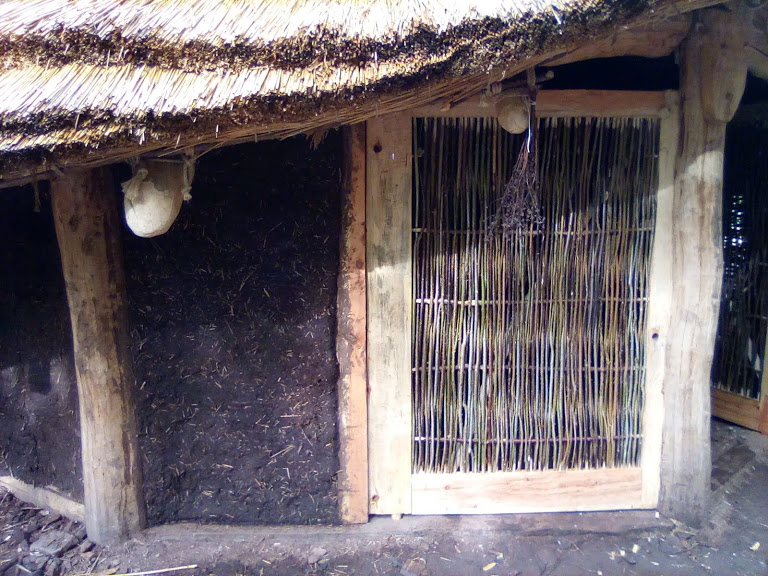
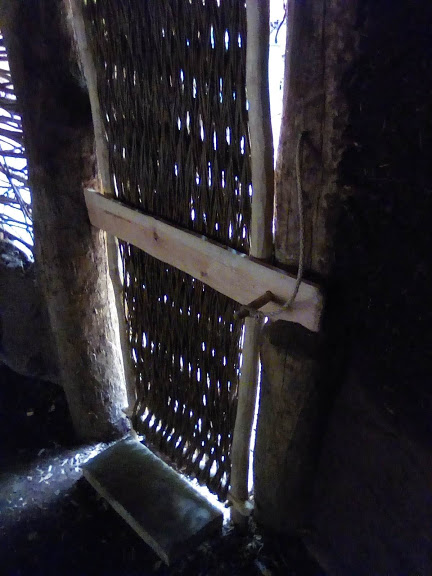
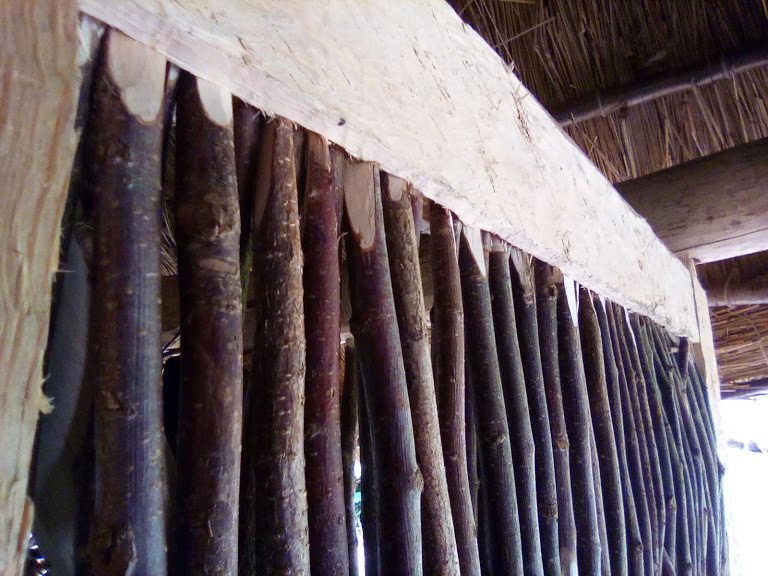
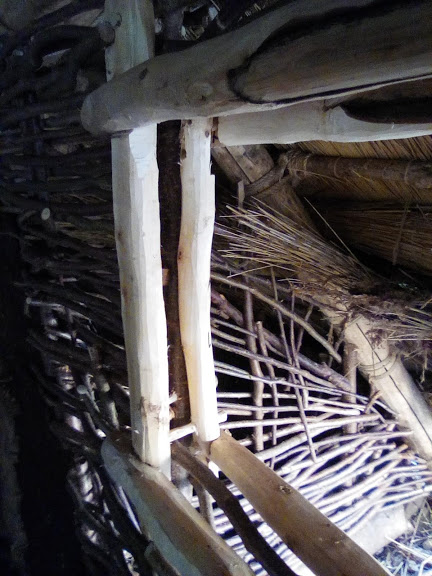
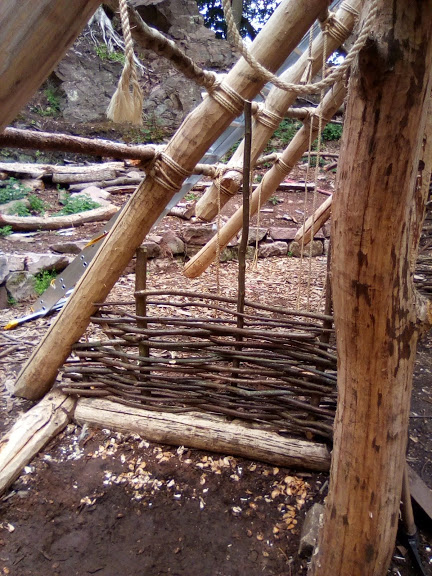
Caroline’s beautifully woven backdoor – with securing plank and peg that takes advantage of the natural shape of the wall postsThe outside of the same door.
These tangible interpretations will degrade and rot over time, leaving no physical trace on this site, but nevertheless, they represent the skills and technical prowess of the volunteers involved in the project. They do exist, representing the practical and cultural solutions of a particular band of people in a particular place and time, despite the fact that nothing will ever survive for future archaeologists.
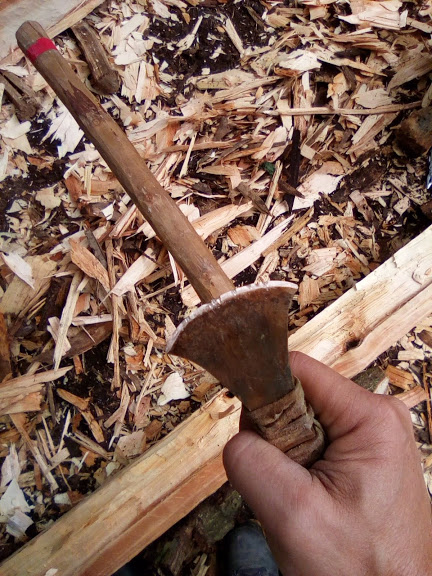
Incredibly, it is the intangible elements of this project that may survive longer than the physical house. Those intangible elements that leave no trace are the true reflection of this project. Friendship, community, understanding and a common goal are what have driven and enabled this project to be a success. What is a beautifully functional bronze axe without the person to use it? And what is that person without the community they work in?
This project will live on in the minds of those who built it, and in the minds and memories of those who know them. It is this intangible effort that will persist in the stories and memories of the project, outlasting the physical and fragile structural elements of the building.
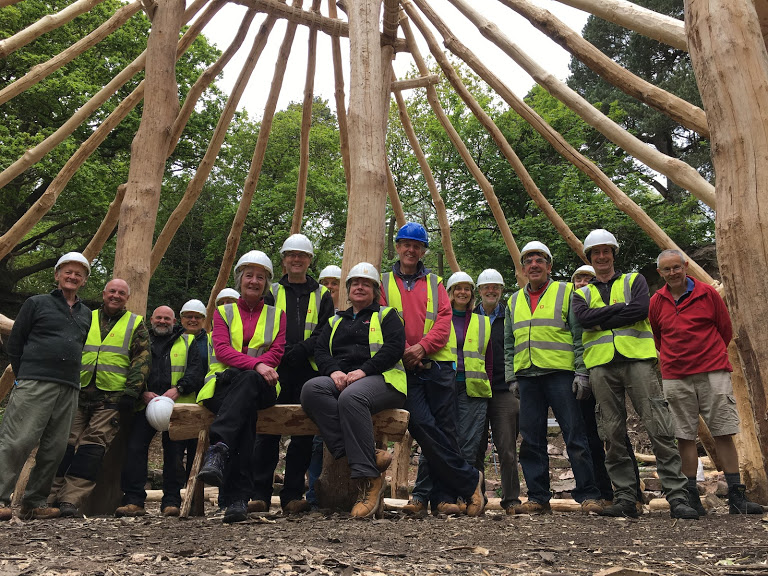
The building is a stunning thing! But what it represents is something more impressive. The gathering together of a group of individuals who, with knowledge, learning, humour, skill, sweat and passion, became a team – a community.
This is their house…
The building showing off the beautifully crafted willow Stags Head made by Caroline Gregson for the topping out ceremony.
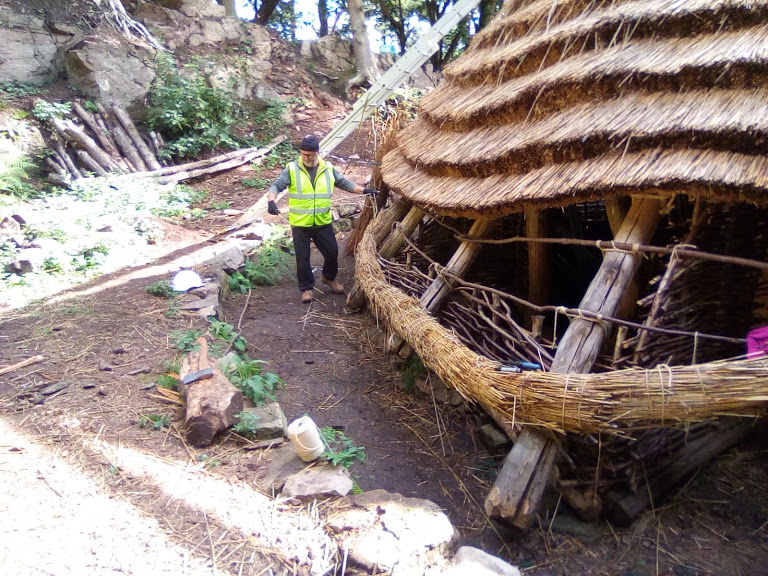
The penultimate project week has begun! After a long summer break, the volunteers gathered at the Hub once more in the pouring rain to plan the final push on the building.
The finishing touches always take time – and the volunteers are determined to show off their skills in the things that will fit out the building and furnish it.
During the summer break, volunteers have been working on various tasks to help the building move forward. Edwin and Mike worked hard on the first of two front doors. The result is beautiful and uses appropriate technology to close a gap with the materials we had to hand. Long-term, there is talk of plank doors to eventually replace these, but that will be some way off and even more work! In the meantime, the first door is a fitting example of a frame door with wattle infill.
Door 1 interior viewDoor 1 construction detail – shaped hazel rods fitting into the grooved frame.Door 1 latch detail.
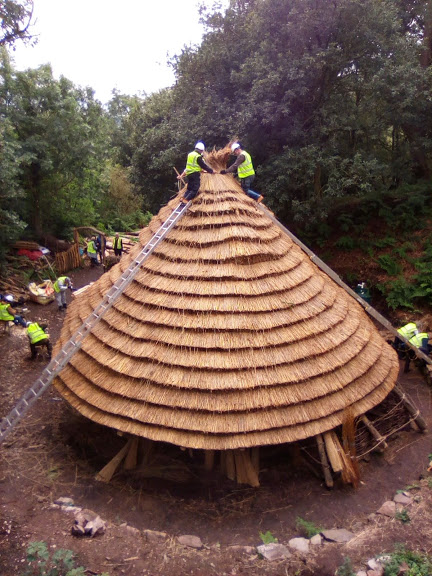
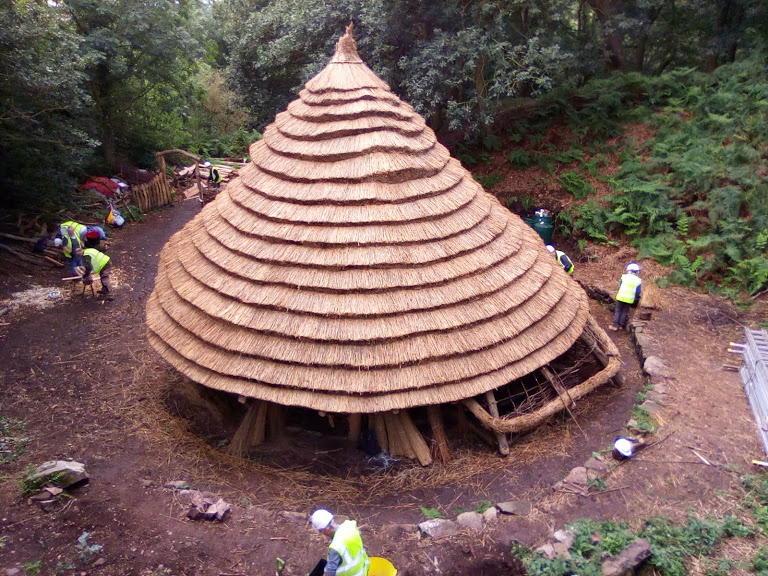
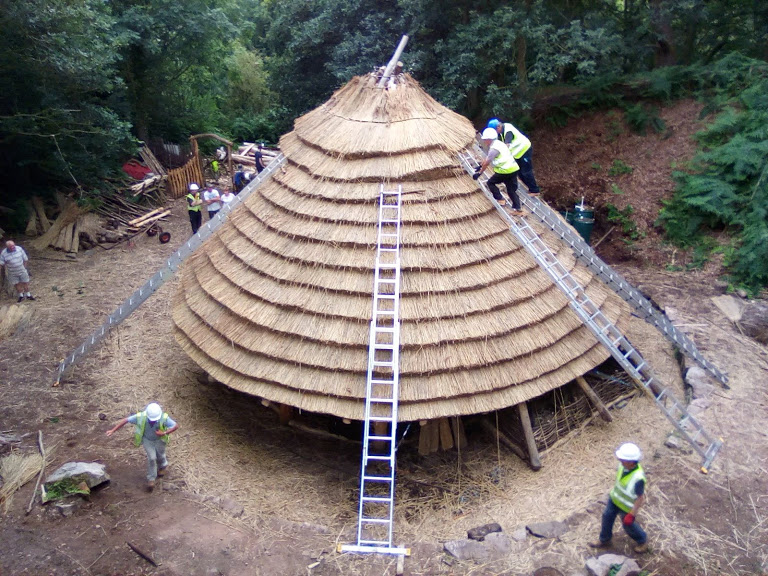
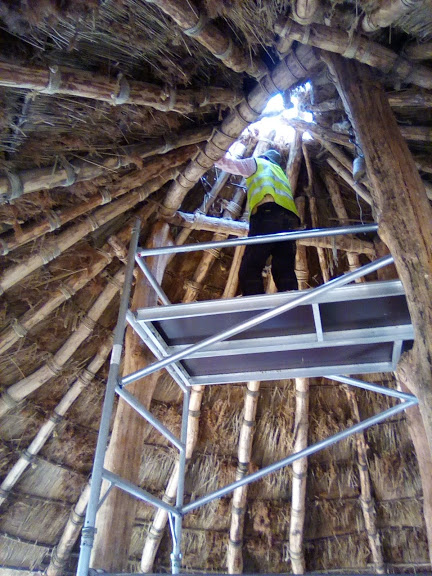
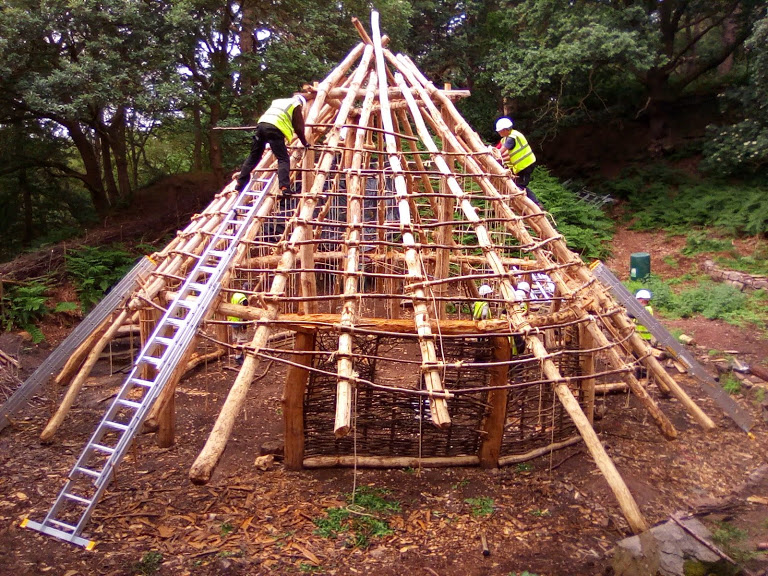
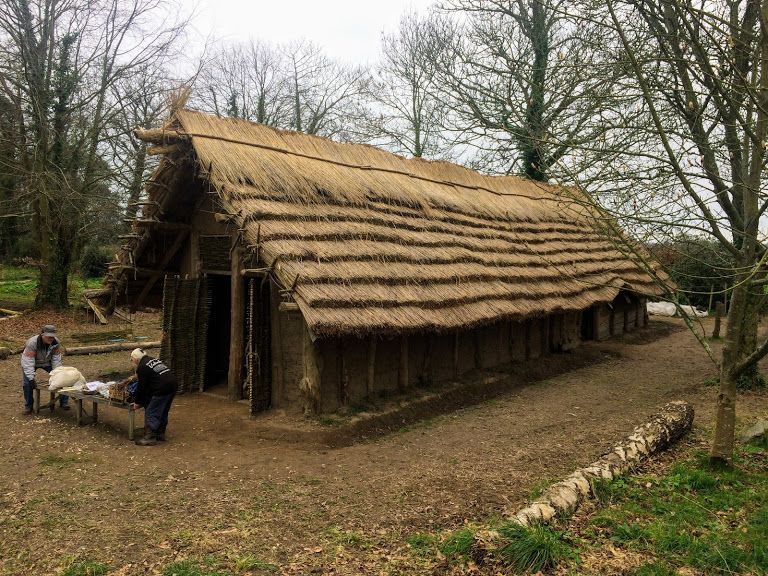
The roof has been finished this week. The “cap” was made using a final visible ring beam to clamp the last 9 reed bundles into place. The ring was attached to the substructure of densely packed and tied reed by stitching horizontally through the roof. This will inevitably be the weak point of the roof, taking the brunt of the weather over time, and at some point it will have to be replaced. As long as this is done promptly (when seen to be deteriorating), the roof should last well for many years.
The roof has also been finally dressed – the layers patted into position using our wooden leggits, and any short pieces of reed removed from the surface. Many weeks have gone into this stage alone – with lots of ladder work and precision required. It is a triumph for the team and experimentally, has confirmed the possibility of negotiating the triangular sub frame with thatch.
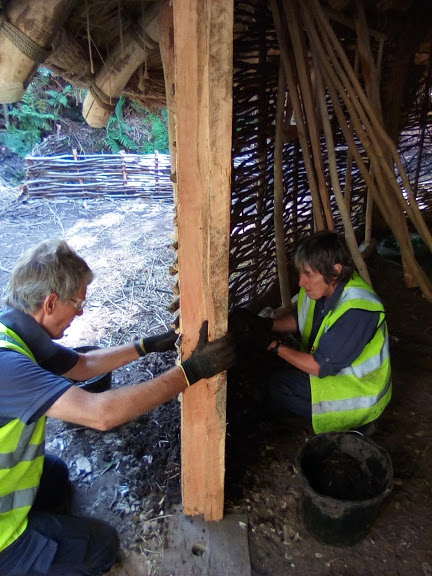
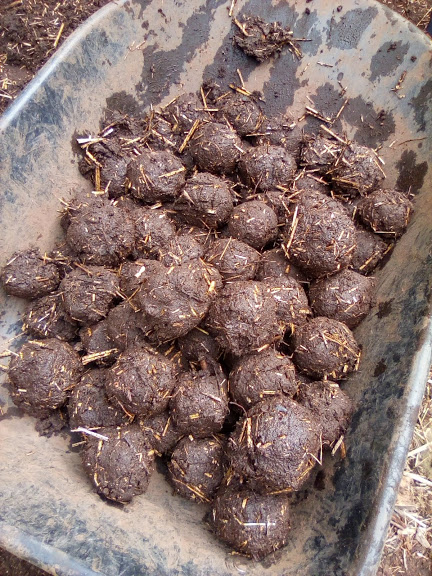
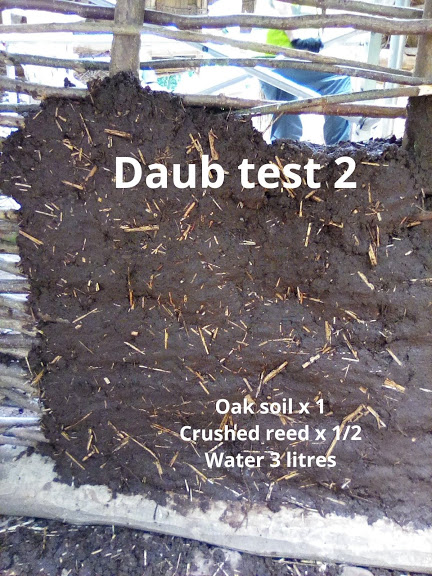
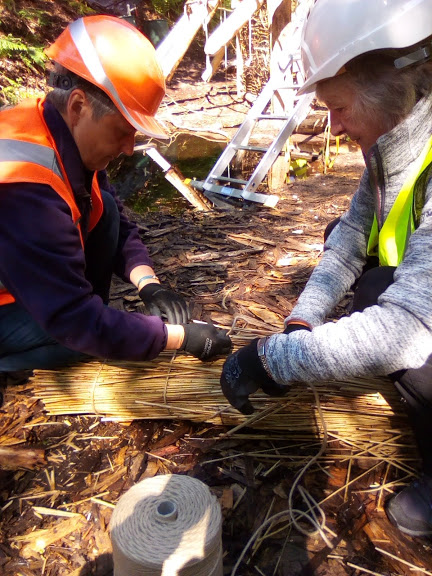
The last major task has begun in earnest. Daubing the wattle walls is a mammoth task – time consuming and labour intensive. Our 12 test sections of daub have had time to dry over the summer, and the results have been generally very good.
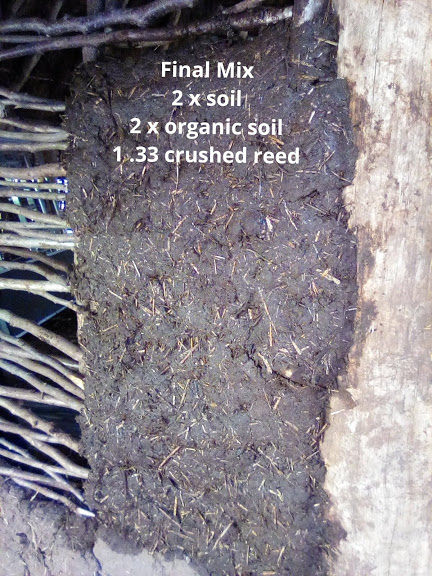
Some shrinkage can be seen on all tests, but none of it is serious. The section with least shrinkage was test 5, and happily used only materials that were immediately available on site – including the use of crushed waste reed from the roof.
The final ratios for each mix are 1 ½ soil, ½ Organic, ⅔ reed. The resulting mix requires pressing into the wattle – and too much water makes it unworkable – but when dry, a good mix forms a solid weather barrier.
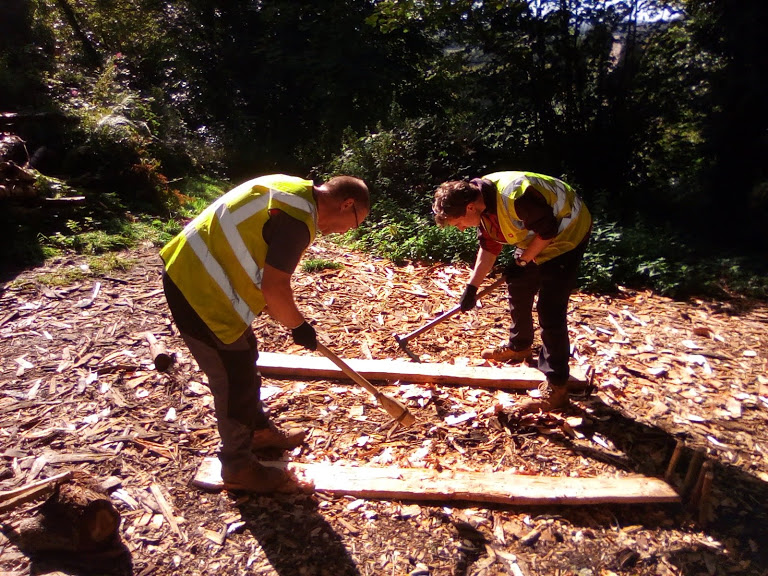
Furniture projects continue using the split timber planking produced by the volunteers.
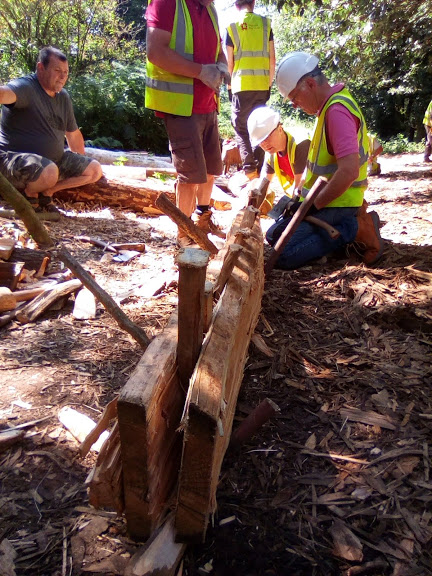
This week has seen the very difficult subject of furniture rearing its ugly head again! We have so little appropriate evidence (timber furniture from western Europe) that we simply have to look further afield for ideas – or risk the under representation of material artefacts in a building of this period. I am convinced that our lack of evidence for furniture in buildings of this period (from Western Europe) is simply an issue of preservation of organic materials rather than a cultural feature of Bronze Age societies The stone built furniture at Skara Brae in Orkney shows clearly the spatial set-up of smaller dwellings, with hearths and storage units (termed as “dressers”) and kerbs of flat stones of varying heights and dimensions (termed as “bed boxes”). This is fantastic evidence that confirms the presence of well furnished and organised houses. I have an issue with this evidence in regards to our building simply due to the fact that it was produced from immediately available flat stones that would have required very little effort to move and place to create furniture.
The splitting, hewing and jointing of timber requires far more input from ancient cultures than the stone furniture from Orkney and we have very little evidence for it! Desperation for evidence drives us further afield to look at surviving early wooden furniture from Egypt and the Levant, we have the evidence for sophistication, but with it comes the issue of distance and inappropriate cultural comparisons!
Its a difficult one – with no easy answers. Our approach has always been to use appropriate techniques to interpret items of furniture we know existed elsewhere in the Bronze Age. The crucial part of it is how we interpret it and explain it to the public. It should never be a case of “this is how it was” but rather, “Using evidence from there, and the materials we have available, this is one interpretation of how we think it could have been.” I still feel this is a better approach than showing the public an empty building and expecting them to appreciate the Bronze Age for its sophistication.
Using this broader evidential approach also brings other aspects of global development into the educational arena and helps in a wider understanding of human development. There is something very powerful about supplying the listener with amazing evidence from elsewhere to back up a lack of evidence from here. It opens their minds to possibilities that were previously unknown but also makes illustrates the effect climate can have on the preservation of evidence. Again, the numerous fired clay models from the Bronze Age in other parts of the world give us a fascinating insight into possible furniture design and sophistication in the Bronze Age. Yes, they are made of clay, and yes we have to take into account the ability of clay to form any shape in the imagination, but these models show chairs and tables and other items of household furnishings that are rarely found (simply due to adverse conditions) in the organic remains of the sites in question. And interestingly, they show detail of construction that goes way beyond simple functionality (no surprises there when we look at the surviving inorganic record).
We also have traces of evidence from other sources which hint at those things models or fragmentary organic remain cannot. The Iliad is full of descriptions of the finer aspects of Bronze Age life that really bring the modernity of (high status) everyday objects to the fore.
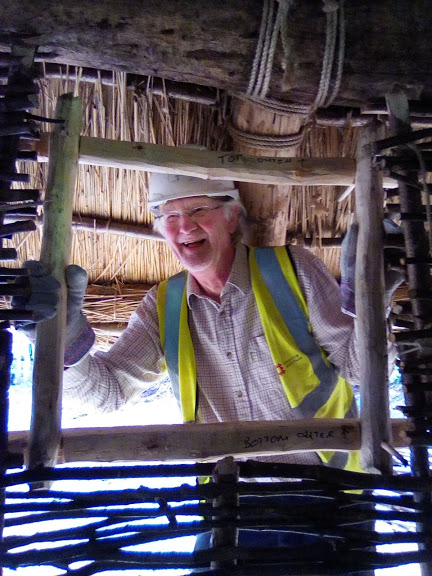
I have explored the question of windows in previous blog pages, but this week has seen the construction and installation of frames in the existing wattle walls. Although these openings will not allow direct light into the building, they will allow indirect light to enter parts of the space which, in my experience are invaluable for everyday tasks without the need for the constant burning of fuel.. The volunteers have decided to peg square frames together on the outside and inside of each opening to clamp the existing wattle and form a sturdy housing for an eventual shutter or closure.
Work has also begun on the experimental annex roof. Bracken was collected over the summer break and bundled to dry. The resulting stems are intended to cover the annex part of the building.
The aim of this roof section is to allow continuing experiments in local roofing materials to be made over the life of the building without requiring the removal of the main roof – or disruption to its operation.
The first test is bracken stems (a very traditional thatch in some parts) which sets the first puzzle for the volunteers to solve. The first part of the mission is to prepare a frame for the thatch to rest on – and to think carefully about how it links to the existing roof without imparting weakness or leaks to the roof.
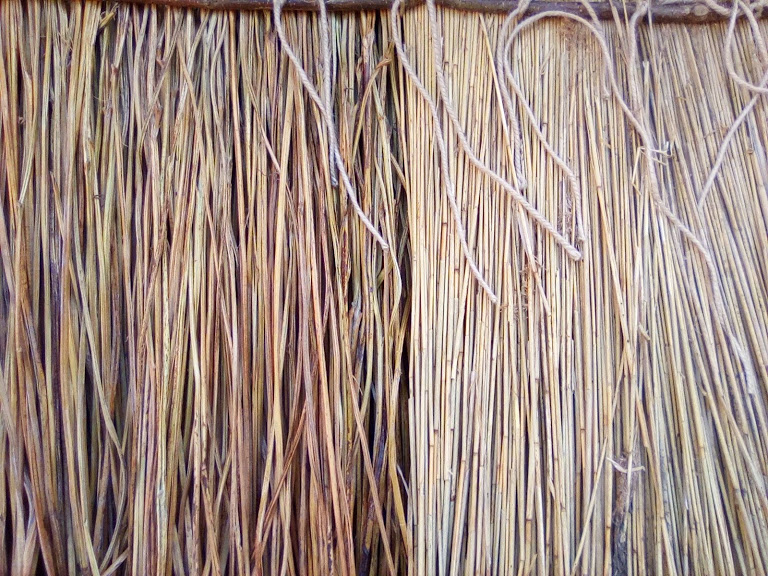
Dried bracken stems on the left, water reed on the right.
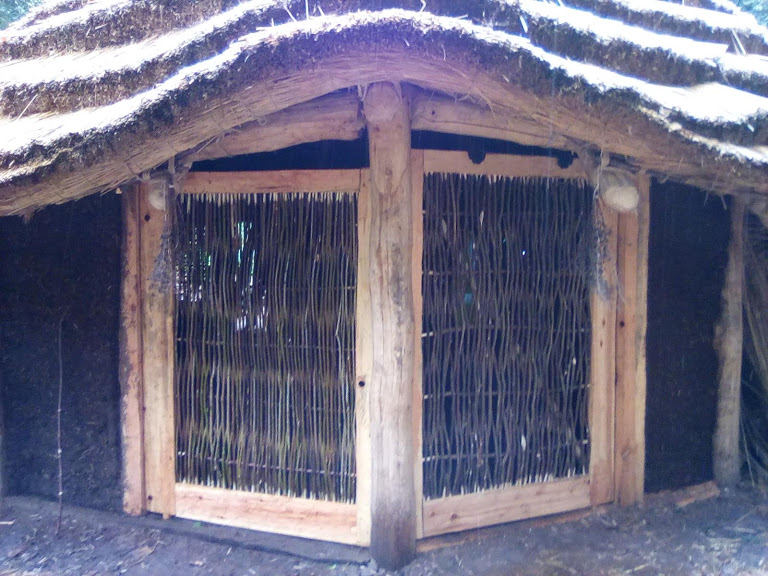
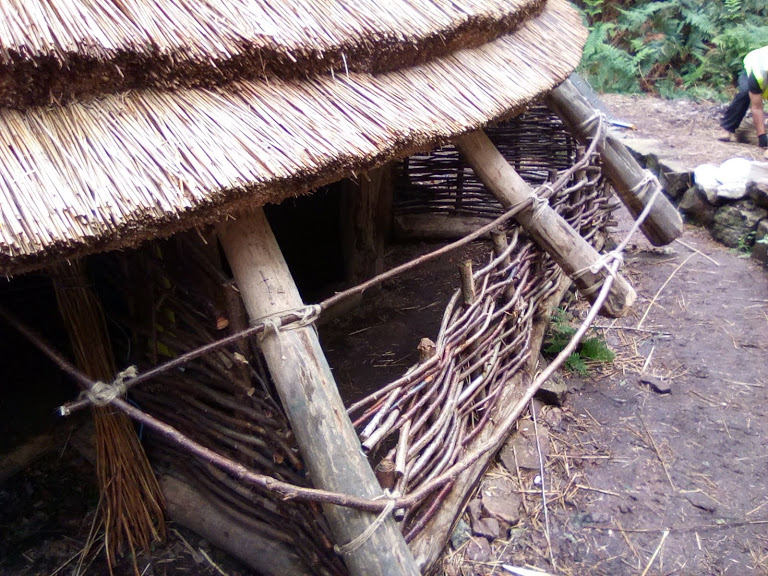
The “backdoor” is also underway, with a team of volunteers aiming to build a frame with horizontal struts (zales) that can be woven tightly with willow. At the moment, it is envisaged that this door will not be in common use – but will provide another exit in times of need. The gap between posts at this point is also very narrow, so a door that hinges into the space would cut down the available gap excessively.
So the week ends with the final tasks well underway. Just one week remains before the construction phase of this project finishes and the numerous tasks that will see this building transformed into a “Home” begin.
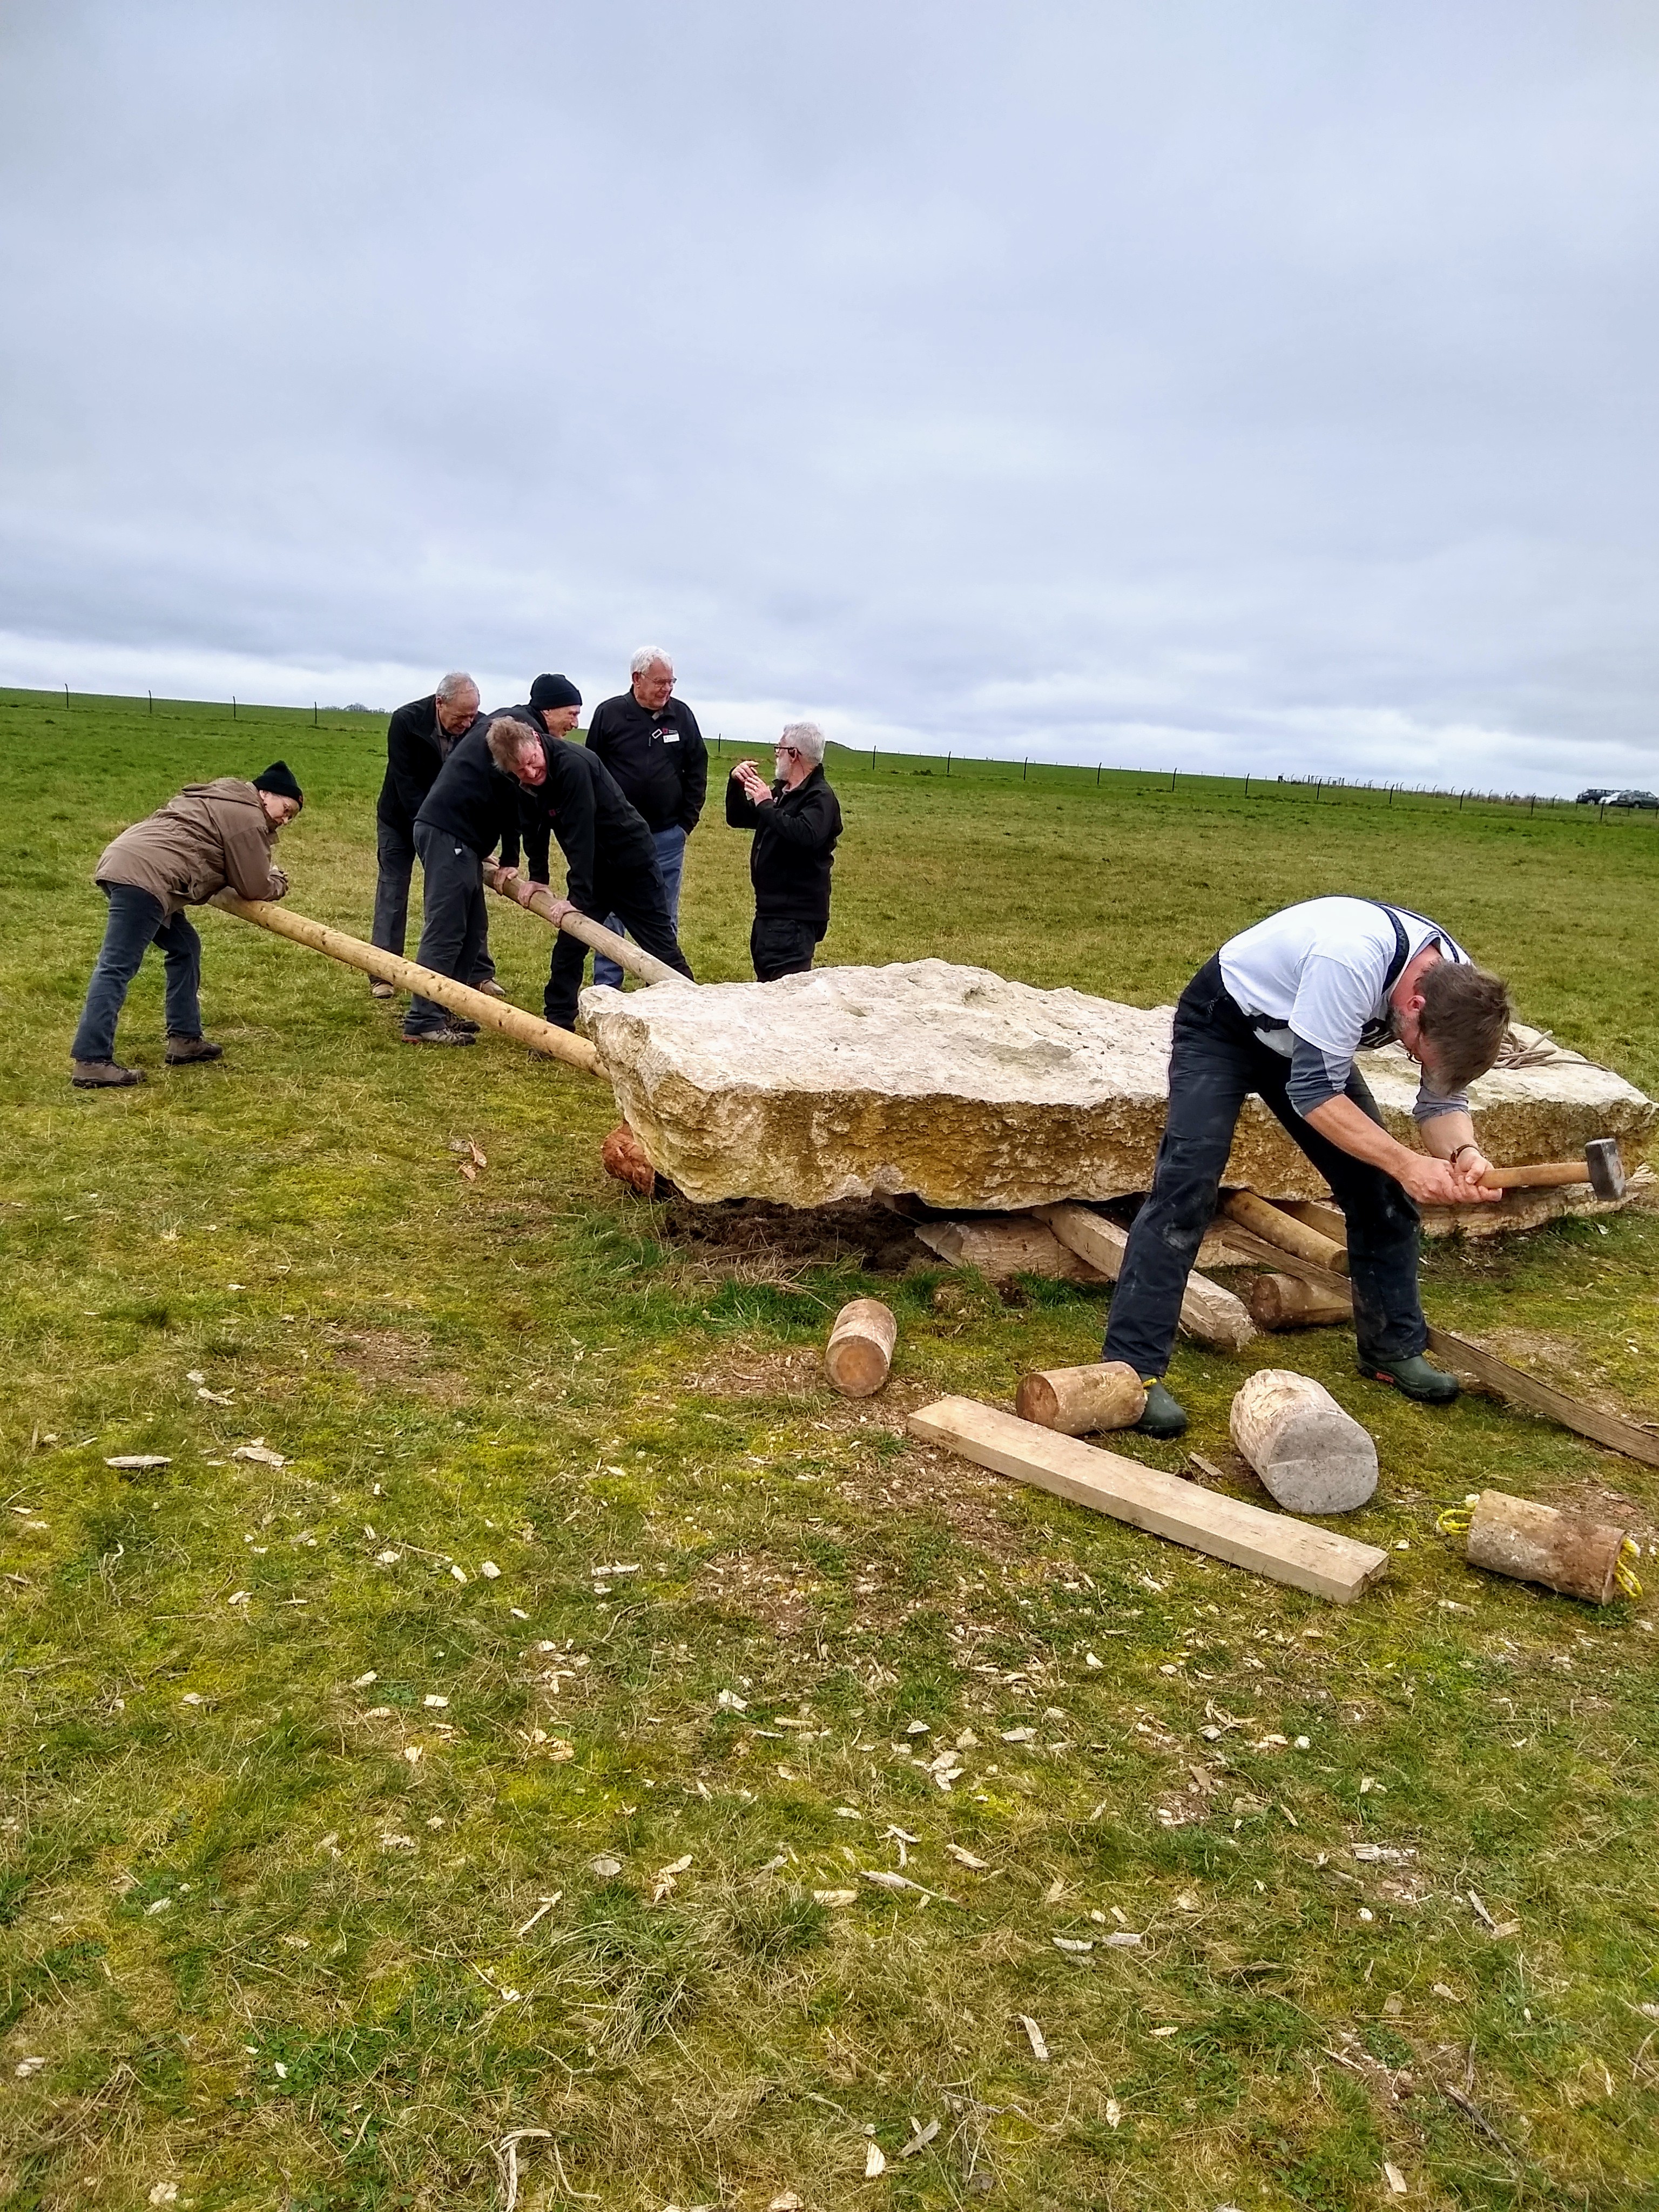
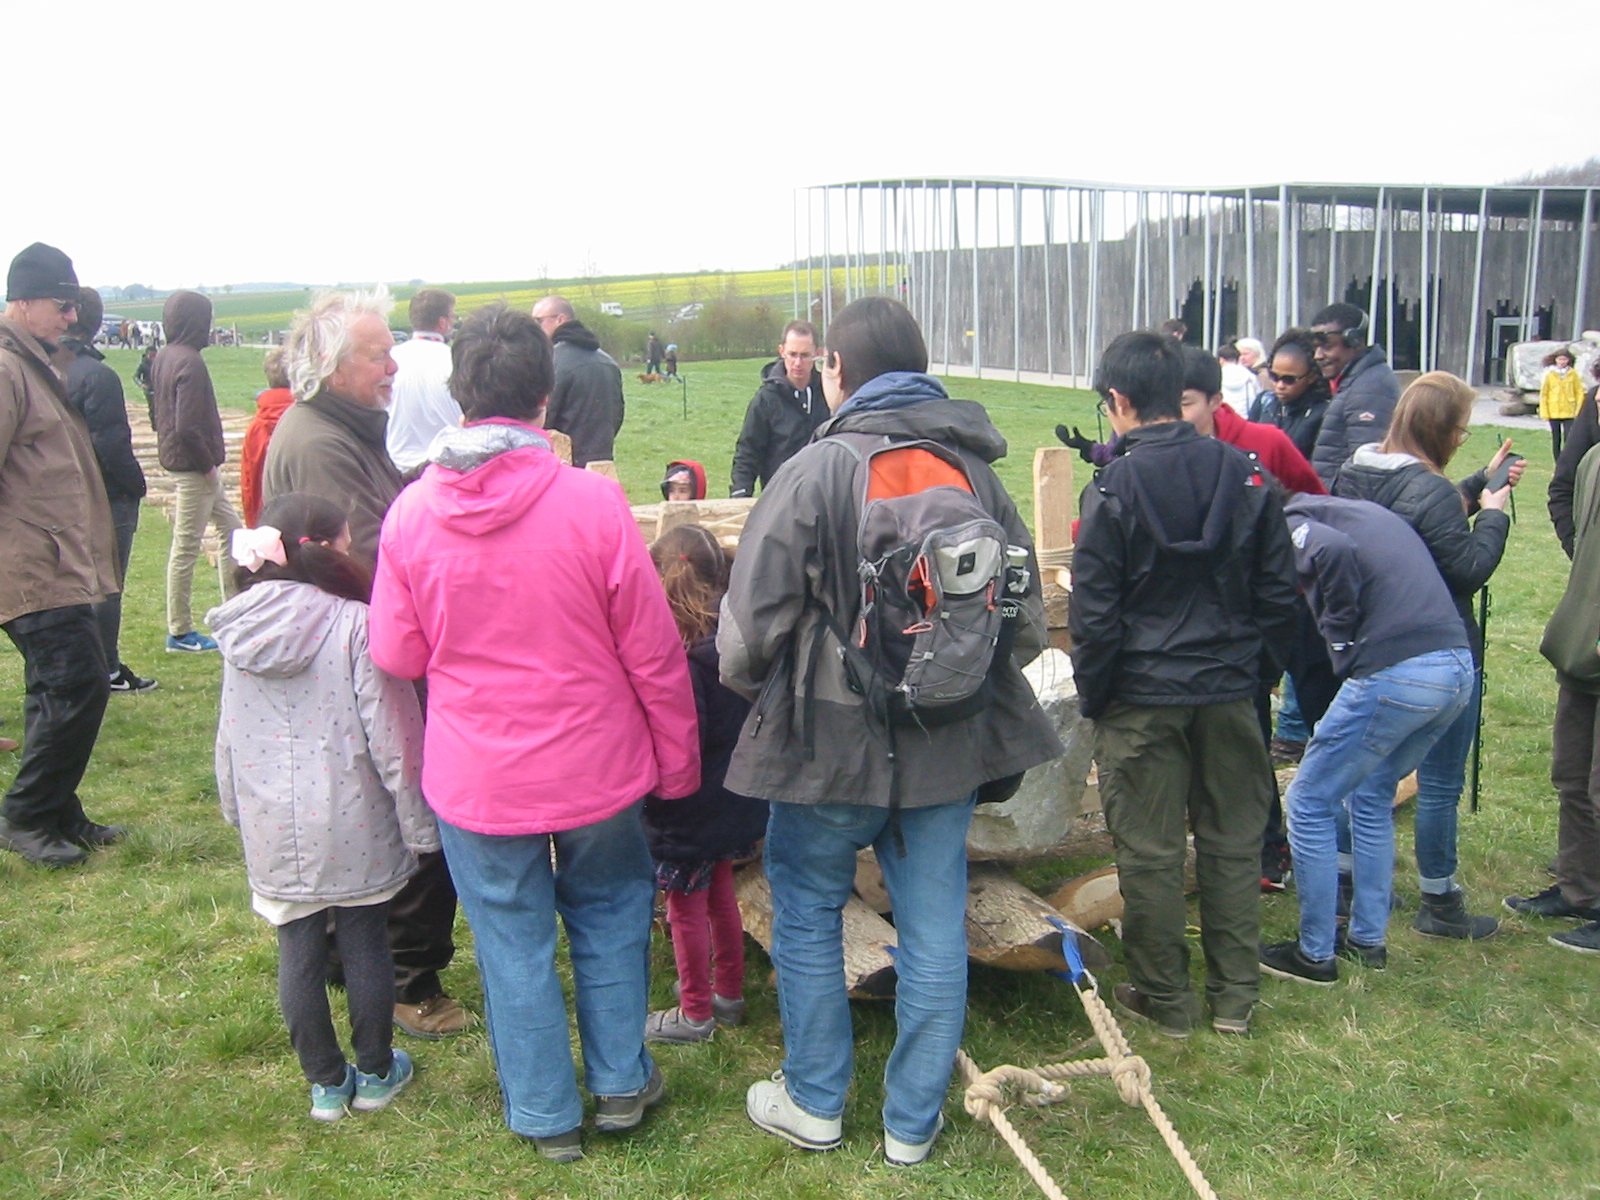
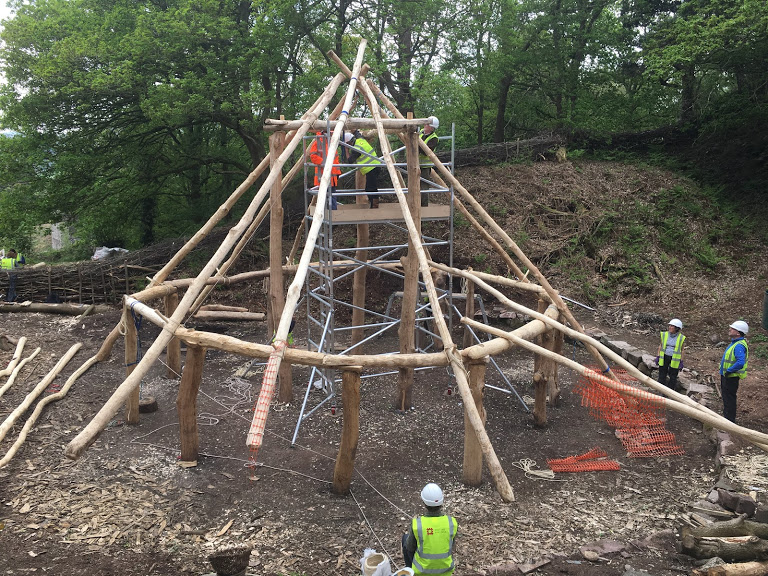
This project arose from a series of questions that stemmed from our previous public engagement project of pulling and raising a monolith in 2018.
This project would not have been possible without the support of English Heritage and their amazing group of Stonehenge Volunteers! Their enthusiasm and dedication during the construction of the sled and throughout the pulling tests made the project safe, successful and enjoyable.
Although successful, our previous project highlighted issues of ground conditions, ease of manoeuvrability, and efficiency of hauling over large distances. The idea of a timber sled or cradle is not new, but questions of its design, efficiency of use, and whether the time and effort expended in its manufacture truly offset subsequent efficiency in use, are still pertinent.
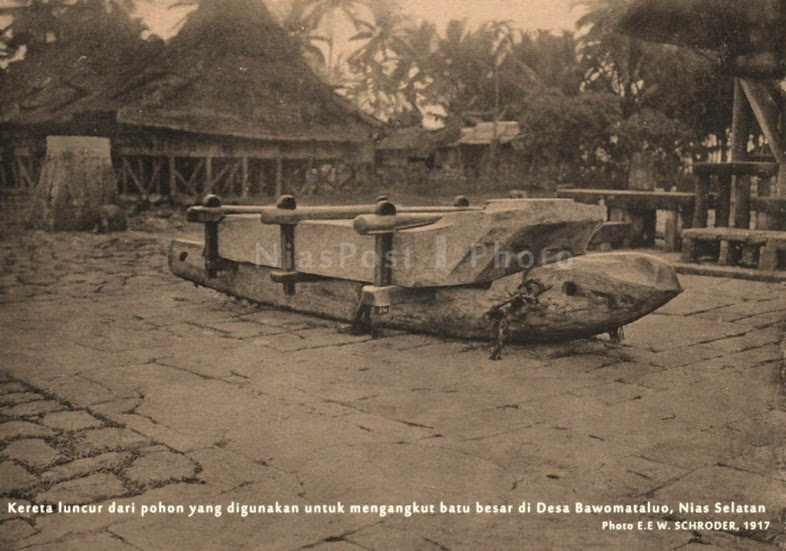
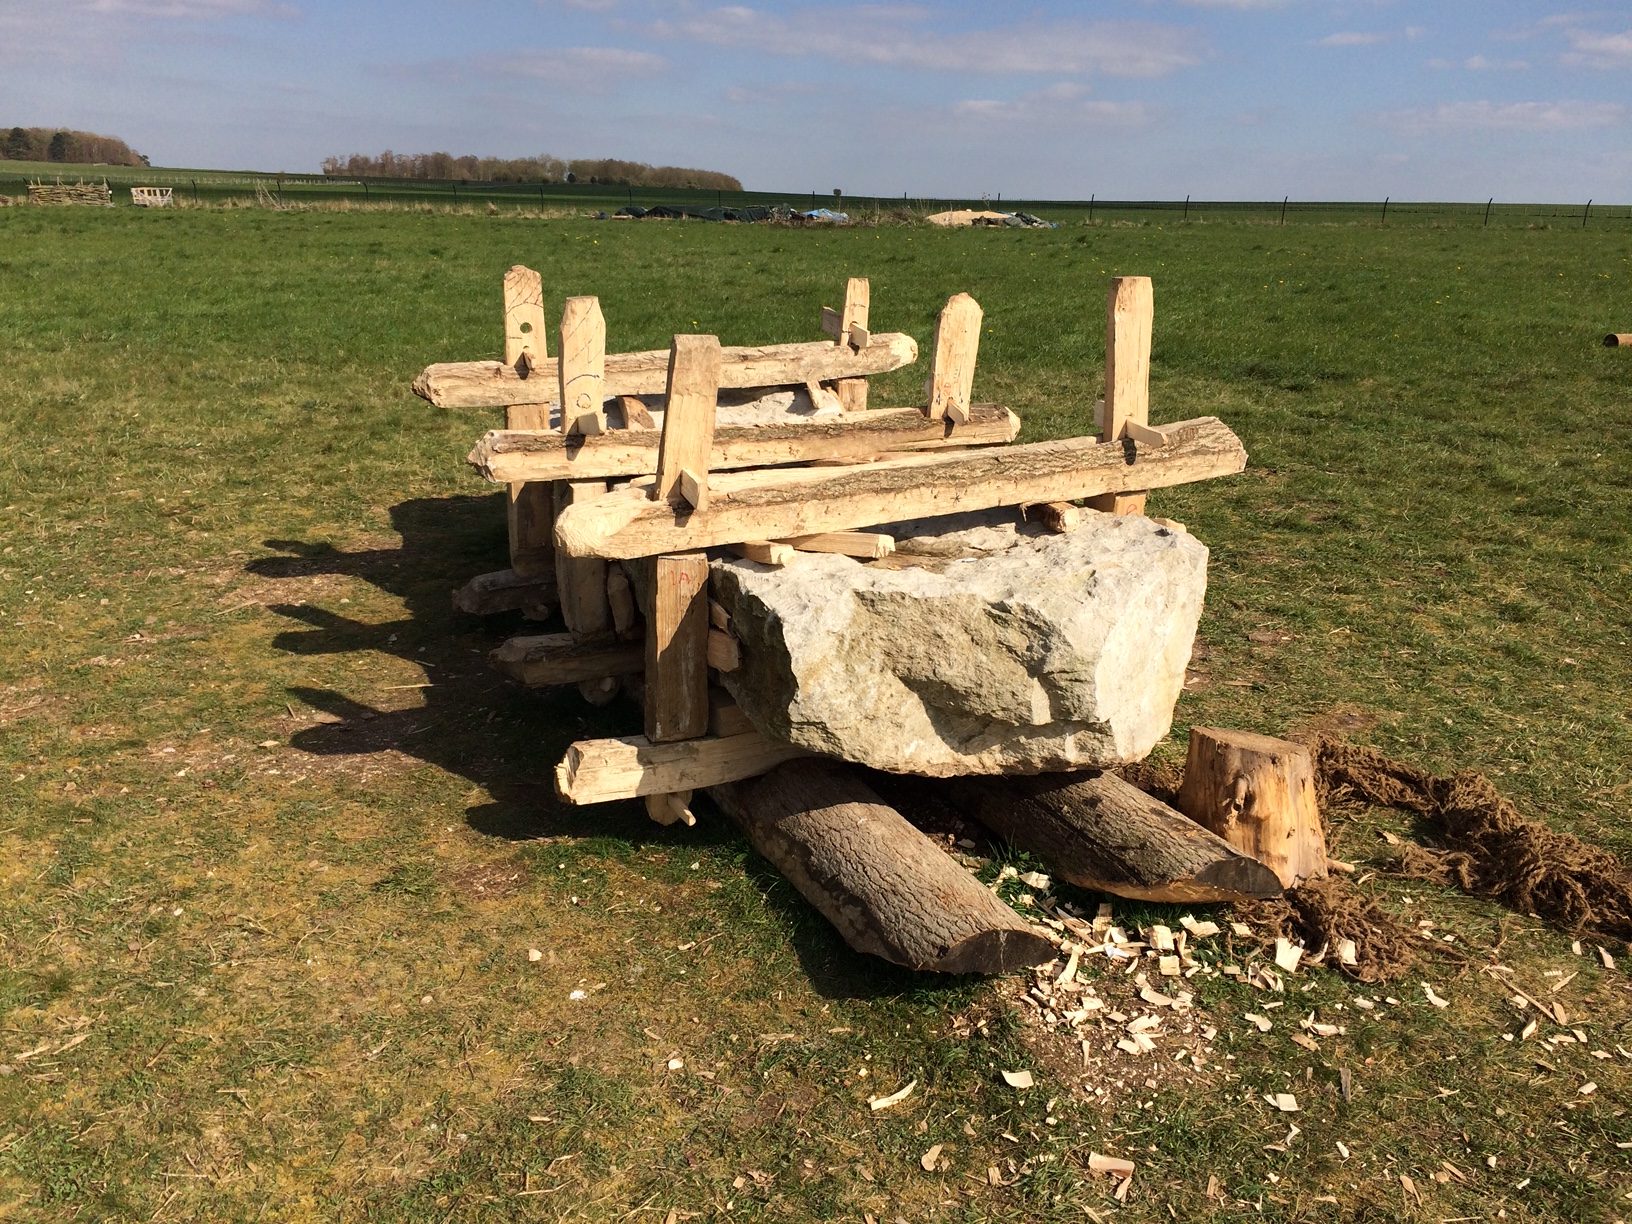
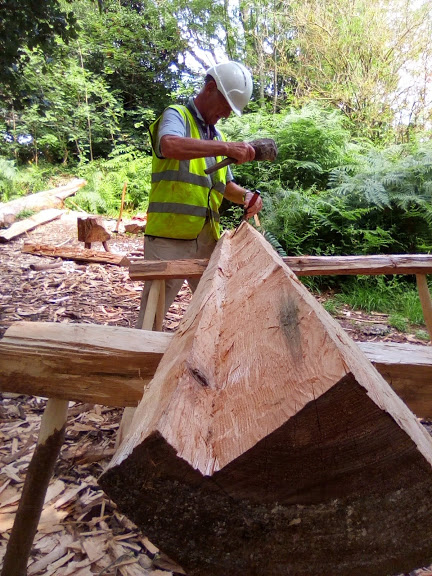
This years project began with the construction of a timber sled using appropriate techniques, materials and technologies (see “Monolith Timber Sled project”). Regarding sled design, I was inspired historic photographs of Schroder (1917) showing indigenous Indonesian solutions to moving large monoliths at the turn of the century. Although we cannot glean meaning from these photographs, the visible technology on display is impressive. The ability of this traditional culture, to produce fine carpentry for such a “functional” task is perhaps surprising to some. But this blend of aesthetics, meaning, and function is a feature of modern humanity , and should not be seen as anything out of the ordinary for the last hundred thousand years.
The construction of a timber cradle to house the monolith had various considerations from the outset, some of which had accidental consequences for the following project,
Constraints of time and volunteer familiarity with stone and bone tools limited the refinement of the timber elements (this may form the basis of future work for the volunteer teams) of the sled, and the finished elements are functional rather than beautiful.
The monolith is unshaped and so the three cradle frames needed to be wedged in place around the stone to form a tight fit. However, this fits at least some of the blue stones from Stonehenge that are unworked – although naturally weathered.
The skis are not physically attached to the frames, This was designed to allow the skis to fall away from the monolith as it was being lifted to vertical – thus preventing the potential splintering of a jointed ski as pressure would inevitably be distributed unevenly through the frames while lifting.
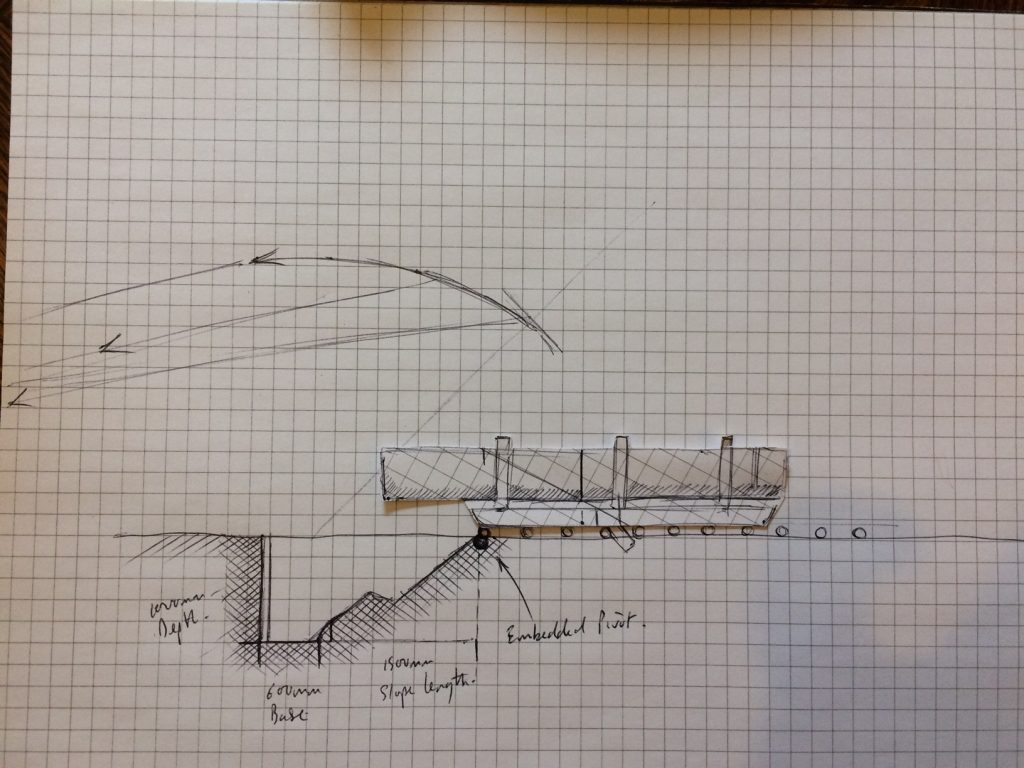
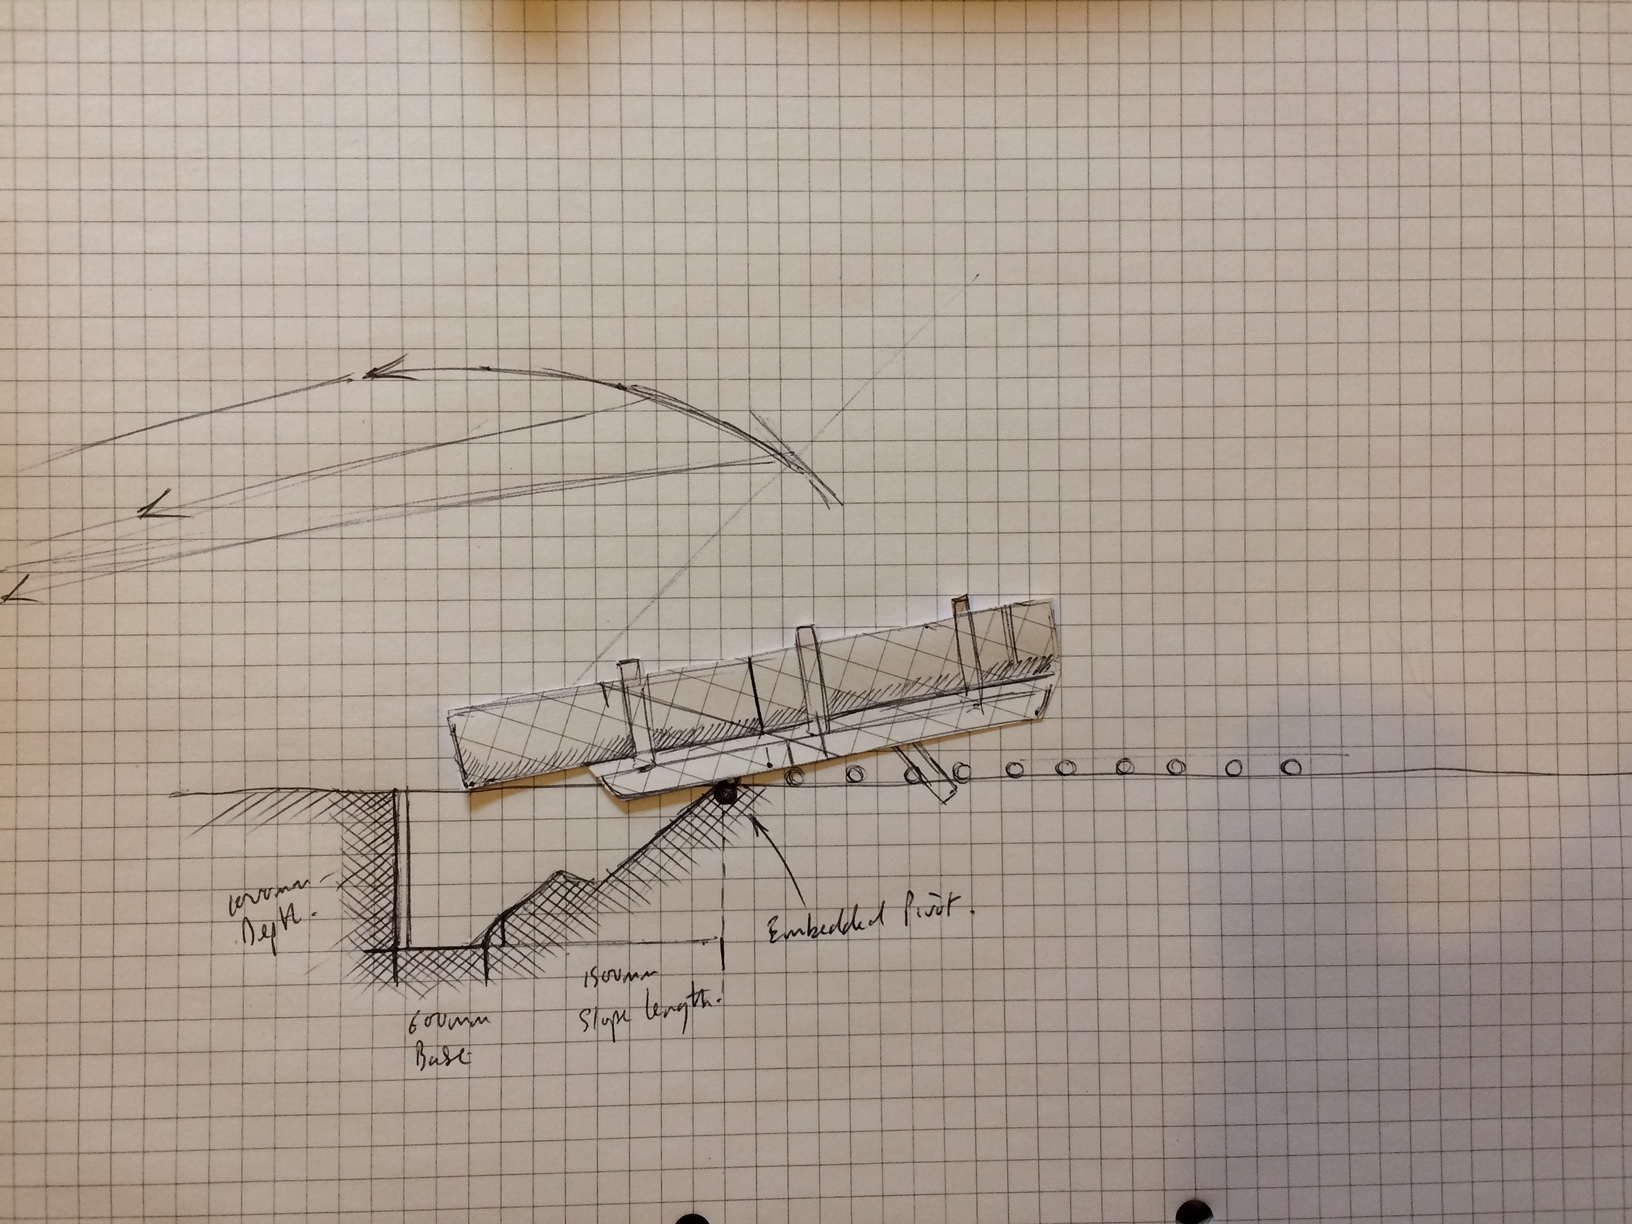
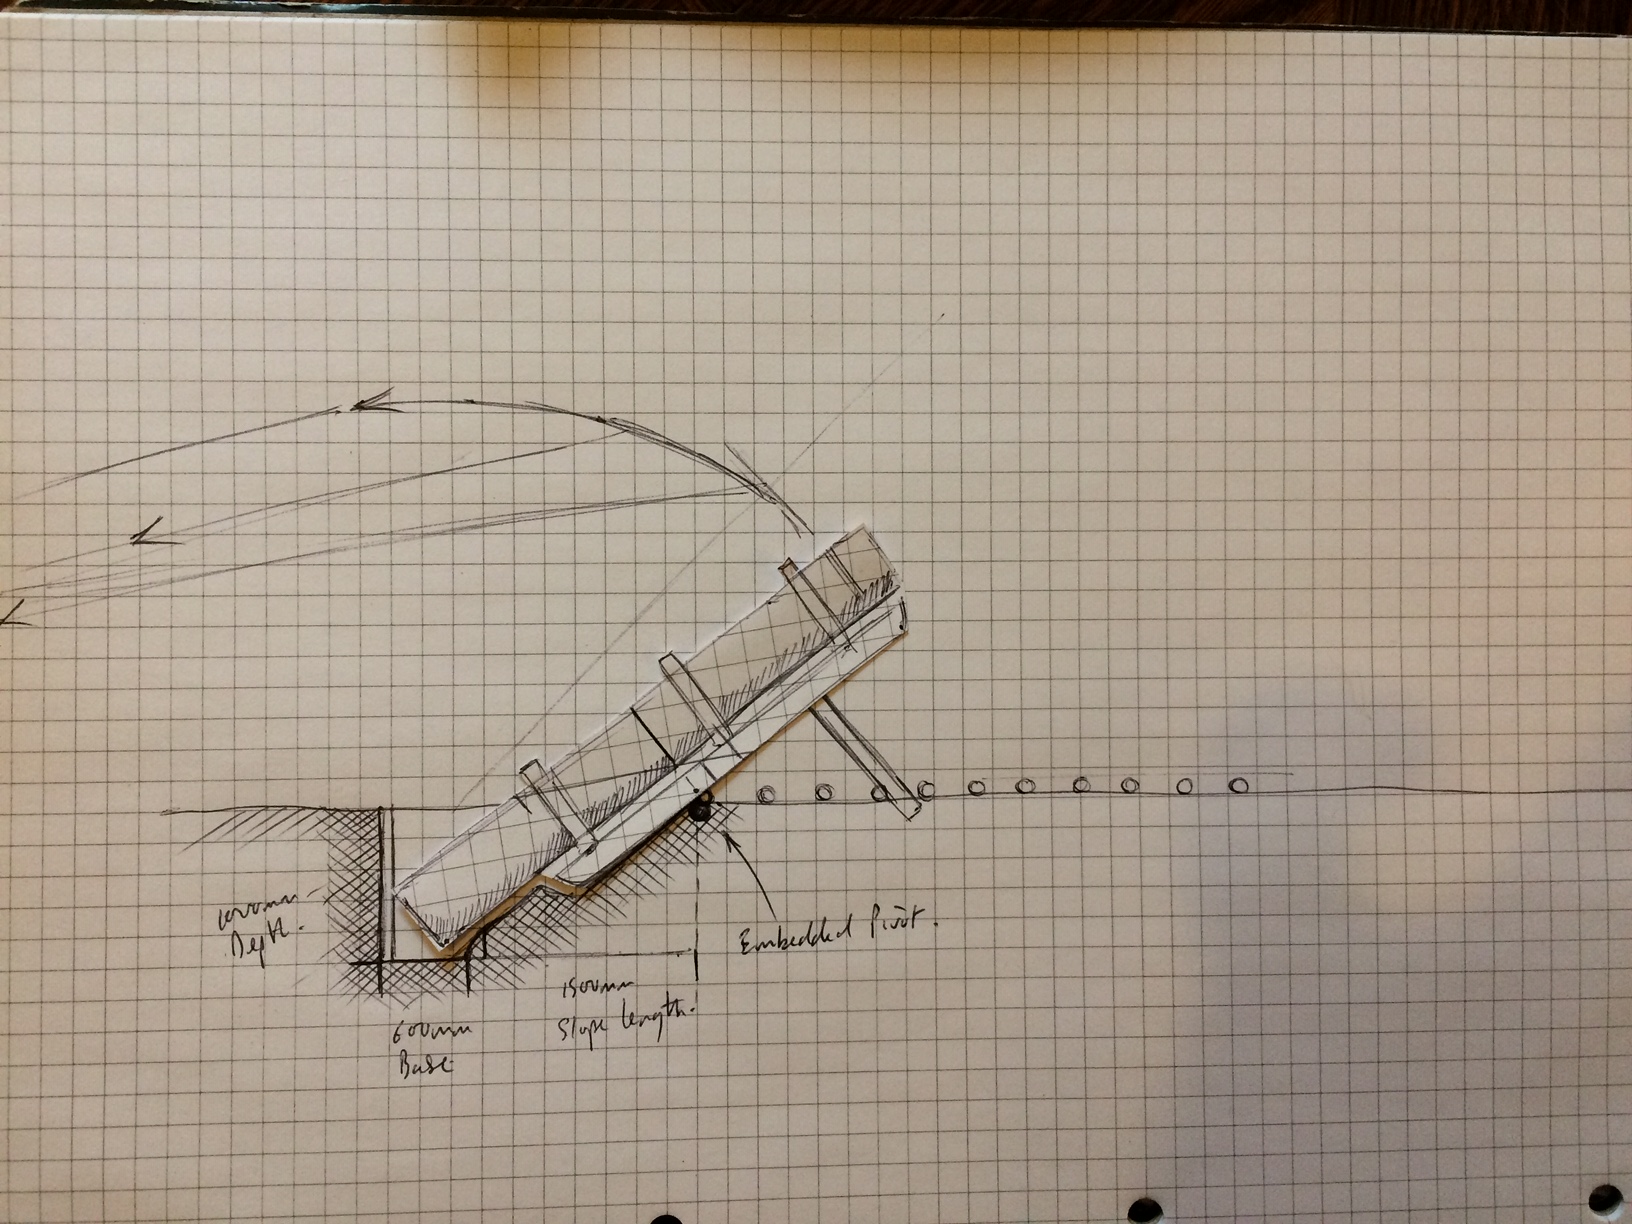
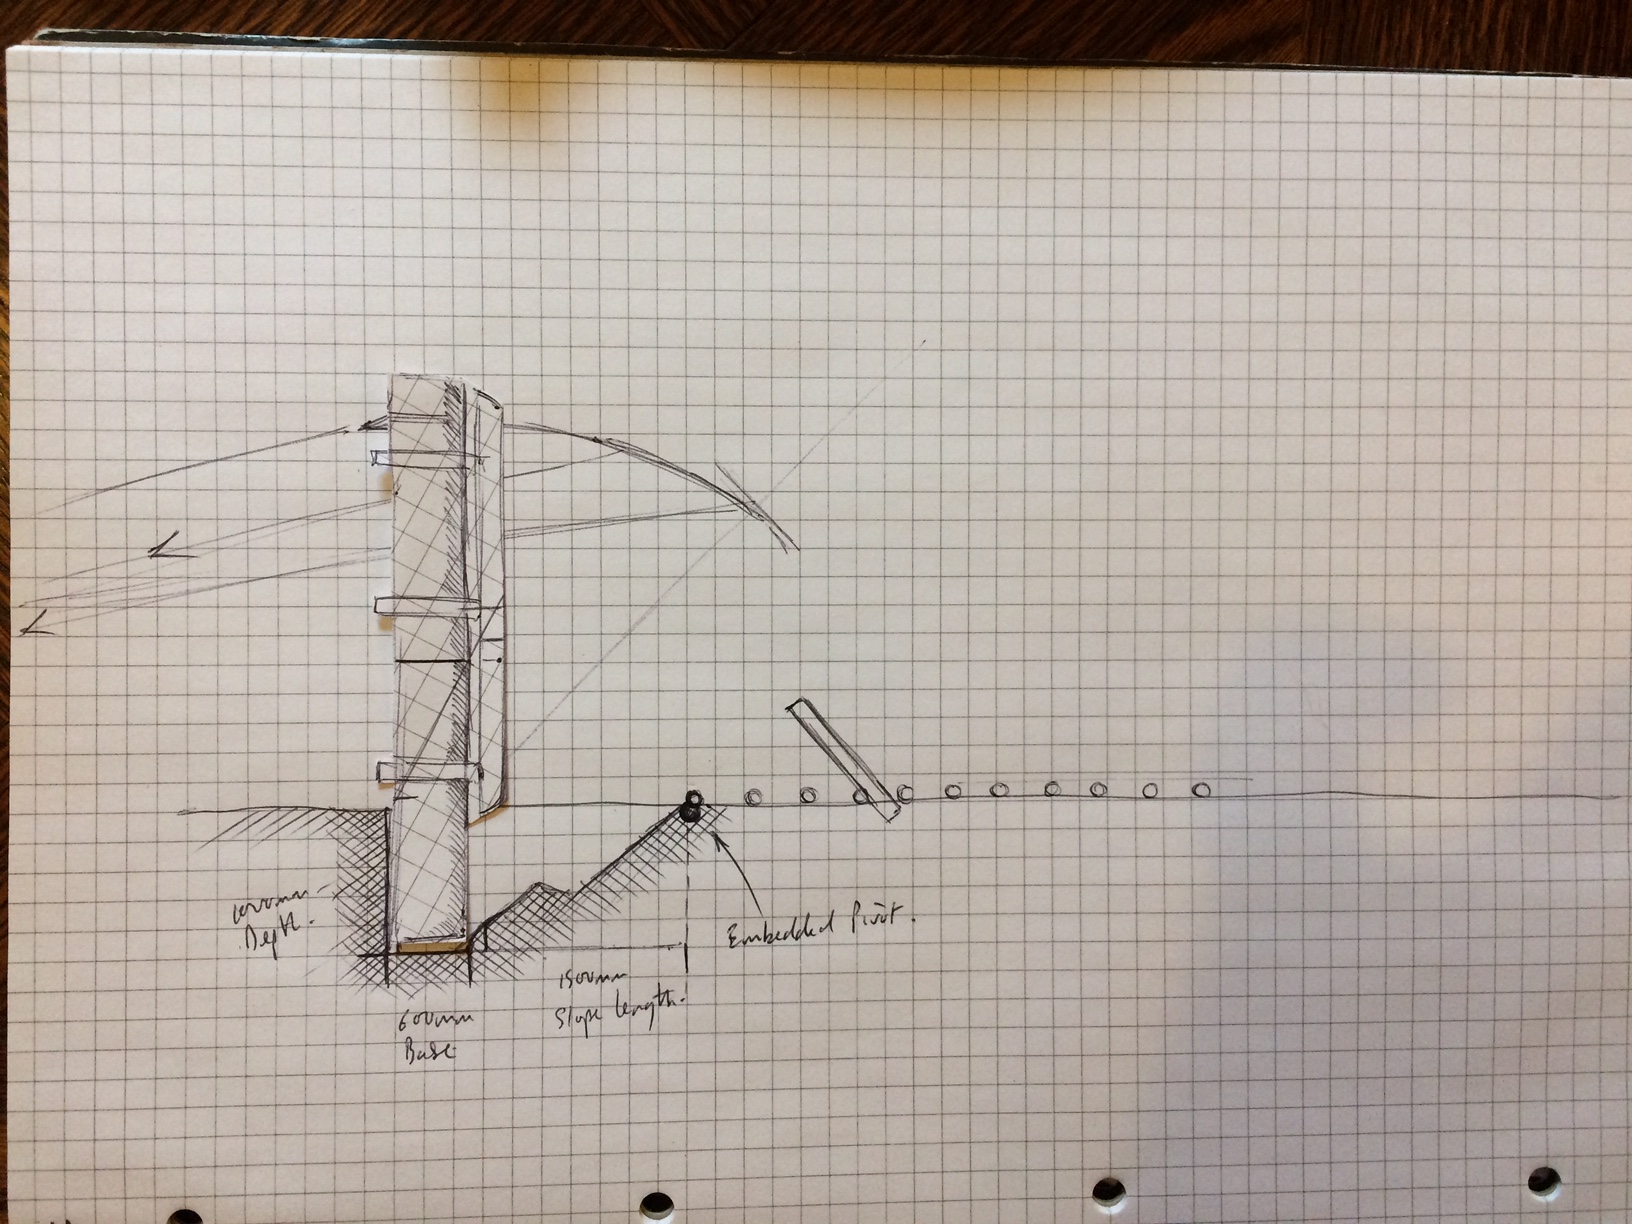
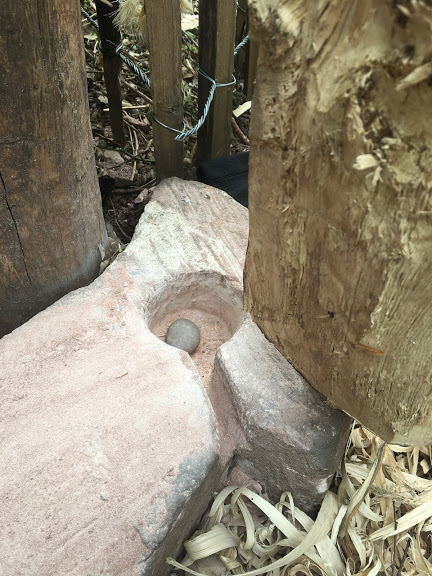
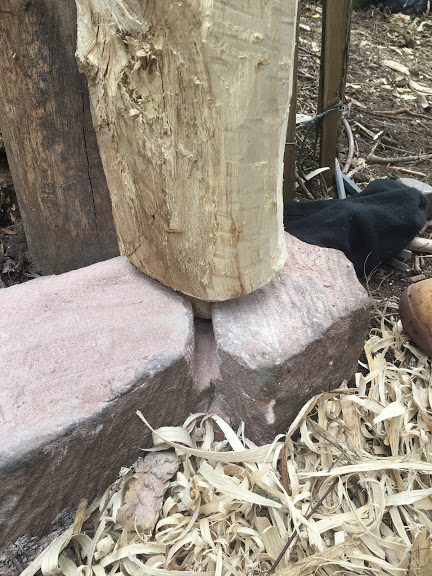
The centre of the monolith sits to one end of the skis – effectively allowing a 1200 mm portion of the stone to project beyond the skis. This was a decision based on the need to raise the monolith at some point without removing the frames. The projecting stone would site in the prepared hole without the need to remove or move any of the timber frames around the stone, thus making a raising and lowering potentially repeatable without long time delays.
Stage 1 concept for positioning the monolith on the sled to allow for raising.Stage 2 – the stone and sled tilt on the embedded pivotStage 3 – the stone and sled sit on the ramp in preparation for raising, allowing the projecting monolith end to rest at the base of the pitStage 4 – the Monolith is raised to vertical with cradles in position. The skis can be attached to the frames or fall away at this point
In essence, this project began as a compromise between pulling and raising a 3.5 tonne stone in a repeatable way. This is a point worth dwelling on, as these two operations are very different, and require a very different set of processes and techniques to ensure success.
The question of pulling around 80 bluestones over 120 miles from Preseli in South Wales to the construction site at Stonehenge would require high levels of efficiency and logistical support to achieve. Our stone represents an equivalent weight to the heaviest of these (between 3 and 4 tonnes). The methods that would successfully achieve this feat multiple times must have been well practised and organised over large distances, and avoided, or negotiated landscape obstacles and river crossings. These long distance transport methods and considerations become largely irrelevant once the construction zone is reached and thoughts turn to placement and raising of the bluestones. As we showed last year, the manoeuvring of stones (of this weight) over short distances, and their raising to vertical is relatively straightforward with the simplest of methods. This becomes a far greater issue with the raising of the much larger sarsens (in some cases weighing well over 40 tonnes).
Having said that, no experiment can cover all the bases, and sometimes the only way to know what questions to ask is to try something first, which inevitably throws up many questions that were unforeseen at the start of this project.
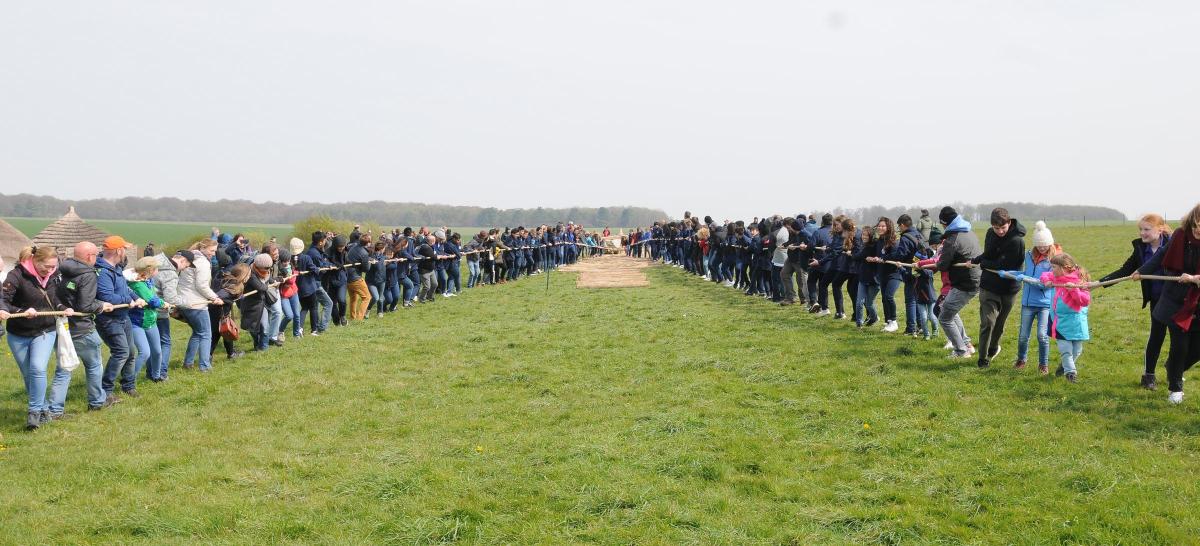
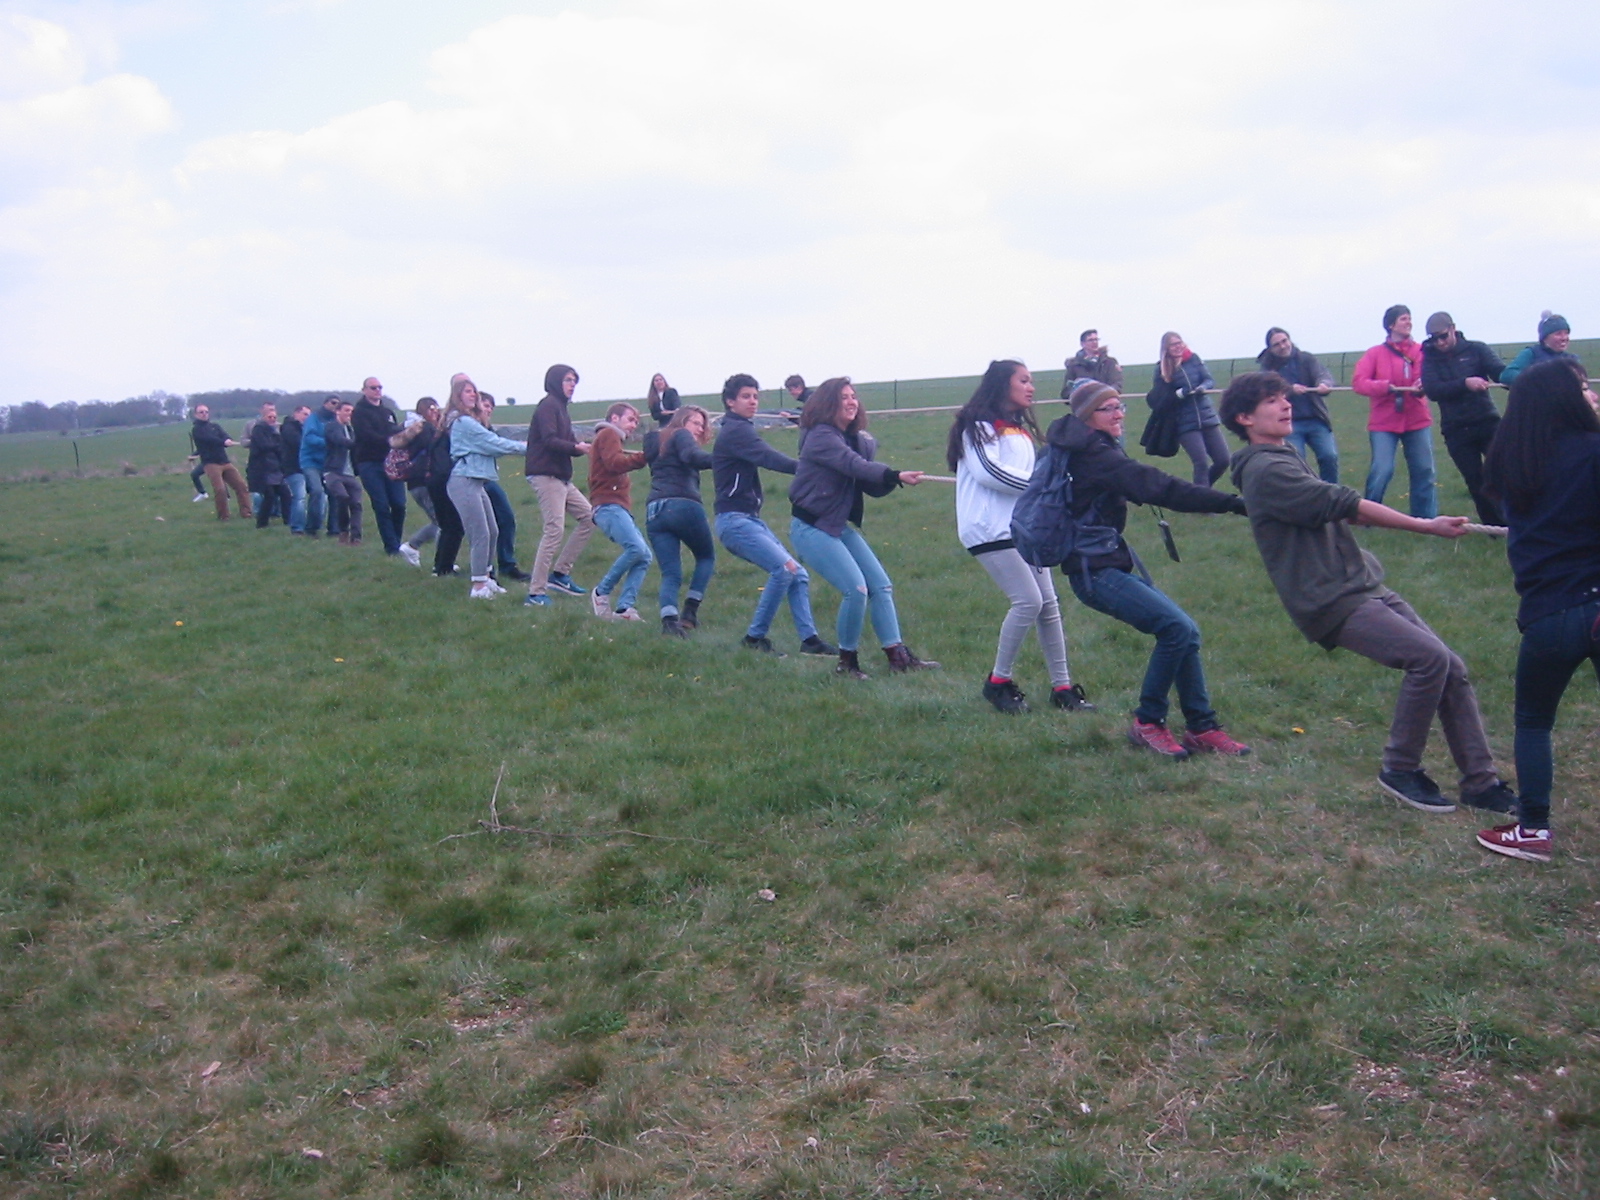
The public in action (courtesy of Salisbury Journal)
Given that this experiment also used the general visiting public rather than professional or trained hauling teams, our collected data would represent comparative baseline information based on inexperienced members of the public with a wide range of fitness, strength and mass. Even so, the results of this 5 day experiment sought to shed light on a simple series of questions.
Experimental Questions.
Is the investment in sled building offset by efficiencies in moving and manoeuvring?
What advantages does a sled offer to the pulling of a monolith over distance?
What are the problems associated with using a timber sled?
How do different surfaces affect the efficiency of sled use?
What is the optimum spacing between sleepers for this sled?
Are rollers redundant when using a sled?
What are the issues associated with pulling the sled across slopes, up slopes, down slopes?
Project Design
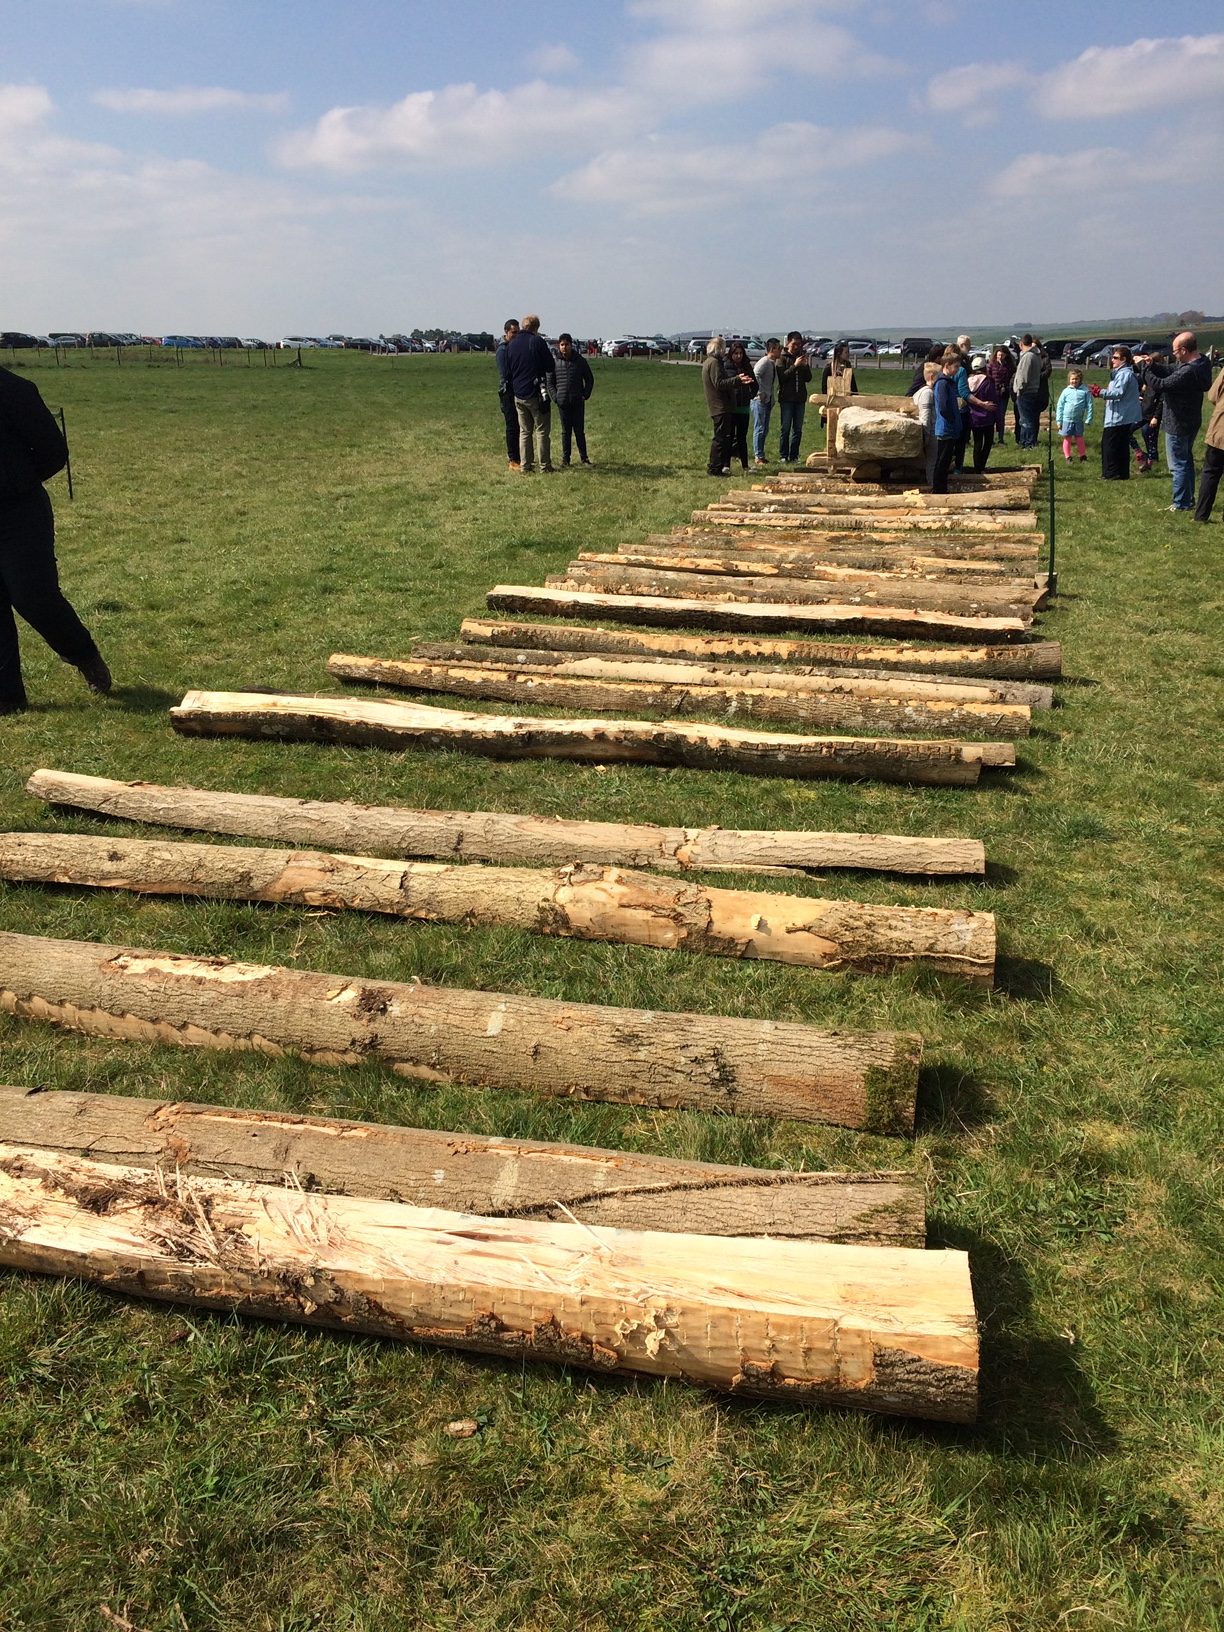
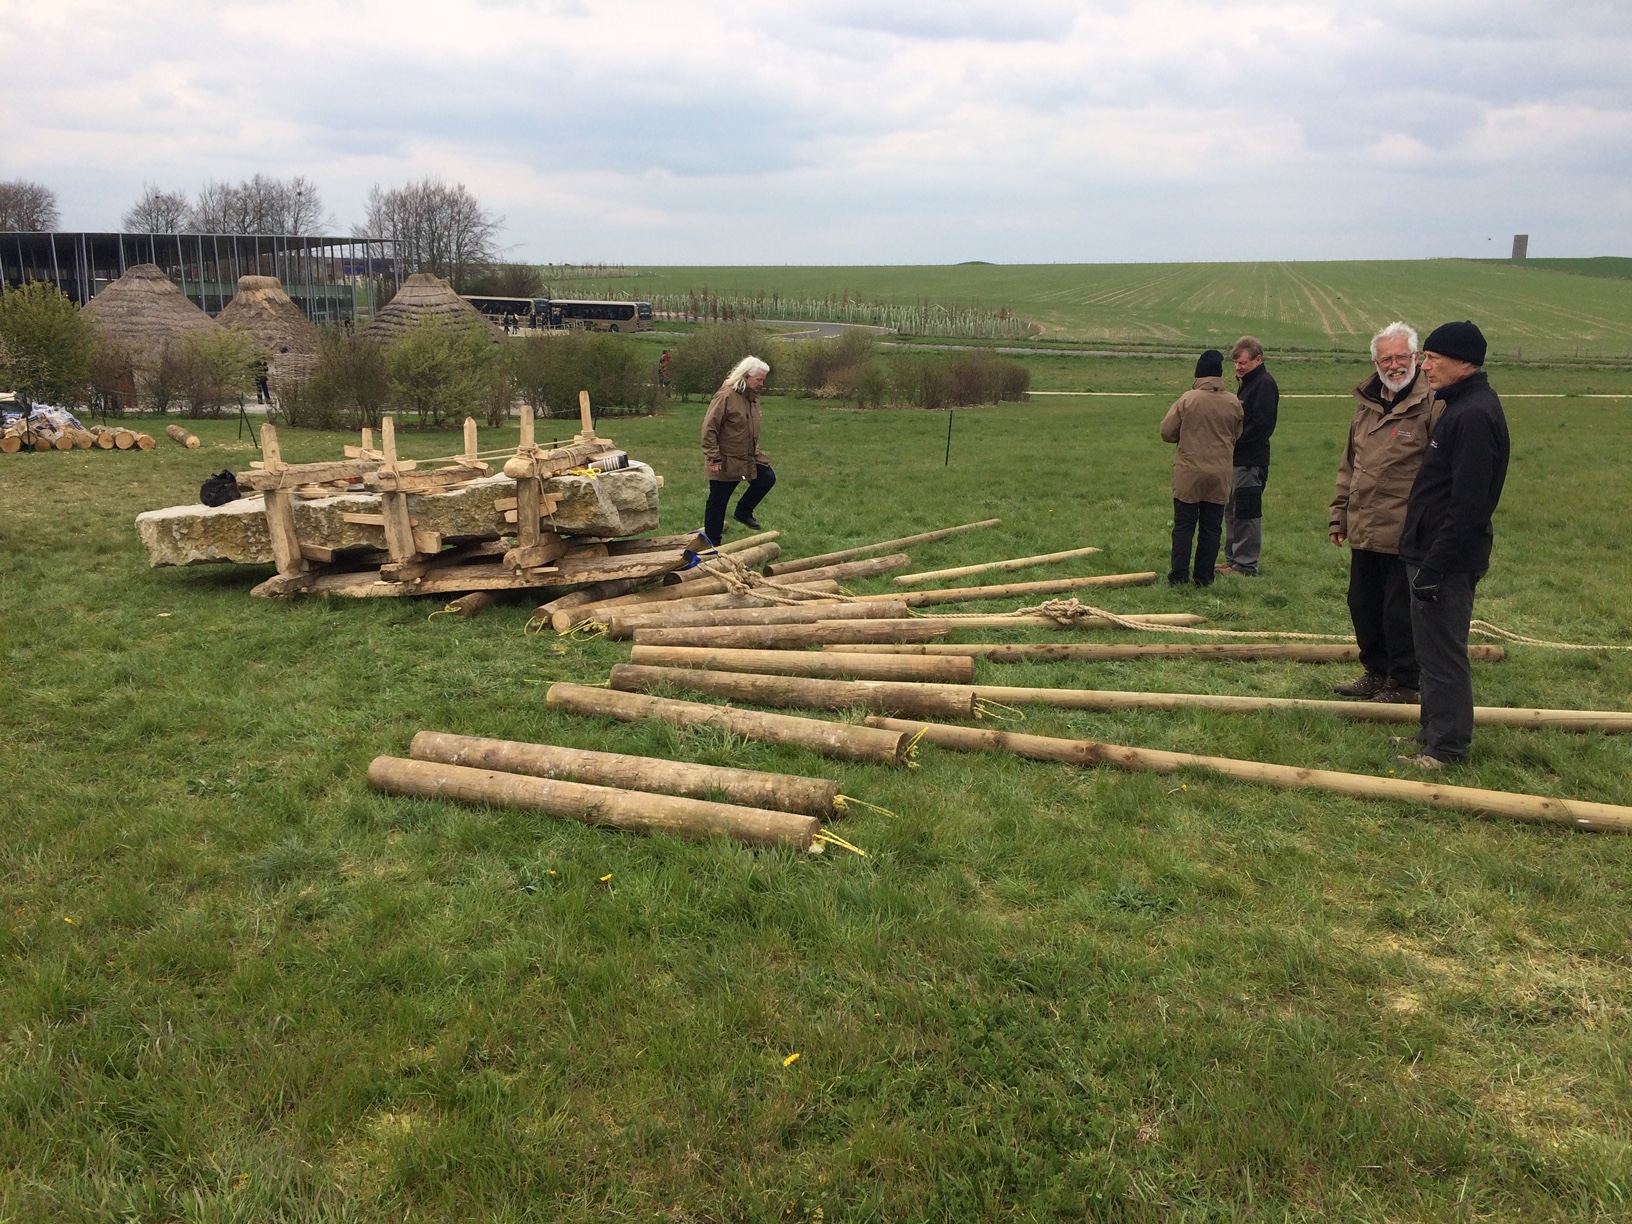
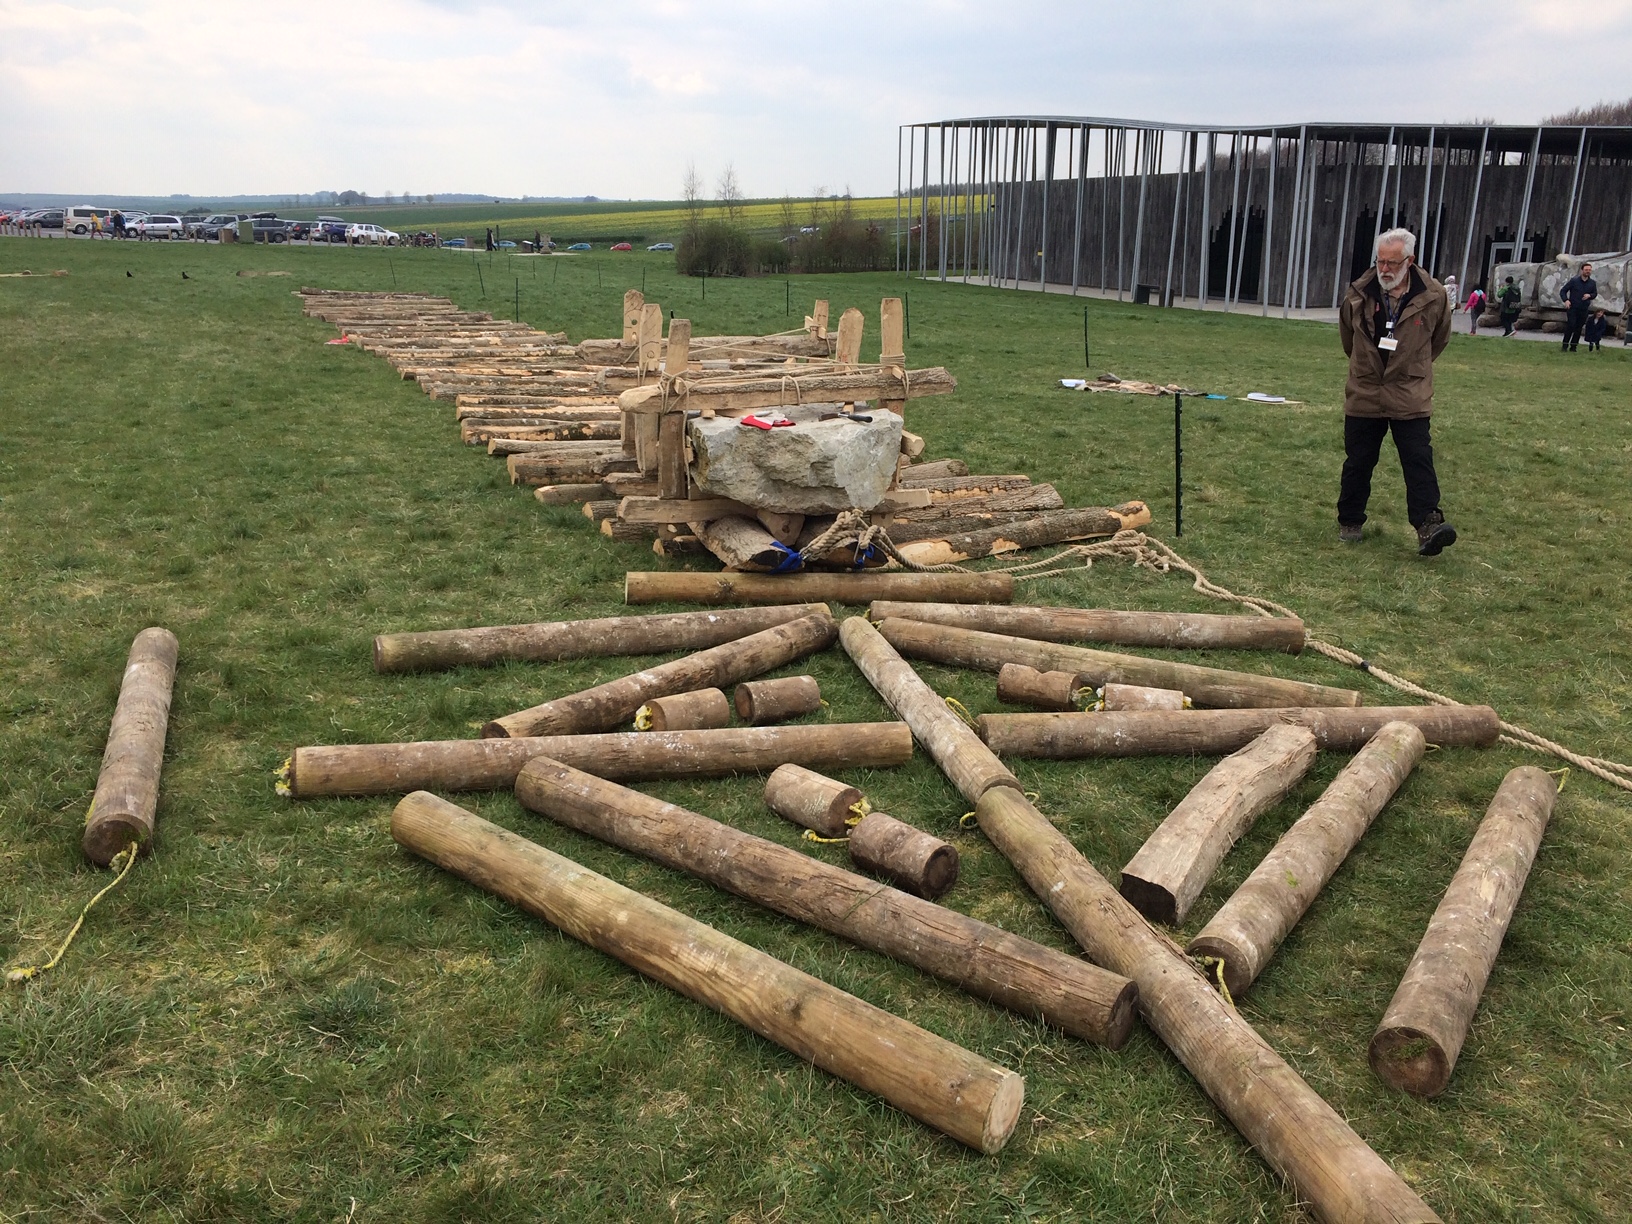
The project sought to test the relative efficiency of hauling and manoeuvring the 3.5 tonne monolith across a variety of courses based on the use of snedded and split Ash timbers. A straight course was laid out that ran across the gentle slope of the Stonehenge visitor centre field. The course was measured and marked at 10 metre intervals and each 10 metre stretch was filled with split timbers at varying distances apart.
The movement of sleepers after a successful pull.
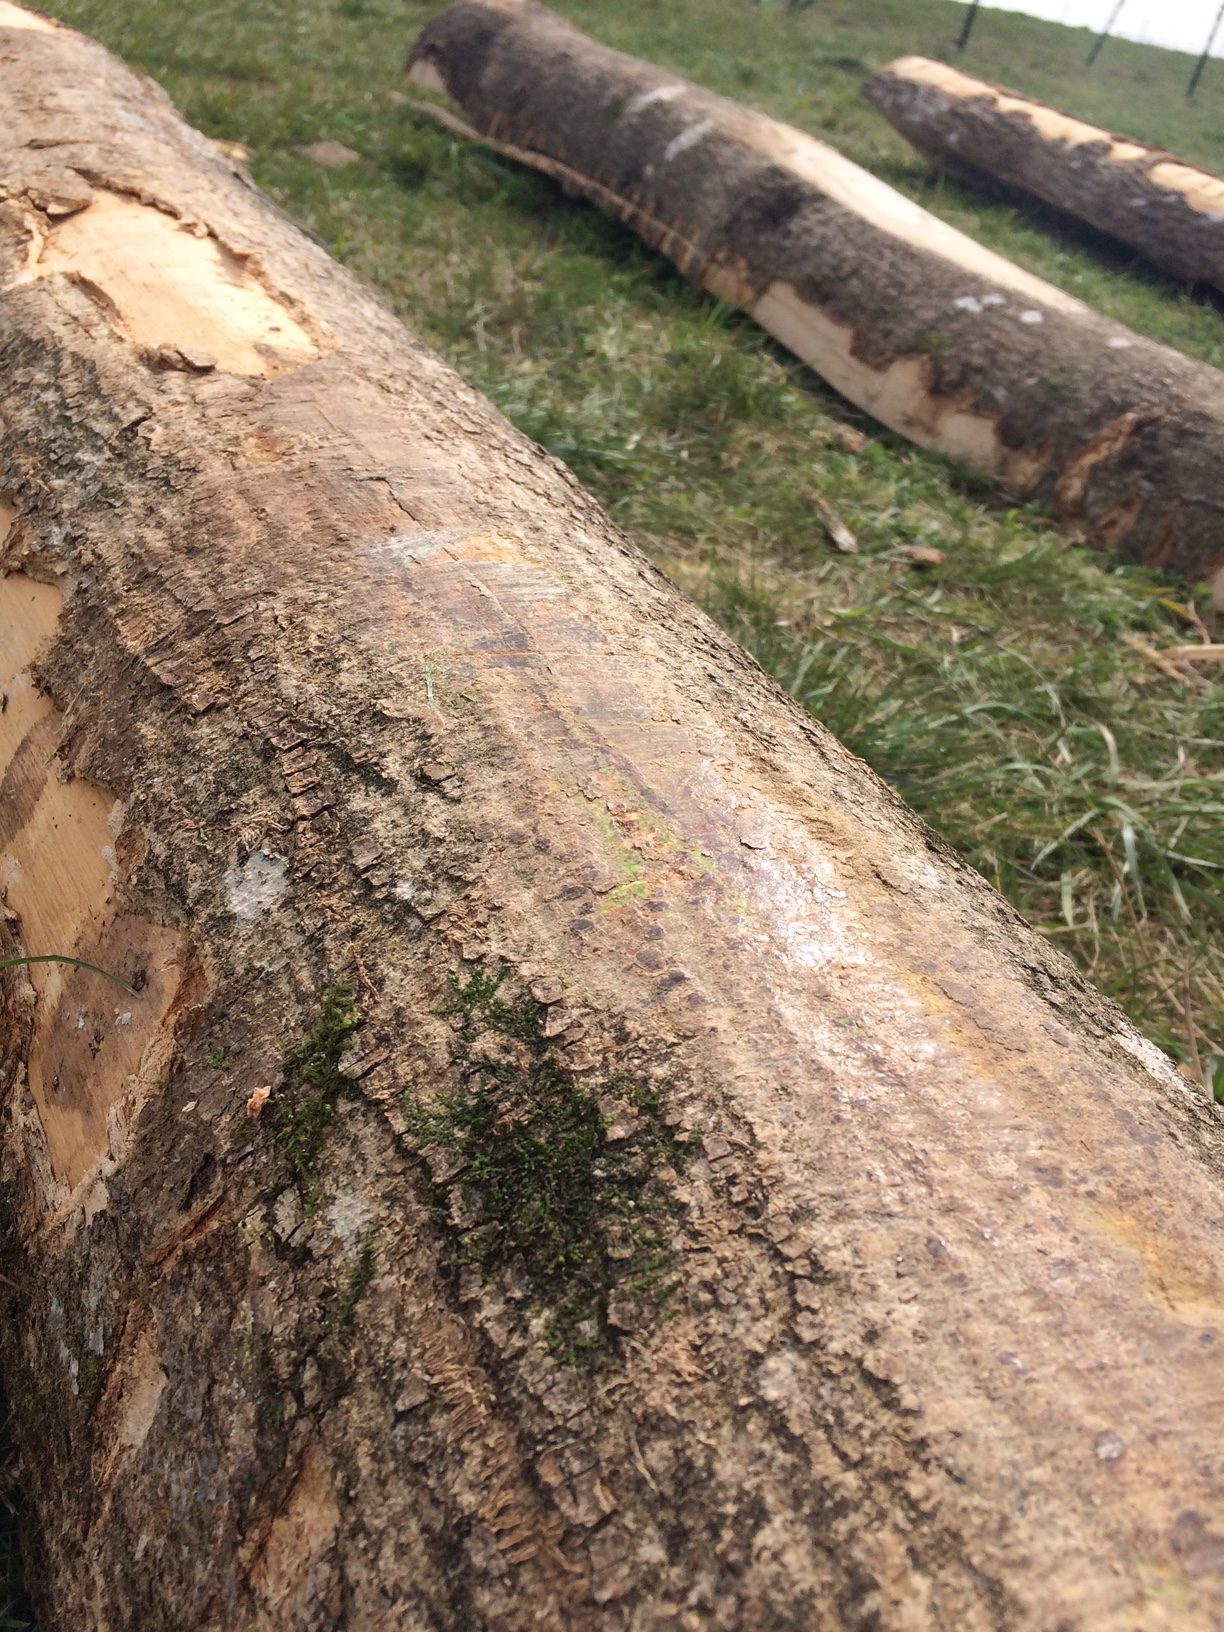
The split timbers comprised of ½ split and ¼ split Ash logs, laid so the split side was downward. For this experiment, the bark of the logs was not removed and no lubricant was used to reduce friction. When laid on the ground, the thicker end of each split timber (the base of the tree) was placed on the down slope side of the course in an attempt to create a more level surface and prevent the sled from slipping down the slope during hauling.
Prepared rollers were also tested in this experiment. The rollers were Pine and machined to 200 mm diameter to reflect the known availability of pine in the Stonehenge landscape during the construction phase of the monument.
The intention from the outset was also to conduct a baseline test of hauling the sled across the medium length grass (mown) without the help of sleepers or rollers.
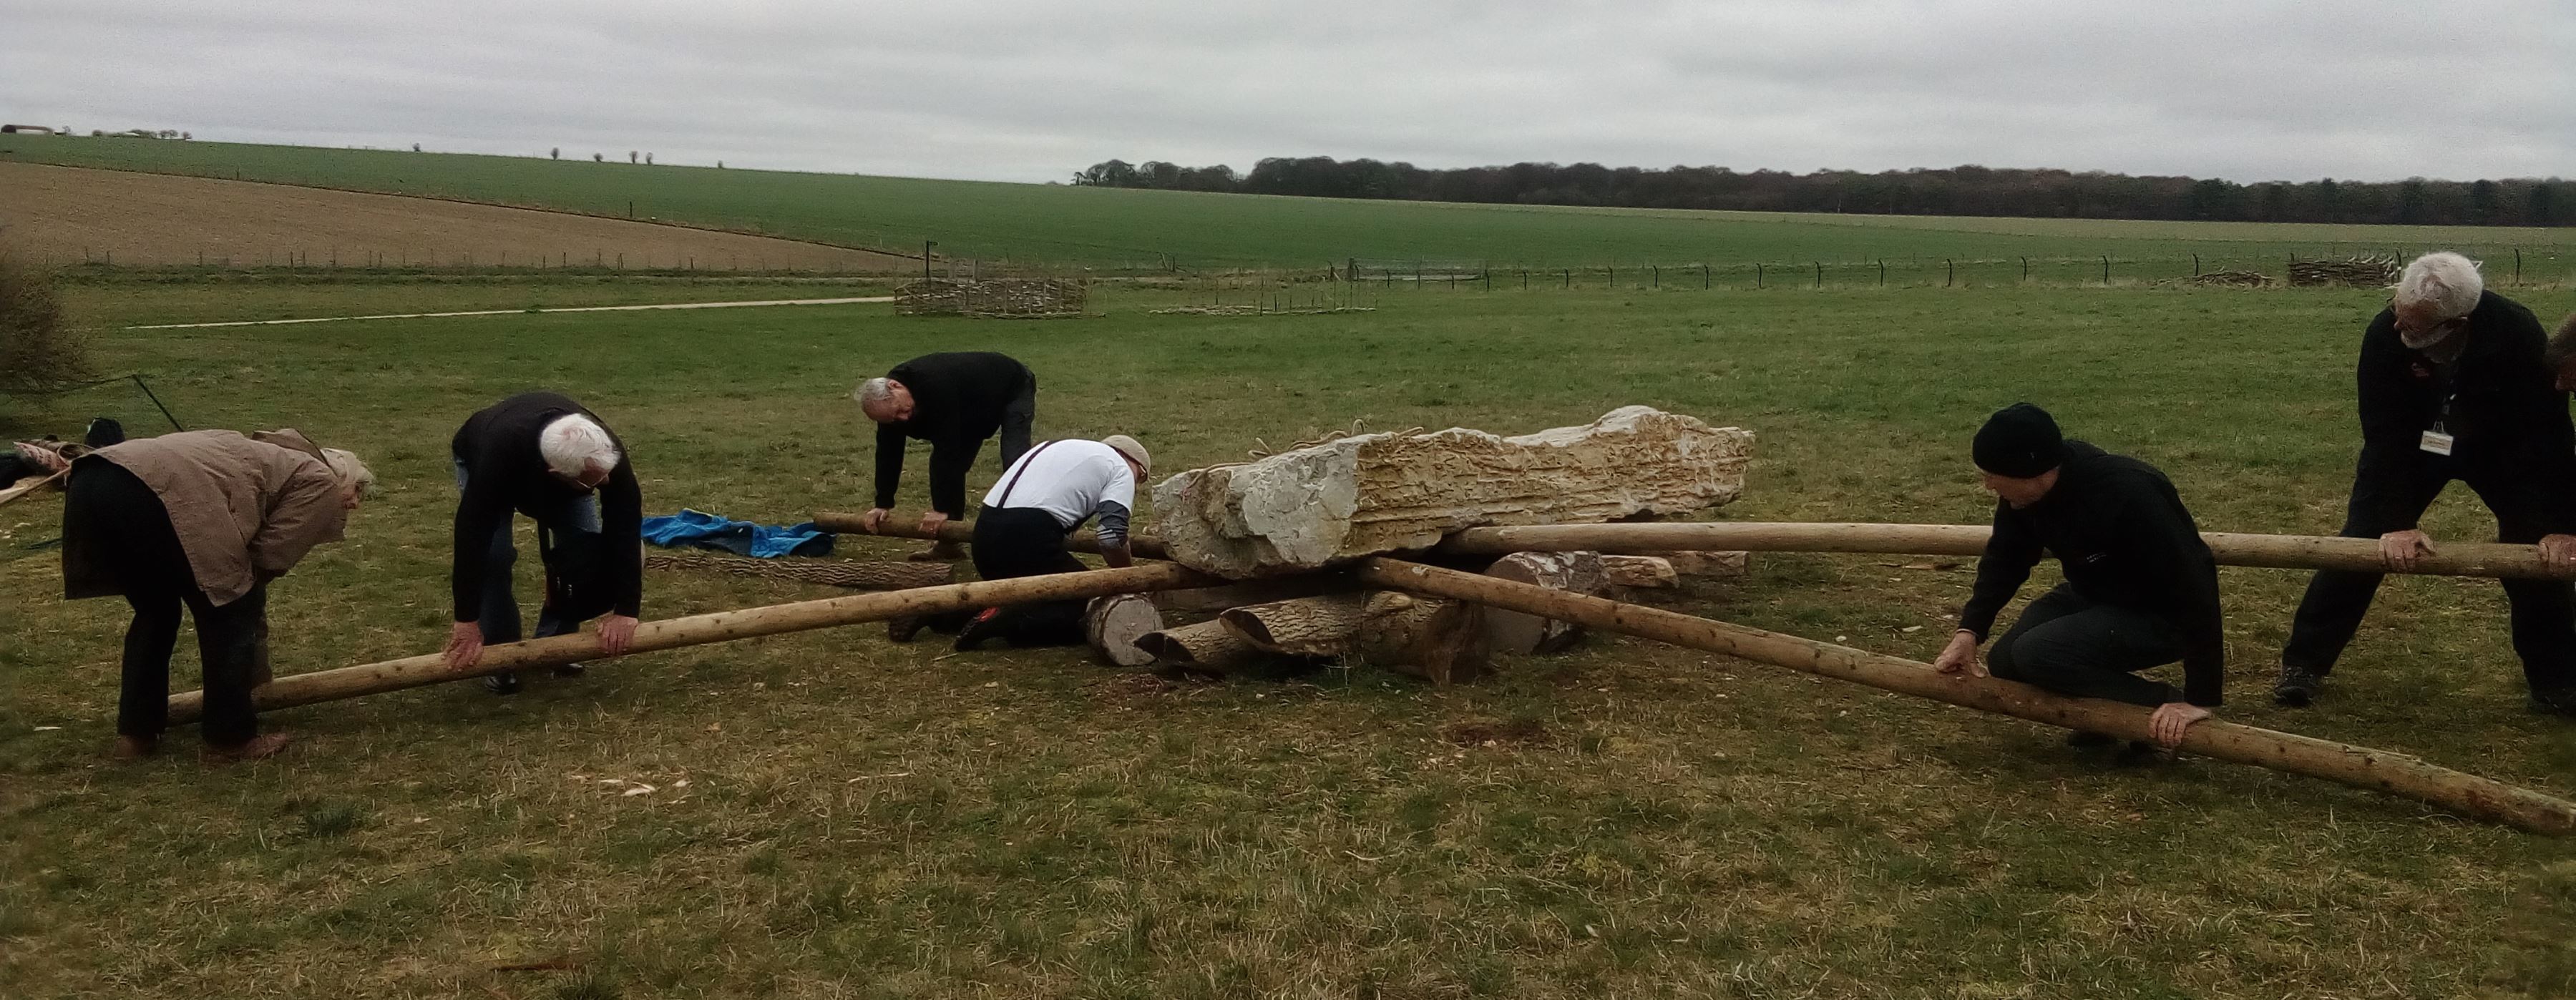
Housing the Stone
One of the interesting aspects of this project that was unseen by the public was the placement of the stone into the sled. This was achieved using a small number of people, levers and some brute force. My first logic was intent on fitting the frames around the levered stone and then using those box frames to lever the stone onto the skis. It was only after we had got the frames into position that I realised we couldn’t do this without risking the frames destruction as the mortises were exactly on the sheer point of each timber against the edge of the stone. We removed the frames and tried again!
Hammering the box section timbers into their notches with the stone levered up to create clearance
The stone was levered with large fulcrums along one long side at a time. each ski was then physically dragged longitudinally under the stone into position.
When both skis were in position, we levered the stone from either end to allow the box frame bases to be driven into position in their respective notches on the skis.
Placing the first box frame element between the skis and the stoneCareful control is required when moving heavy weights!
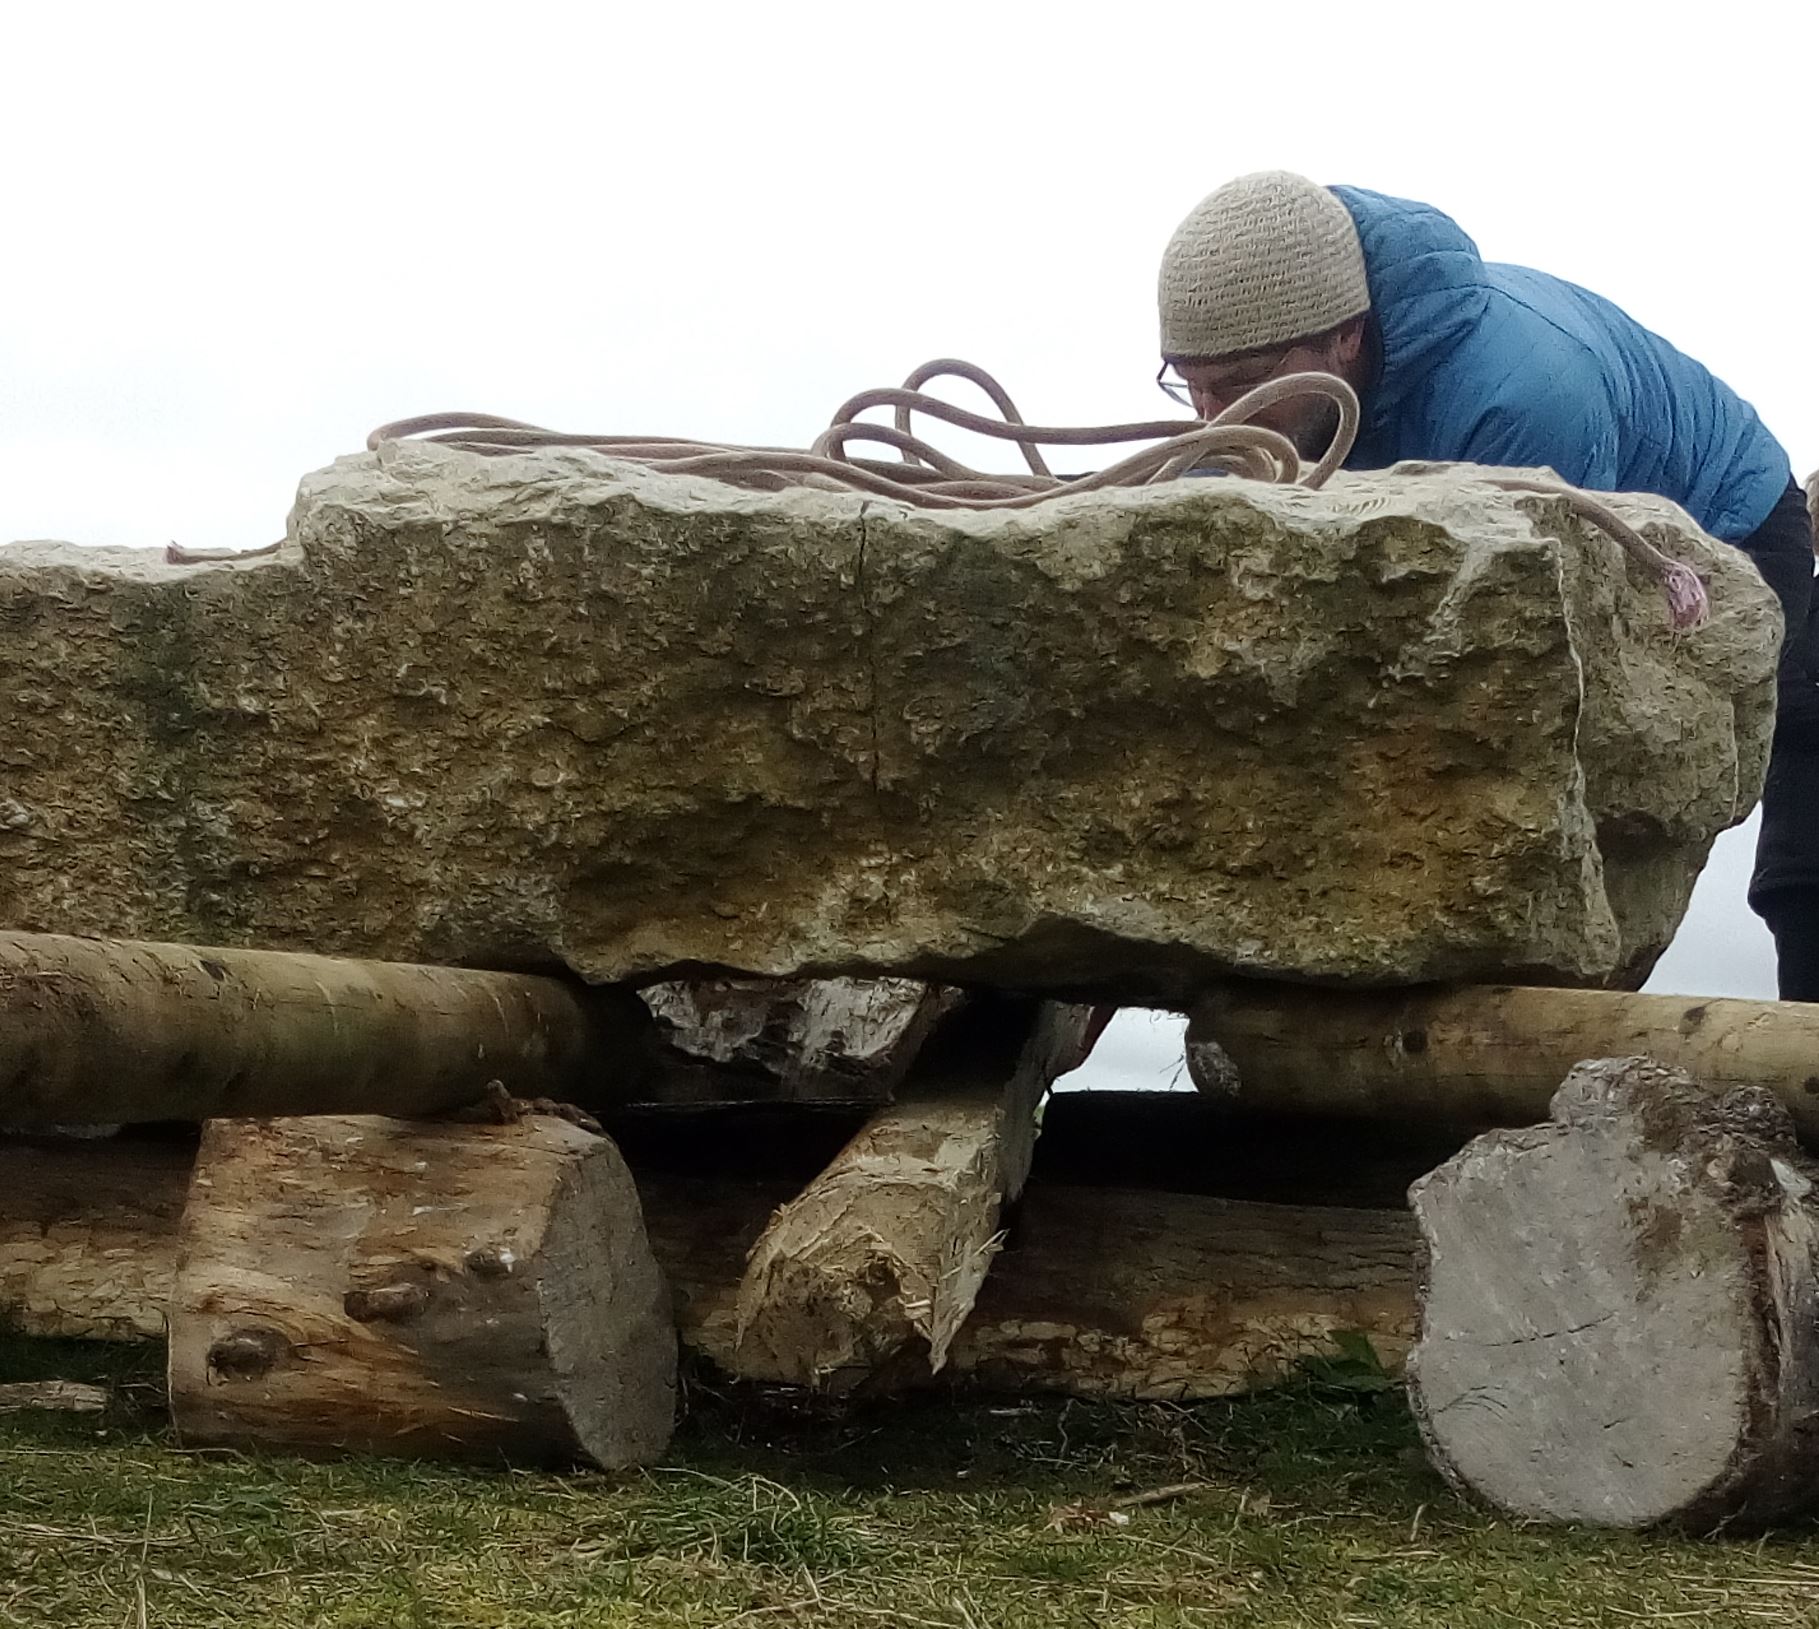
Once the three box frame bases were in position, the other frame elements were dropped into place and pegged. Wedges of various sizes were then driven between the frames and the stone to hold them firmly in the correct positions. Particular attention was paid to ensuring each frame base was fully located into the ski notches.
The box frame bases located in the notched skis
Only 2.5 hours of problem solving and eight people! – Oh, and some long levers!
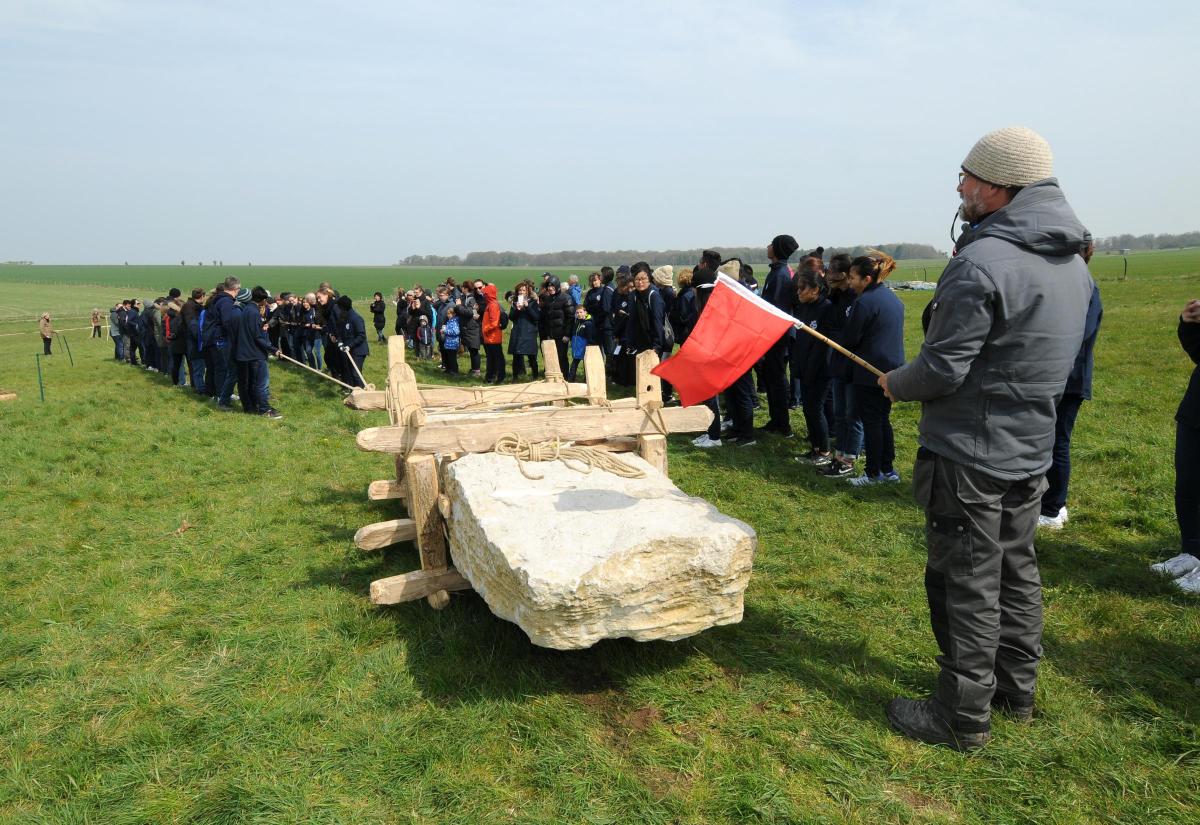
The stone finally mounted in its cradle.
The next stage (pre public involvement) was to get the sled onto the first section of track way. Initially, this was achieved with levering and sliding the sleepers beneath the skis. It worked but was time consuming and awkward. later on we attempted to refine this process by placing thinner timbers (40 mm hazel sticks) under the tip of the skis and then pulling the sled with brute force up onto the larger timbers of the track way.
Sled Testing
Testing was conducted over several days in April after a spell of dry weather. The ground was damp unlike the very wet and muddy conditions of last year.
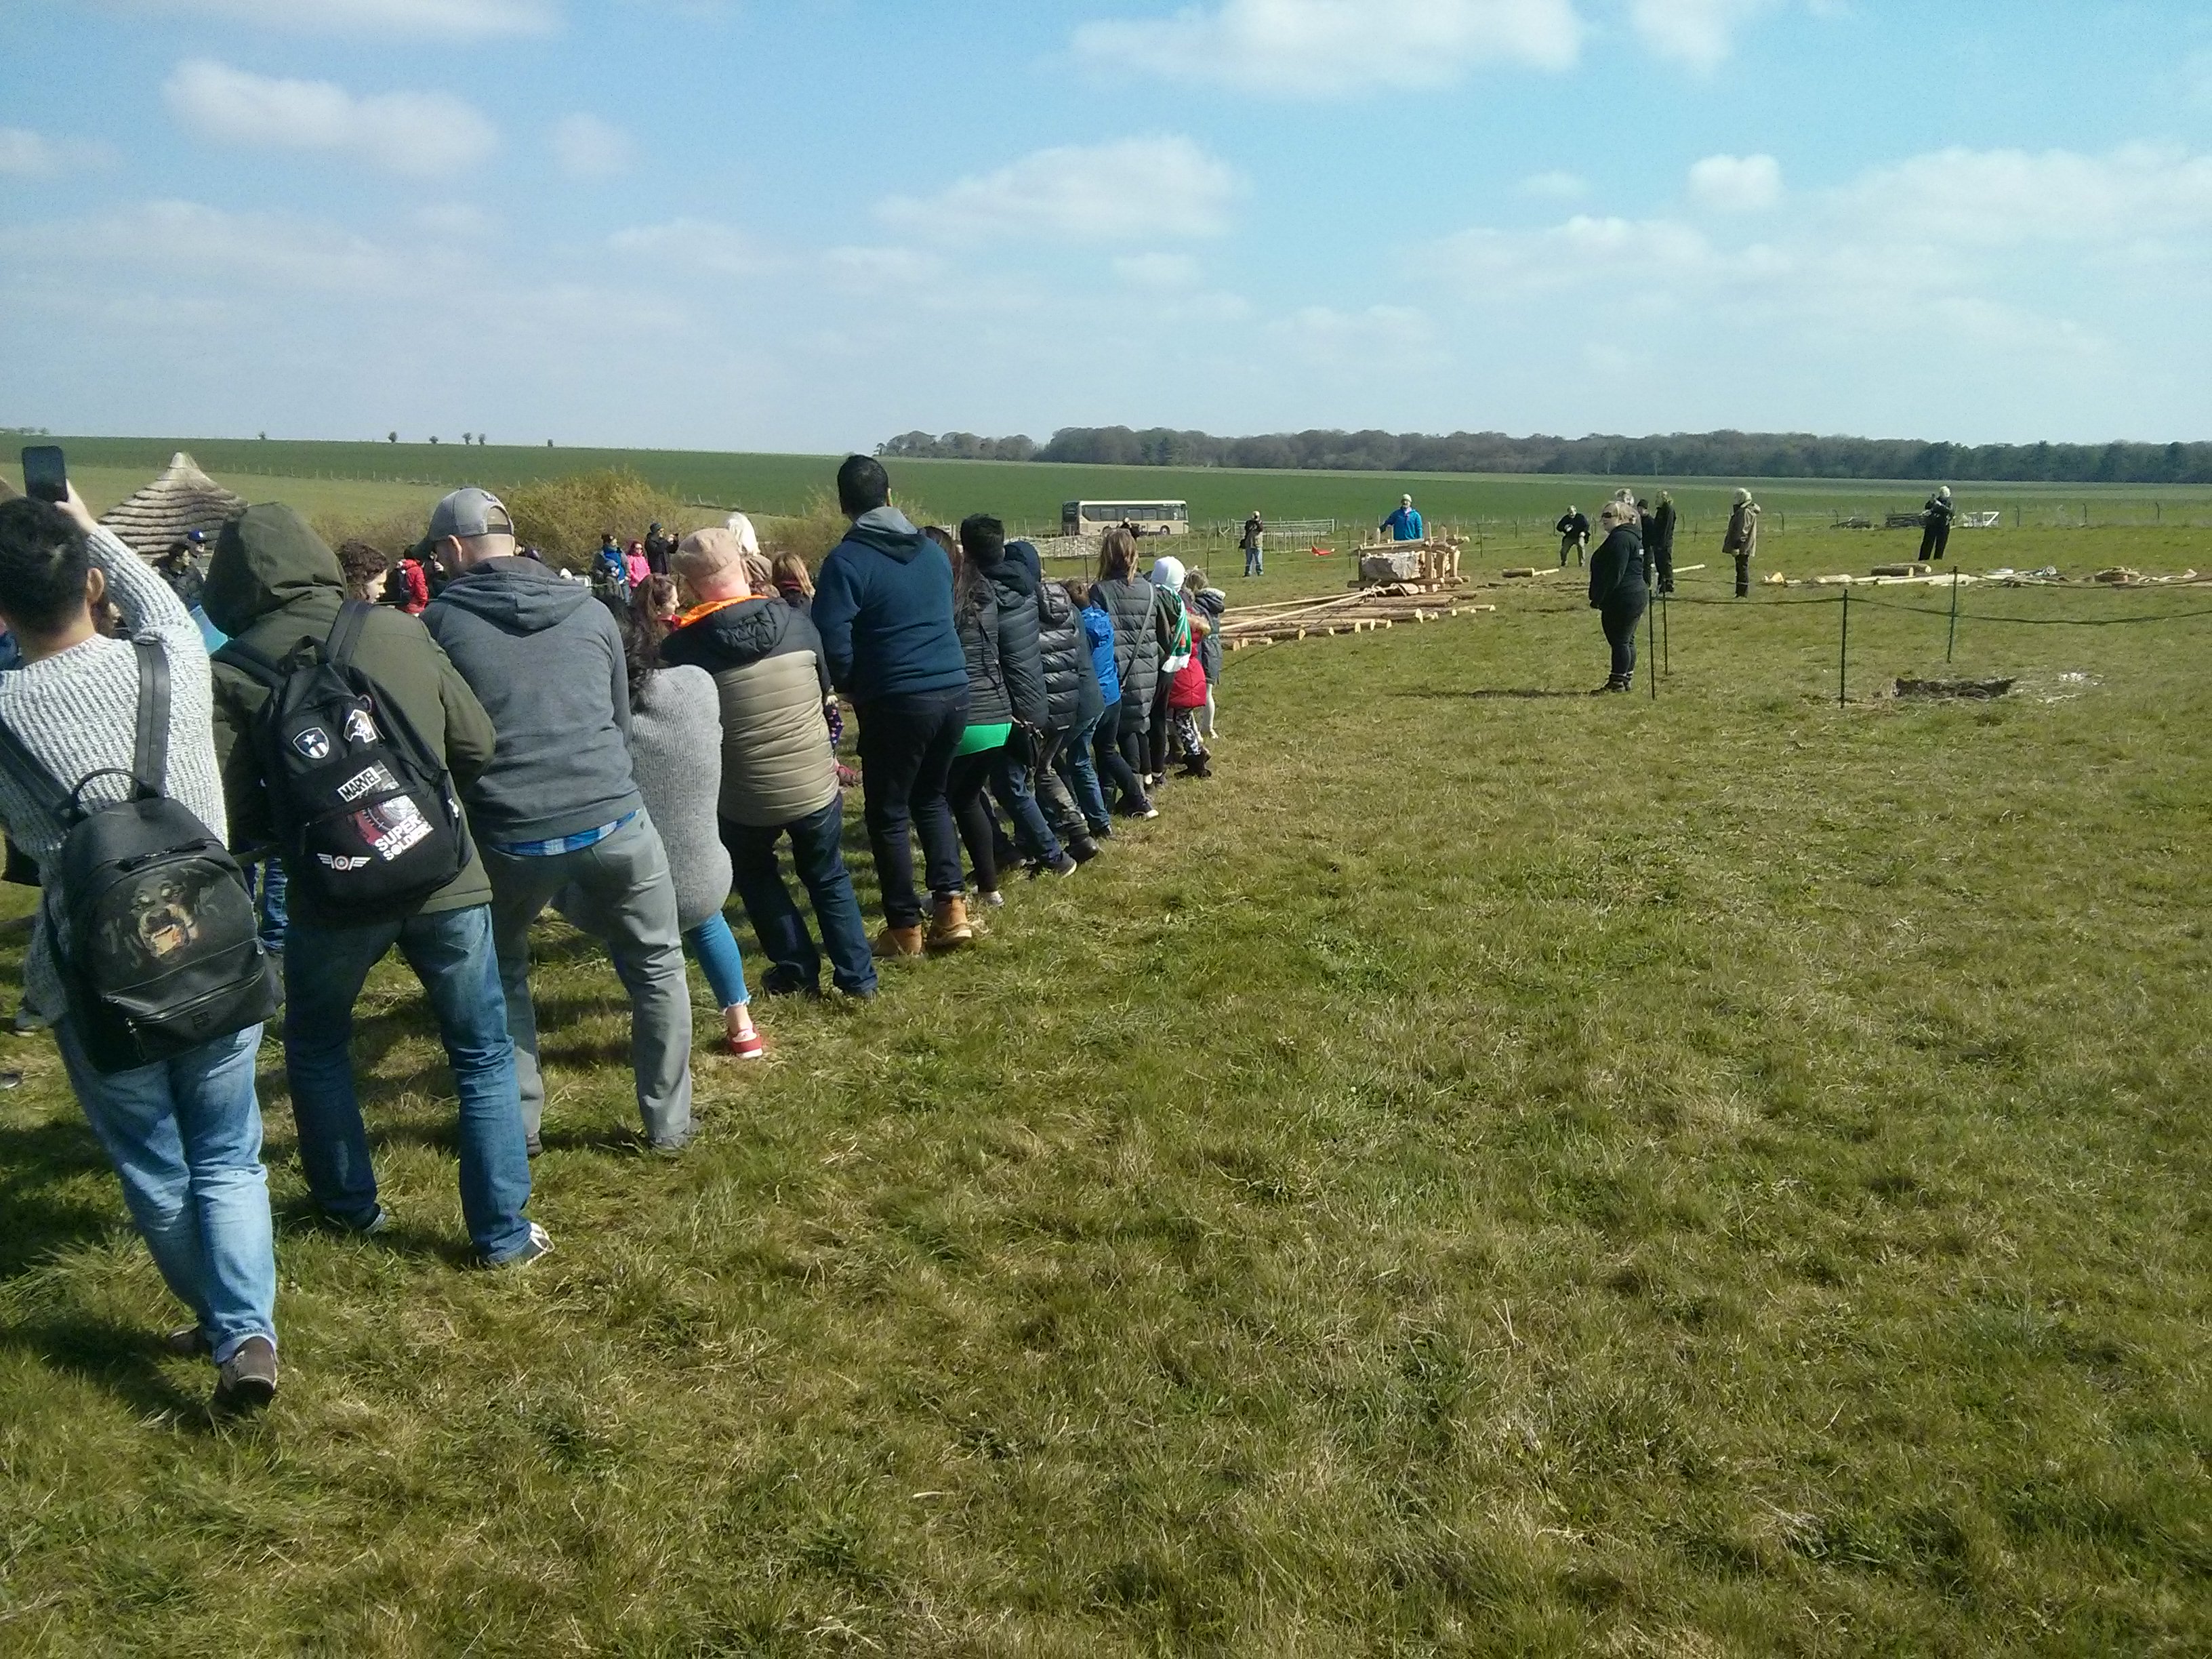
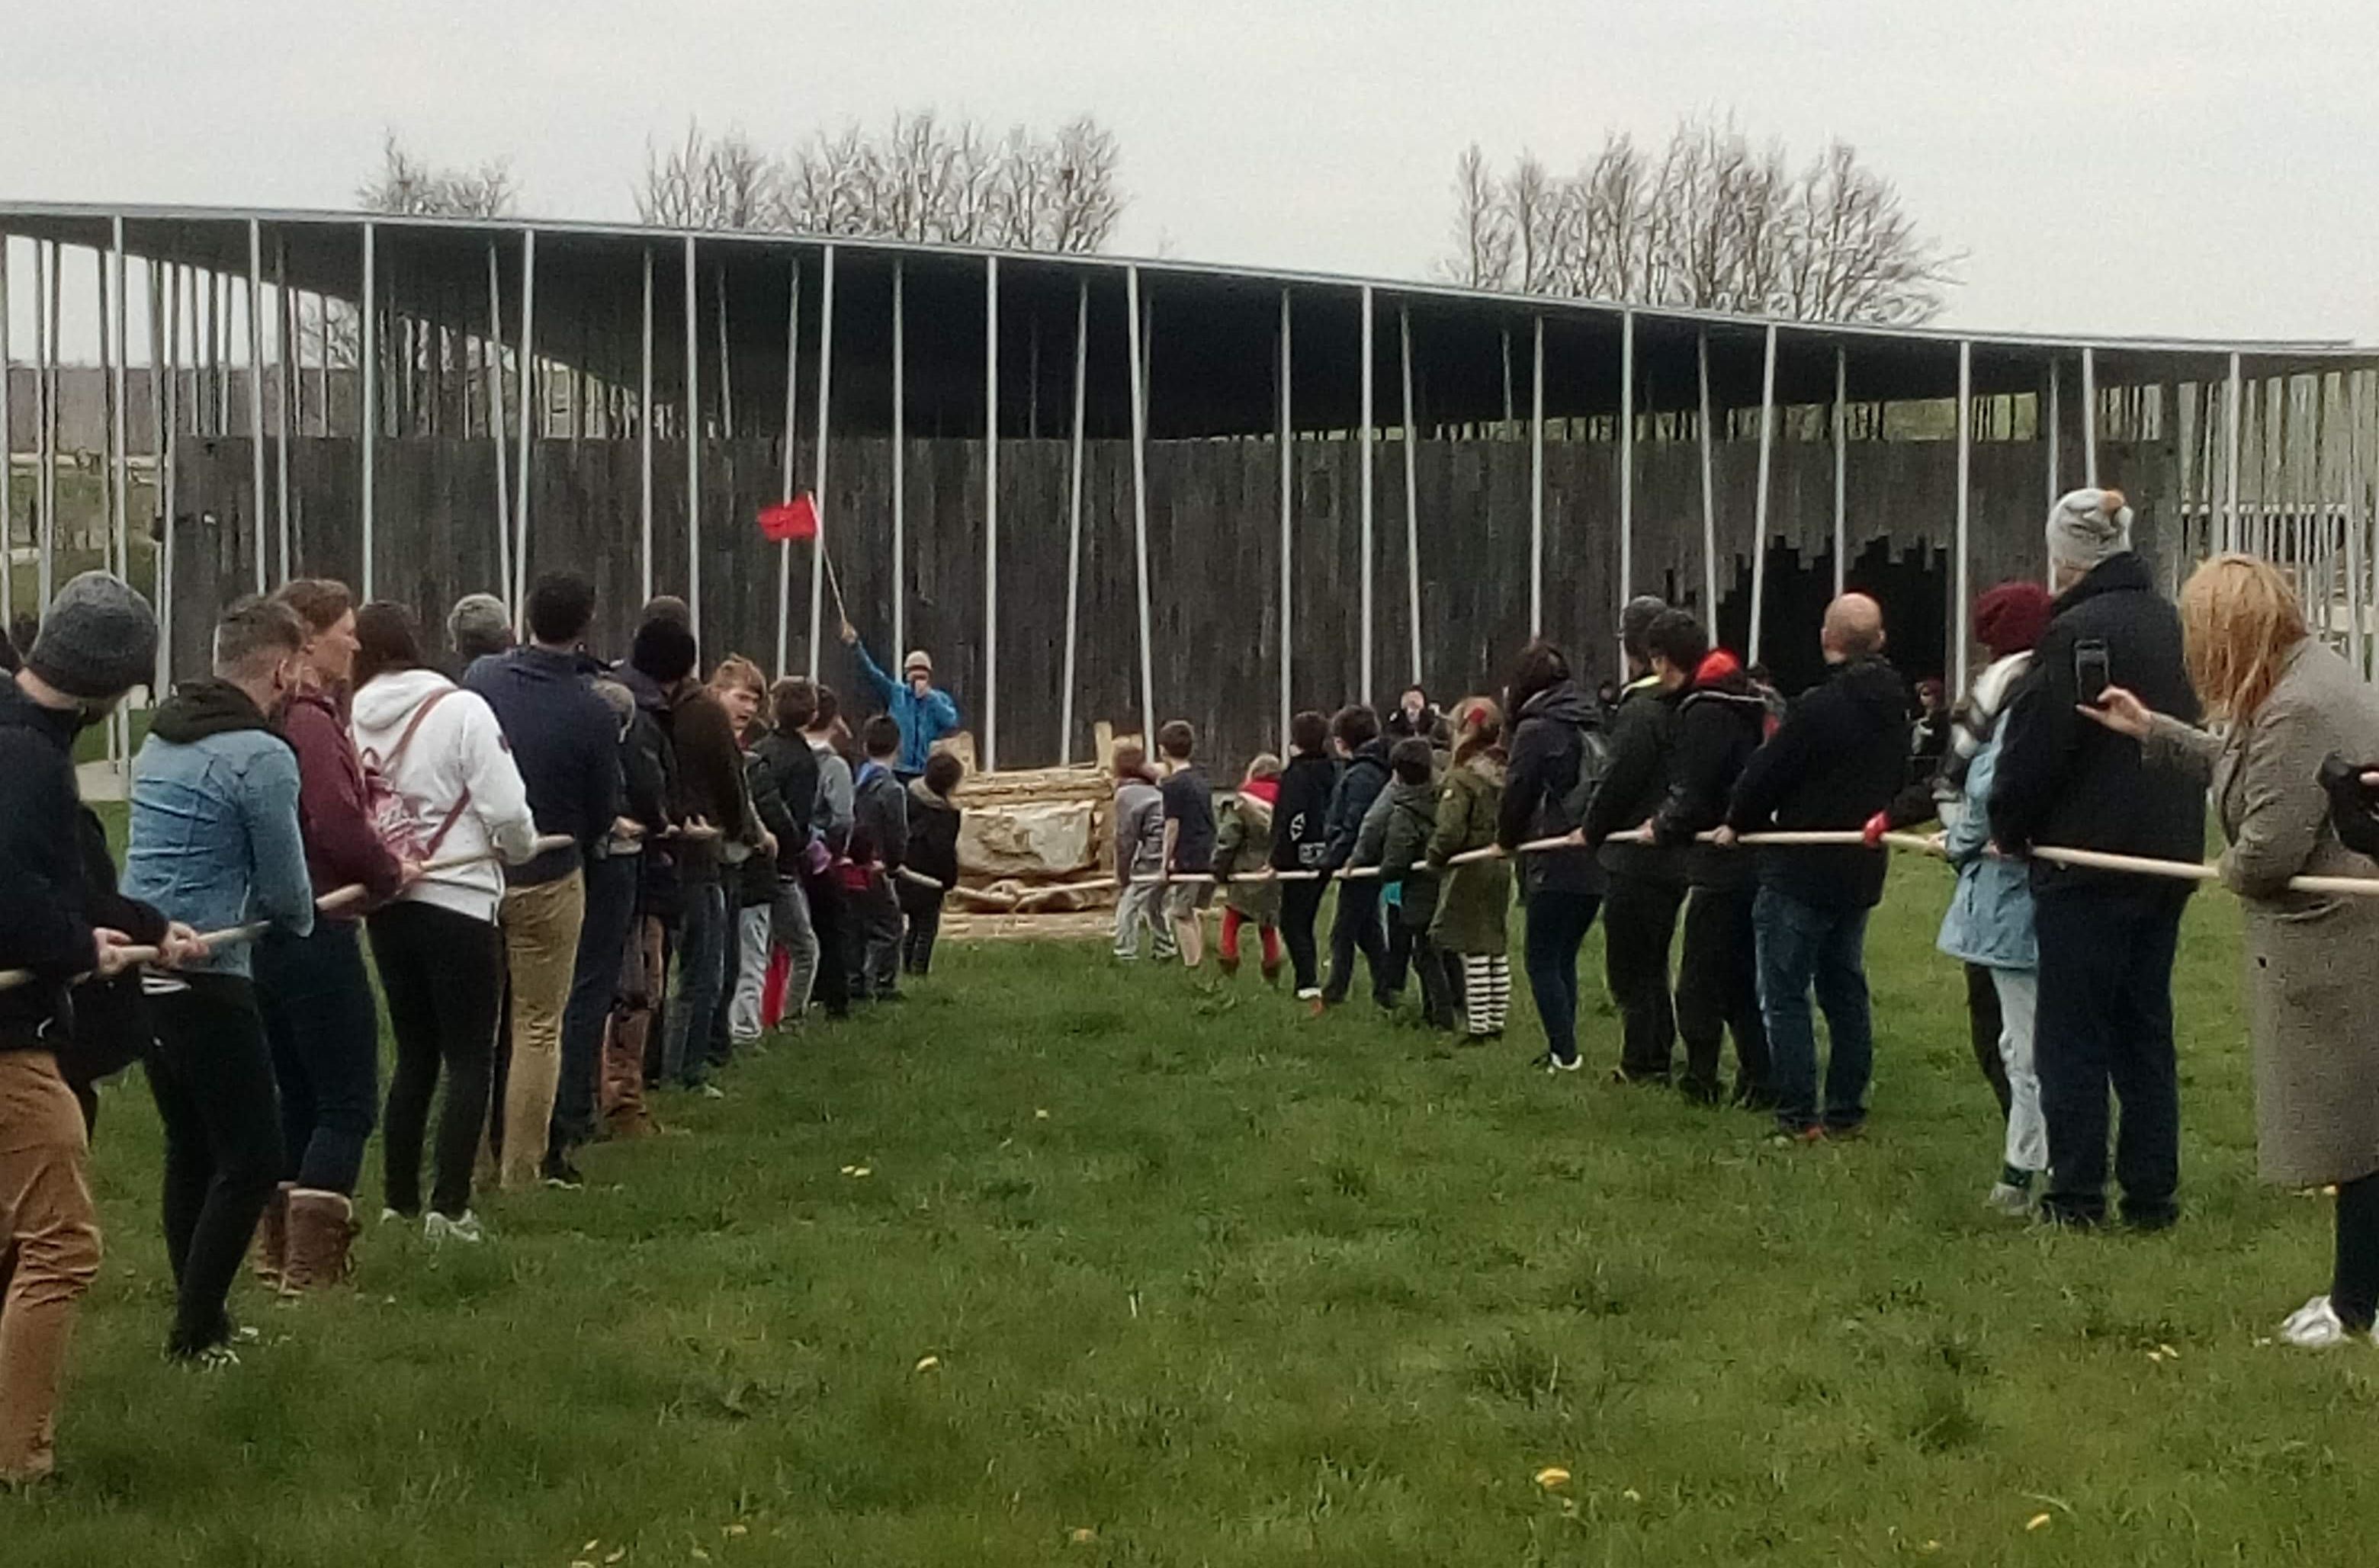
Each test was conducted after an initial recruitment of volunteers from the visiting public. Each group was counted (adults and children) and given an introductory talk from Julian Richards – focused on what we do and don’t know about how Stonehenge was built. each group then received a safety talk from me including clear instructions of how to pull and when to stop.
It is worth noting that this experiment used a “Tug O War” method of pulling which produced results over short distances, but does not lend itself to long distance pulling.
The public exert themselves during a pull up slope – showing classic “Tug O War” style!
Each team pulled the sled over a range of track ways so comparative timings could be taken with the same pulling teams. Times were taken for given track distance and simply extrapolated to an arbitrary 1 Kilometre time. This time does not allow for fatigue over greater distance but gives an idea of track efficiency and sled behaviour.
Sections of track way were split into the following types.
A. ½ split 250 mm Ash @ 500 mm centres spacing- initial sticking point – but movement was smooth and steady once this was broken. 3 sleepers “rolled” with the skis and created an uneven pull with more friction at corners.
B. ½ split 250 mm Ash @ 800 mm centres spacing – obvious rocking and rolling movement in the sled. This rise and fall put shock through the frame joints and resulted in some wedges loosening after only 10 metres.
C. ¼ split 250 mm Ash @ 500 mm centres – the ¼ splits acted as faceted rollers – making for an uneven ride – but enabling good control.
D. Rollers 200 mm Pine @ 700 mm – easy movement but with some lateral slewing. Seems to be more suited to level ground.
E. Rollers 200 mm Pine @ 500 mm – easy movement but with some lateral slewing. Some bunching of rollers over uneven ground.
The split timber sleepers gave very good control during pulling, with no risk of the stone running with the pulling teams. The sled dis not slew downhill on the sleepers, enabling good control over lateral movement. Moving across slope, the pulling teams were positioned slightly up-slope to control lateral movement. The friction between skis and sleepers was enough to stop down slope lateral movement.
Pulling teams positioned slightly up slope of the track way sections
Cornering and steering was attempted using various sleeper arrangements, but it was much simpler to make an abrupt turn to line up for the next straight pull rather than attempting a graduated sweeping turn.
Turning the sled through 90* used sleepersArranging a “fan” turn to change direction by 90*
Abrupt turns were achieved by moving the pulling teams to the new direction and pivoting the sled on an arrangement of sleepers or rollers.
Roller arrangement for a 180* turn
180* turns were achieved in two stages by moving the pulling teams to 90*, pulling to slew the sled, then moving them again to 180* to make the final alignment. Sleeper and roller arrangements were problematic and no configuration assured success. The rotation was paused several times to enable the re-positioning of sleepers to avoid the sled slipping off its supports.
Moving Up and Down Slope
The gentle slope at the visitor centre (around 5*) offered opportunities to test issues of moving the sled on other than flat ground. Although this is not as extreme as some of the gradients encountered by the ancient stone movers, it has the potential to hint at issues on a small scale.
Up-slope experiments demonstrated pronounced slewing issue unless the course was laid parallel to the incline. Several adjustments were made to the pulling teams to keep the sled on course.
Down-slope pulling on sleepers and rollers highlighted some significant slewing issues with the sled wanting to find its own way down the course. A brake team was put on a rear rope to add control when required. At no point did the sled gain enough momentum to require active braking, but this would undoubtedly be a serious issue on steeper inclines.
An up-slope pull
Some of the slewing issue may have been due to the mounting of the stone off its centre of gravity. The projecting stone (intended to fit in the pit during raising) effectively made the sled back heavy or front light. Up-slope pulls would exaggerate this effect and allow the tips of the skis to wander more easily. However, this doesn’t explain the slewing on down-slope pulls, where the gradient would be expected to counteract the imbalance of the sled and stabilise it.
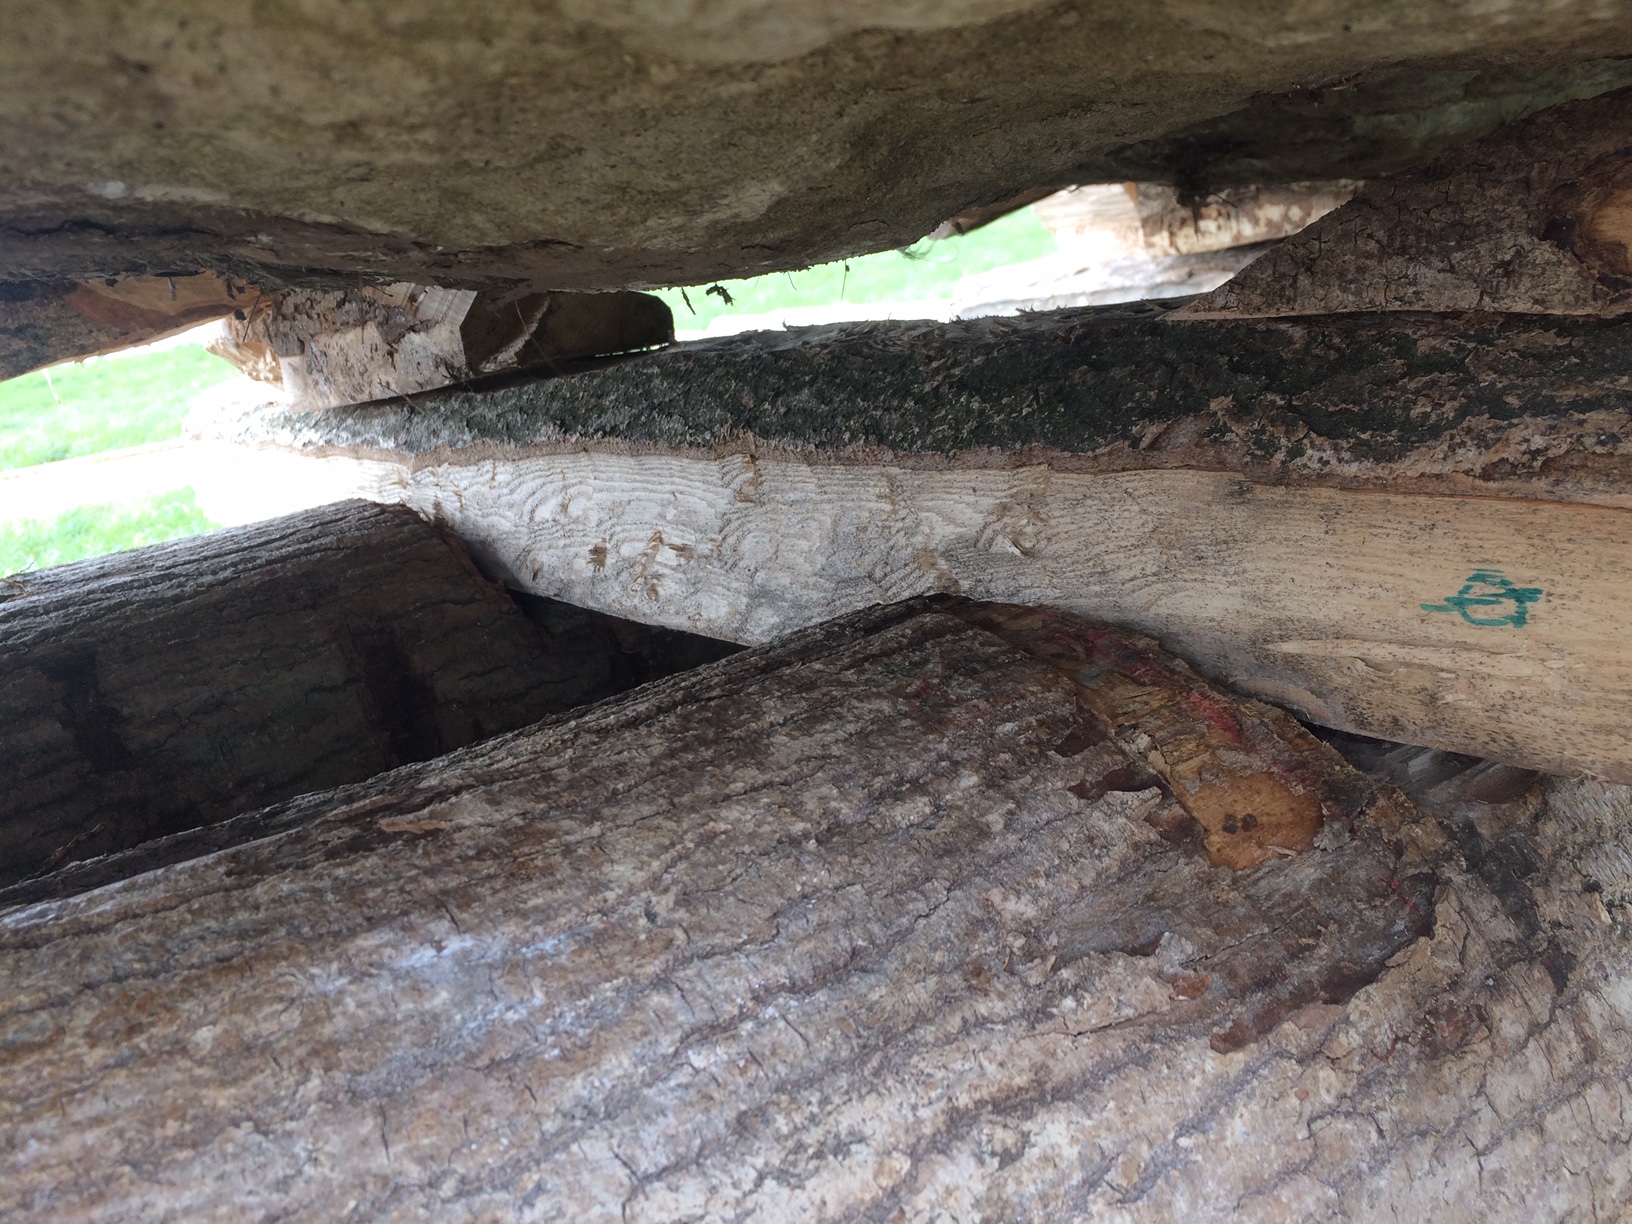
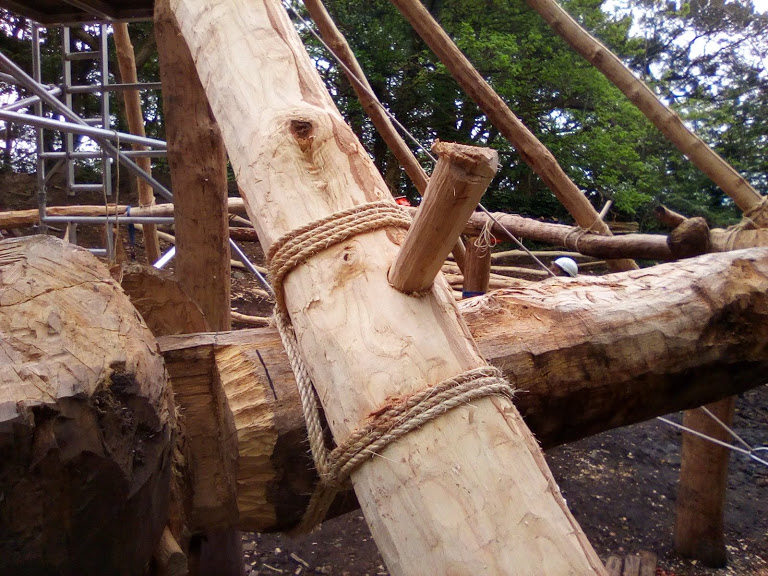
The interlocking skis, frame base, and frame side with retaining peg
Experiment Timings
Moving Trackway Test @ 800mm spacing
Pulling Team 78 (plus 10 moving the rollers or sleepers )
10 metre sections, Rollers = 93 seconds = 155 minutes per km
10 metre sections, ¼ split = 55 seconds = 91 minutes per km
10 metre section, ½ split = 43 seconds = 71 minutes per km
Sleeper Trackway Test @ 800mm spacing
Pulling Team 105
15 metre section, ½ split = 24 seconds = 27 minutes per km.
10 metre section, ¼ split = 25 seconds = 41 minutes per km.
½ Split Sleeper Trackway Test @ 700mm Spacing
Pulling Team 100
30 metres, ½ split = 32 seconds = 17.5 minutes per km.
20 metres, ½ split = 15 seconds = 12.5 minutes per km friction smell!! – cracked vertical tenon
Roller Track way Test @ 700 mm
Pulling Team 150
10 metre section, 14 rollers = 18 seconds = 30 minutes per km.
10 metre section, 14 ¼ split = 20 seconds = 33 minutes per km.
20 metre section, 28 ½ split = 24 seconds = 20 minutes per km.
Polish and wear on the ash sleepers
Grass Baseline Test
To offer a baseline comparison to the various sleeper and roller tests, this experiment had always included an attempted pull on grass. It was intended to show the efficiency of using a track way but the results were unexpectedly exciting and contrary to what we expected (which is why full scale experiments are so useful!)
It should be noted that the ski bases had become compressed and polished from their pulling over timber sleepers, the grass was short (50 – 80 mm) but green. We did not adapt our pulling style in any way from the method used in our track way experiments.
The first pull on grass came about when we pulled the sled off the sleepers at one end of a sleeper run. The ski tips dug in slightly on leaving the sleepers and the pulling teams ground to a halt. but with encouragement, they actually succeeded in moving the sled perhaps 6 metres.
Encouraged, I set up a pull to run alongside the sleeper track way. This pull confounded us all with its apparent ease and speed.
The sled on grass, unexpectedly efficient!
Grass Baseline Test
Pulling Team 150
56 metre section, dry grass, polished skis = 59 seconds = 17.5 minutes per km
Grass Uphill Test
Pulling Team 160
43 metres, dry grass, polished skis = 55 seconds = 21 minutes per km
21 metres, dry grass, polished skis = 25 seconds = 20 minutes per km
Grass Uphill Test
Pulling Team 42!
33 metre section, dry grass, polished skis = 65 seconds = 33 minutes per km – unsustainable for distance.
Grass Pull, Minimum Number
Pulling Team 38 to physically move the stone 5 metres
Damp Grass Pull
Pulling Team 48
8 metres, damp grass, polished skis = 15 seconds = 31 minutes per km. Skis seemed to lose silica polish from dry grass pulling. The timber grain was raised by the damp.
Damp Grass Pull
Pulling Team 100
55 metres, damp grass, unpolished skis = 56 seconds = 17 minutes per km.
Damp Grass Pull
Pulling Team 110
36 metres, damp grass, unpolished skis = 34 seconds = 15.6 minutes per km
The sled moving easily over grass – and leaving no trace
Test Observations
Sleeper spacing is critical to maintain a smooth passage of the skis over the track way. 800 mm centres creates a rocking motion in the sled that stresses the timber joints and resulted in one cracked tenon. Spacing of between 500 mm and 700 mm enable an efficient pull without incident. The wider the spacing within this range, the less material required to form a track way.
This experiment used split trees as its sleepers, but the obvious question (regarding materials and harvesting efficiency) is how little harvested material could still improve pulling efficiency? Would it be better to have lighter and smaller diameter materials such as coppiced hazel, or brash from larger tree clearance, and utilise larger timbers for more structural tasks in the landscape?
¼ split timbers work as sleepers with a reduced efficiency in pulling, but they can “roll” beneath the skis, and cause potential jamming issues. They do increase material harvesting efficiency by 100% and this is worth noting.
Prepared rollers work well – in terms of pulling speed and efficiency, but they do not allow the control of split timbers or grass. Working up or down slope seems to increase the likelihood of slewing, and on steeper gradients, brake teams or chocks would be required to control movement.
It would be easy to settle on the most efficient method of pulling as “The” method employed in the movement of the bluestones from Preseli to Stonehenge, but we must remember the sheer scale of that challenge. Well over a hundred miles of varying landscape, geology, obstacles and locally available materials, not to mention the cultural navigation required to cross boundaries and tribal areas. It is over simplistic to settle on a “fix all” remedy for this question. In my opinion, a variety of tested and untested methods may have been used to negotiate the route. It is clear that a permanent track way of laid timber or other materials would be an enormous drain on human and material resources. That said, I can foresee the need for stretches of well engineered permanent track ways to solve landscape obstacles such as steep slopes, wet ground, or excessively stony ground. It may have even been necessary to modify some of these areas with permanent landscaping or shaping. However, we have shown, that in flattish or mildly sloping areas of grassland, a well designed sled could be used alone to transport a bluestone. All of the methods require sufficient numbers to achieve more efficiency, and although our teams ranged from 40 to 150 people of all ages, if we doubled or trebled that number, and they were trained, fit and active people, I suspect a good mileage could be achieved every day.
The question of sleeper “kits” has been raised by this experiment. The production of well shaped, lightweight sleepers that would be easy to lift and carry, would enable a slow walking pace to be maintained across more problematic land, although this would require extra teams of movers to achieve a flowing placement of the movable track way ahead of the sled.
Professional pulling teams would improve efficiency dramatically. In this experiment, we used a traditional “Tug O War” methodology to pull, facing backward. Appropriate harness technology exists from this period in the form of rucksack frames and cordage to produce well fitting harnesses that would allow any number of pullers to be attached to the main ropes facing forward, using their body weight to move the stone, and their arms to maintain rhythm and drive. It would be really interesting to try this methodology with teams of physically strong and fit people who are used to working hard for sustained periods (sports teams etc).
However the teams were formed, whether from locally recruited people, or by permanent teams that moved with the stone across the landscape, what is clear is the need for a substantial and sophisticated support framework that would shelter and feed them during their journey. Perhaps tribal teams took over from each other at cultural/geographical boundaries, or the permanent team was supported by those diverse tribal communities. What is clear, is the level of communication and cultural bonding that would have been required to take 80 such stones across 120 miles of landscape.
The initial design and concept of the bluestone Phase at Stonehenge also has a direct bearing on the methods used to move the stones. If the project was conceived as the movement of 80 stones to form a single monument, then I suspect, the landscape engineering and track way manufacture would be a primary focus in order to move the stones as efficiently as possible. On this scale, I could envisage rest stops, semi permanent shelters, timber harvesting and processing areas, landscaping, bridge building etc. If however, the project grew from small beginnings, and developed over time, then the initial investment in engineering and material gathering would not have seemed worthwhile, and solutions may have been more contingent.
By accident, the notched skis of our sled worked very well across most surfaces (apart from sleepers with 800 mm spacing and above). The flexibility of the skis, their ability to move independently of each other and their location with three box frames, ensured that they never became disengaged from the frames entirely. On the one occasion when they became entangled with a short length of timber and crossed, they were simply pulled apart and the pulling continued. The split surfaces were placed toward the ground and hewn to remove serious irregularities. During use, these surfaces were compressed and polished by their movement over grass. The width of skis spread the stone weight over a broader area and left no trace on grass and damaged the ground very little in areas of bare earth. It would be worthwhile to make other sets of skis with different profiles in order to see if efficiency could be improved. I could envisage each sled having two or three sets of skis carried with is to tackle specific ground/surface types during a long journey.
Although this experiment set out to test timber track ways, we were all surprised at the performance of the sled on grass alone. Although early spring, the experiment was carried out after a period (1 week) of dry weather. The grass was roughly mown and the ground not prepared in any way. What was surprising was the relative ease with with the sled moved and steered across the ground. The skis became heavily polished with what I assume was a silica sheen from the grass (this could be tested). I suspect that the same tests conducted in late summer, when the grass is long and very dry, would produce even more impressive results.
Julian Richards talks in detail to the public after a successful pull
This project was designed with public engagement in mind. The importance and insight of recruiting members of the public to take part in projects like this cannot be overstated, in terms of monument interpretation, insight and empathy with past cultures and their achievements. It is tempting to only look at the hard facts of engineering feats like this. How heavy the stone is, how far was it pulled, how many people were required to move it, how many trees were felled to produce materials etc, but this ignores the value of these projects to those involved. Even a project of this small scale begins to point to the immeasurable aspects of ancient monument building, such as how it feels to be involved in something greater than oneself, or to help create a monument that will outlast your lifespan, or your children’s, and is larger than any one person or group could ever hope to build. Projects like this can also point to the use of the process to unite factions or cultural groups, or geographical areas in the past. And of course they hint at the social and logistical organisation of societies in the way large groups of people must have been directed to achieve these feats.
And, although hard data may suffer as a result (in terms of bio-metrics), the value including the public in this kind of project was clearly demonstrated by the hundreds of people who voiced their newly found appreciation of those ancient builders. In their minds, this project was easily extrapolated to bigger stones, larger distances, more people, and other methods.
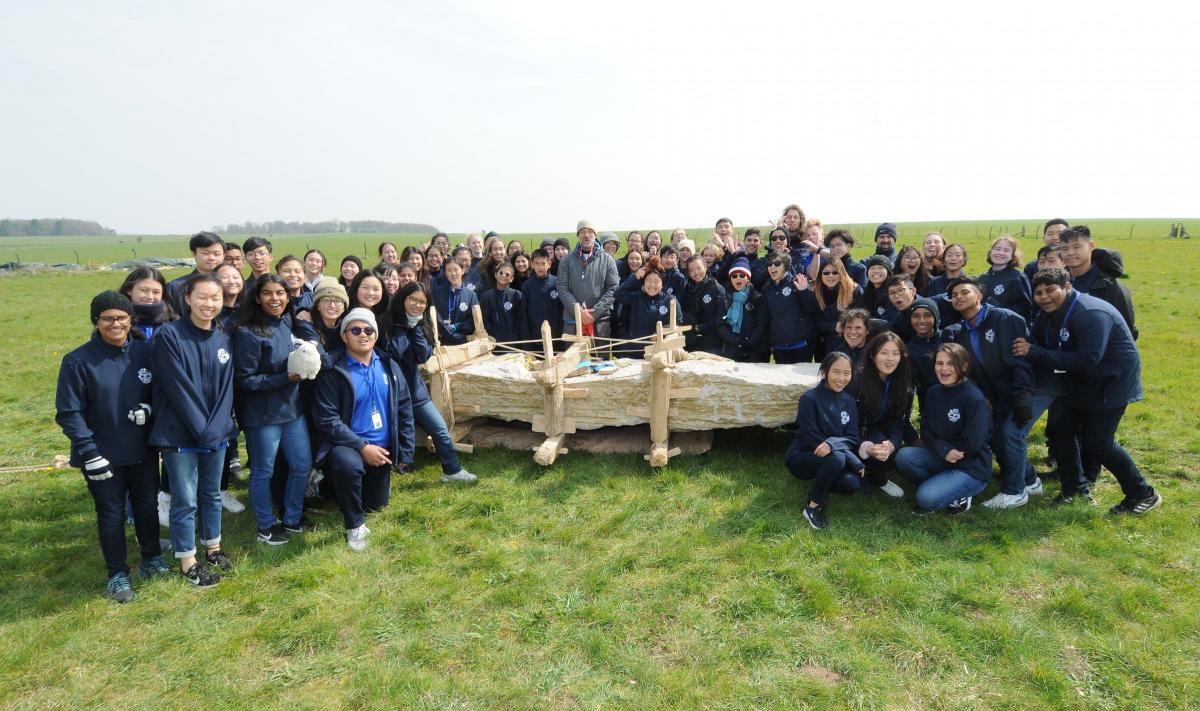
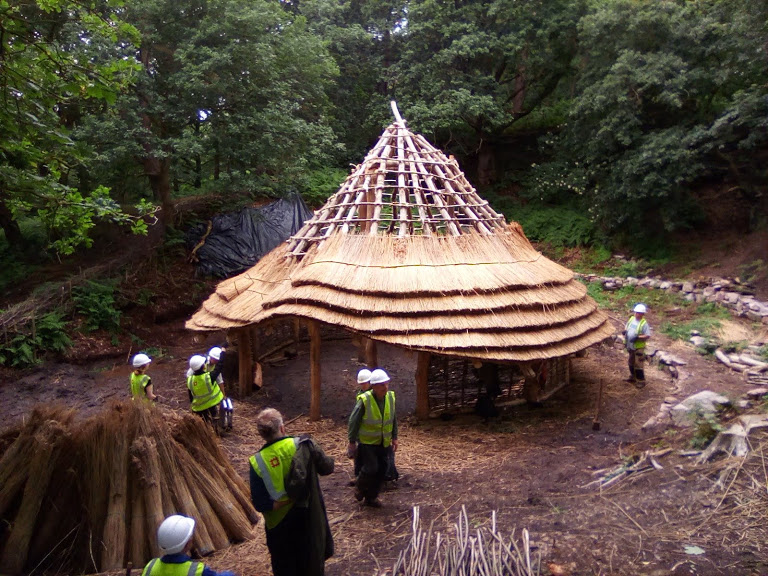
This school group got a real taste of the past – and pulled the monolith with enthusiasm!
Results
To return to our project questions,
1. Is the investment in sled building offset by efficiencies in moving and manoeuvring?
Clearly it is. The construction o a sled is a serious investment in work and time, but the efficiencies it offers over track ways and on grass alone would be invaluable during a monolith pull of over 100 miles.
2. What advantages does a sled offer to the pulling of a monolith over distance?
The sled create options and flexibility when negotiating a landscape. Track ways can be utilised using many local materials from brash, straw, and larger timbers in places where the ground requires it. In flatter areas with grass or bare earth, the sled is a stand alone solution that has good efficiency.
3. What are the problems associated with using a timber sled?
A sled required maintenance over distance. We had two minor issues (the tail of one ski splitting and the end of a frame base splitting to the mortise) that were solved, but over time and rugged landscape, these issues would be multiplied. Route finding and landscaping of obstacles would be essential to make the journey feasible.
4. How do different surfaces affect the efficiency of sled use?
The figures speak for themselves. The most efficient surface was the half split Ash sleepers (12.5 minutes for 1 kilometre) – although this pull resulted in the cracked frame member and was (i would suggest) unsustainable over any distance.
The next fastest time was 17.5 minutes per Km on ash sleepers – but this was equalled by the sled on grass alone! One requires a track way of timbers, the other – nothing but the ground! This is even more impressive when we consider the likelihood of there being a permanent track way from Preseli to Stonehenge and the material/labour that would require. If we assume that was not the case, then the sleeper experiment would require the timbers to be moved in sections to lift the old track and replace it ahead of the sled. Our experiments have shown the significantly slower times of between 71 and 155 minutes per Km.
5. What is the optimum spacing between sleepers for this sled?
For this sled, the optimum distance for sleeper spacing was 700 mm to achieve good speed and minimise the use of sleeper material
6. Are rollers redundant when using a sled?
It is easy to make generalisations in experiments, so I won’t. I can foresee a use for rollers somewhere in a 100 mile journey, but they are certainly not essential to move the sled efficiently and would be a disadvantage on steeper slopes where controlling the movement of a heavy object would be paramount. What we have successfully shown however, is that no rollers or sleepers are required to efficiently move the sled on grass in winter.
7. What are the issues associated with pulling the sled across slopes, up slopes, down slopes?
The main issues of pulling up and down slope seemed to centre on the slewing of the sled away from its intended course. I suspect on steeper gradients, brake ropes and lateral stabilisation ropes would be required to control these movements. Again, the usefulness of a box frames come into their own for attaching such ropes without interrupting the underside of the stone and skis.
Next?
These are preliminary results and are general. I have more work to do on the data I took, but in general, the experiments have thrown up further questions and suggestions. An obvious next step would be to explore the potential routes from Preseli to Stonehenge and to examine the extremes of landscape obstacles on those potential routes. A meaningful experiment would be to attempt to negotiate those features with a stone of the right dimensions and weight – knowing what we now know.
More experiments would include serious refinements of the pulling system over distance. A heavy object can be moved inefficiently over short distances, but it takes refinement to be efficient over distance. I would like to see the use of trained teams, using appropriate harness technology while pulling forward (like a truck pull in Worlds Strongest Man).
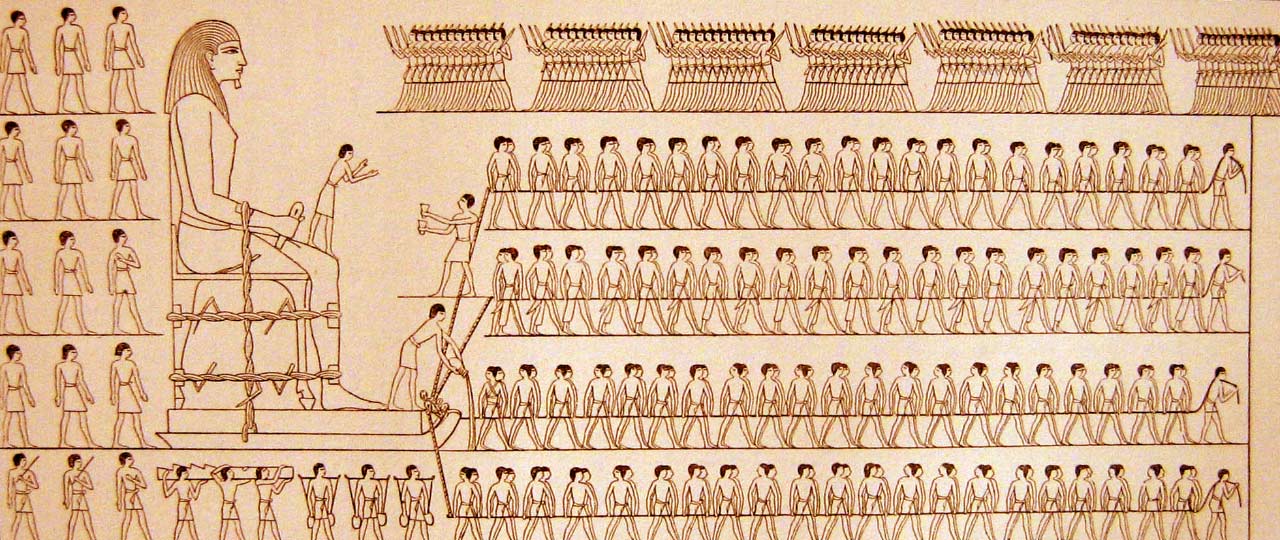
I would also like to test a very wide variety of materials as potential track ways over different ground types. Straw, brash, hay, bracken, heather, to name a few, might offer lightweight and easily transportable “track ways” rather than the persisting notion of large and heavy timbers. It is interesting to note that the few pictorial representations we have of heavy objects being moved by sled in the past (on flat ground) are not shown to be on sleepers or rollers.
The Djehutihotep depiction of a sled in use to move a large statueSlab 47 Depiction from Nineveh showing the transport by sled of a lard statue. Small pieces of material (moved by individuals) are placed longitudinally before the sled to form a track way.
Many thanks to English Heritage, their wonderful and committed volunteers, Julian Richards for his knowledge support and enthusiasm, and of course to the may hundreds of people who came and pulled the sled!
This week will be our last official week before the summer break. Our focus remains on the thatching task and the construction of furniture for the building interior.
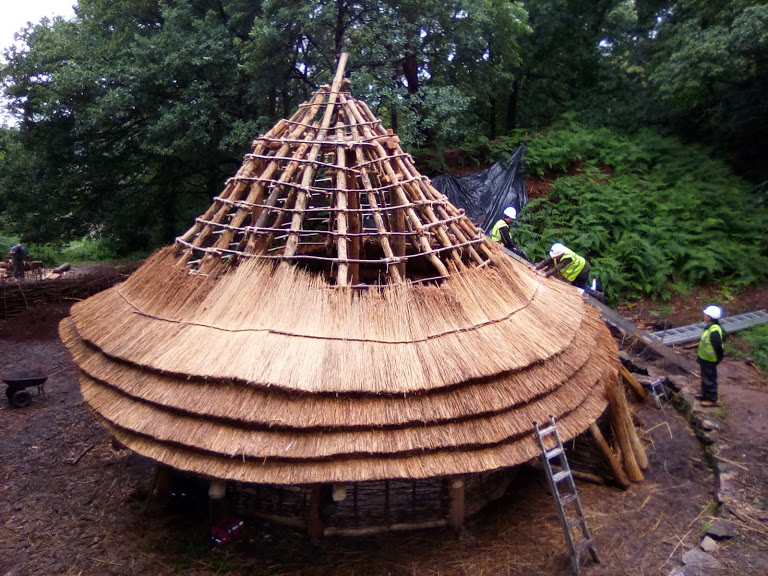
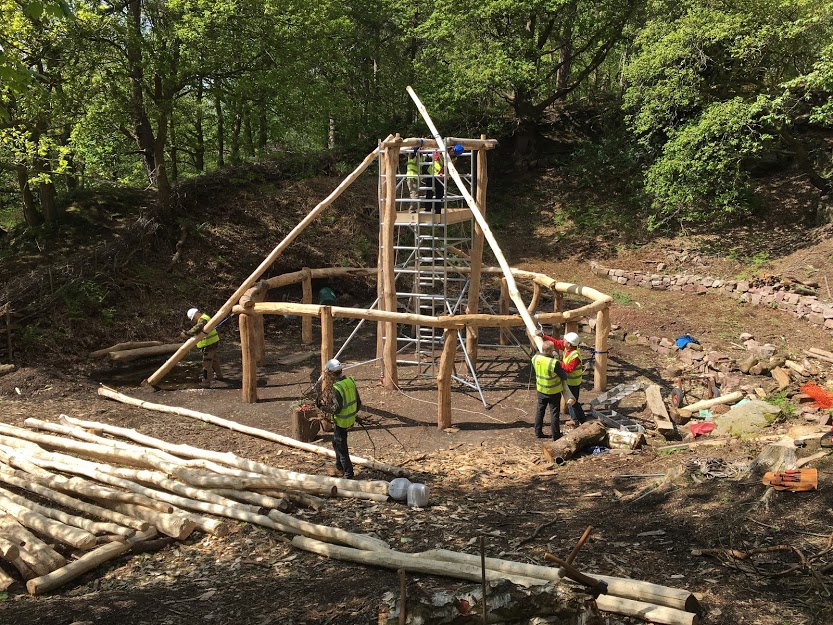
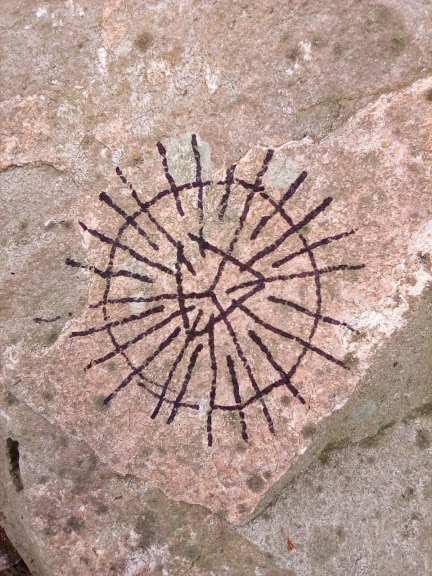
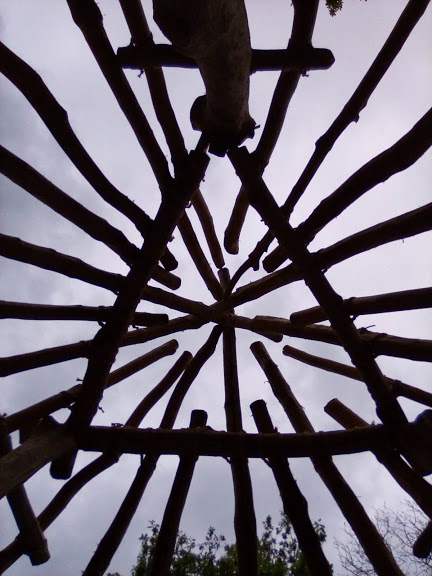
The first task this week is to “solve” the issue of the thatch overlying the projecting purlins of the roof structure. From the very beginning of this project (18 months before we started building!) the impact of the structure on our ability to thatch it was of concern. The issue stems from the transition of roughly circular walls (constrained by the posthole evidence from House 6) to a definitely tetrahedron roof apex (in this case constrained by the model making solutions to the internal post hole evidence – and my structural solutions to those patterns). I have stated many times during this project, that the look of this building is based on my interpretations of the evidence. Different builders may have found solutions that I did not, but, given by extensive trial and error model phase, the triangular purlins just below the roof apex presented a sound and interesting solution to the available posthole evidence. The question was always “how do we transition a conical roof base to a pyramidal roof top without creating weaknesses or issues in the thatch roof covering. More specifically, how do we overcome the slightly projecting purlin ends without creating holes in our thatch?
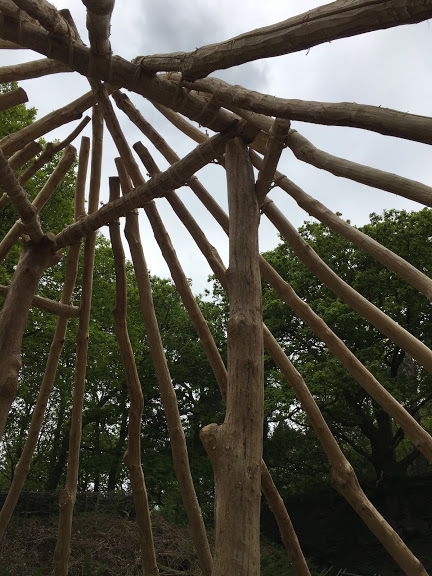
The first part of this process was to cunningly avoid the formation of corners at these points by carefully positioning the rafters either side of the purlin ends. We also chose specific rafters with bends – or knuckles, to change the angle of the roof pitch ant these points – and to maintain the overall roof line. Remember, 25 rafters had to meet at the top of the roof – despite their roof angles ranging from 45 degrees to over 50 degrees in places (not an easy task). The result is a roof frame that has a circular circumference, that blends into three discrete flat sides with rounded corners, and finishes at a regular tetrahedron top. In terms of thatching, the issues all centre on the angle of thatch running past these projecting purlins. Reed is not a very flexible material and will break if over stressed. The temptation to run over the purlin ends with the thatch had the potential to create issues of broken thatch and leaks. The rafters above the purlin corners changed angles through their natural shapes to reach the imaginary centre of the roof apex. So what we needed was to change the angle of the thatched roof at these three discrete points – to allow the thatch to run smoothly beyond them and so avoid broken or disrupted thatch.
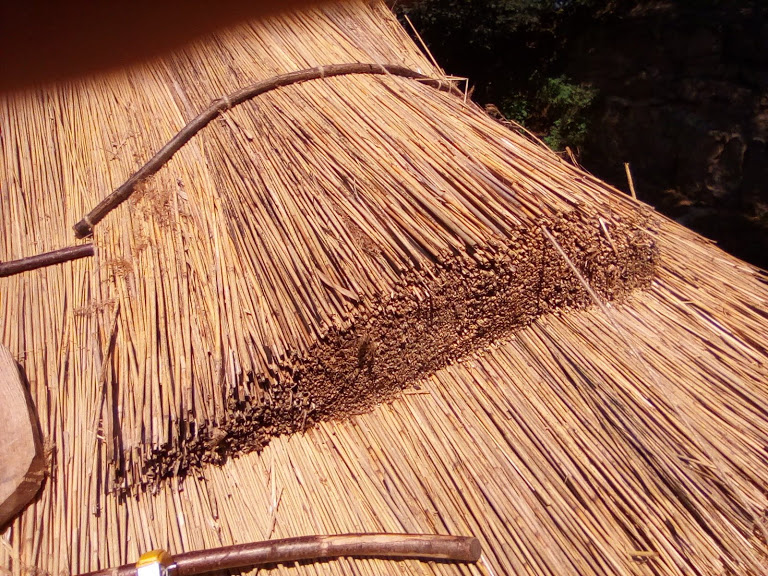
This was achieved (after debate and agreement) by the creation of three thatch blocks (one at each projecting purlin corner) that would adjust the angle of the thatch at those points, thus allowing the next ring of thatch to run beyond the purlins without mishap.
This was done by building up thatch bundles and locking them in position with a short sway. The thatch was cut short to prevent it riding up and over the purlins.
Once in position, these three “bolsters” were then covered with the next layer of thatch – allowing the reed to adjust to the angle of the roof as it changed from the flatter areas to the purlin corners.
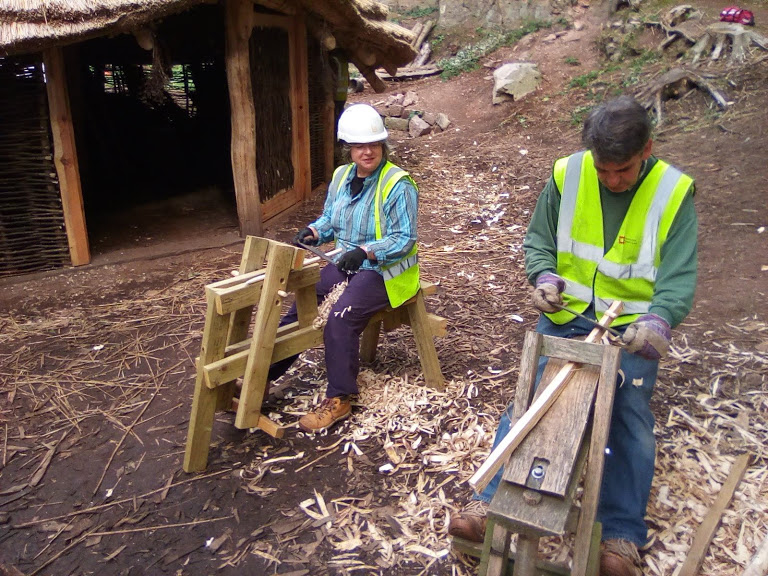
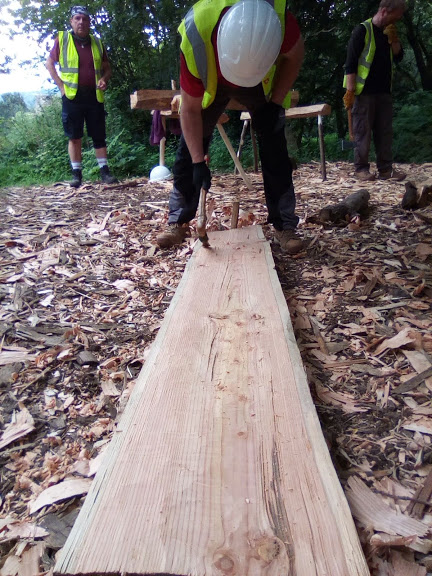
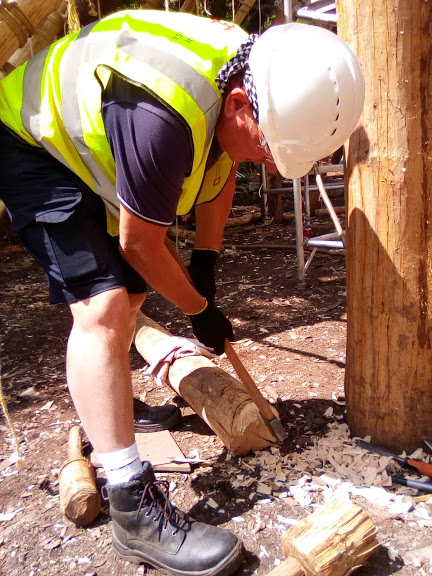
Furniture production is in full swing this week. A team is concentrating on splitting and shaping planks for the first interpretation of a bed.
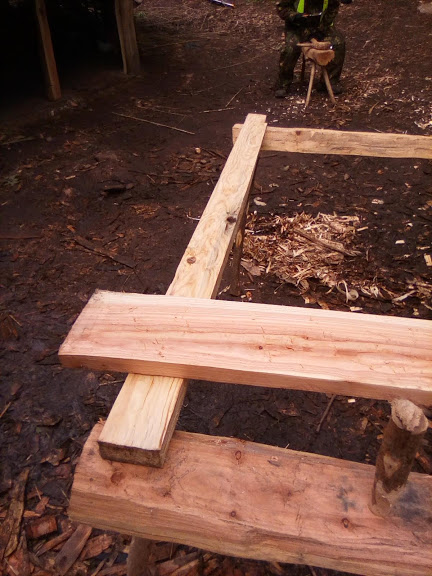
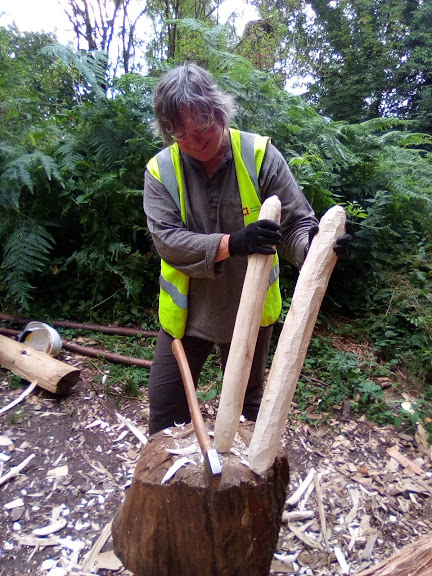
Edwin has produced two trestles using appropriate techniques to aid the manufacture of the door frames and doors. It is this aspect of projects like this that interest me. Edwin saw a need to make the carpentry tasks more efficient, and using suitable techniques and materials, produced the equipment to enable it. There is of course, no direct evidence of timber working trestles from the Bronze Age in the UK, but, given the complexity of carpentry from elsewhere in the Bronze Age world, I have no doubt they existed. Edwin saw a need, and used the tools he had at hand to produce them, and in line with currently available carpentry evidence- a valid interpretation of the past in my opinion.
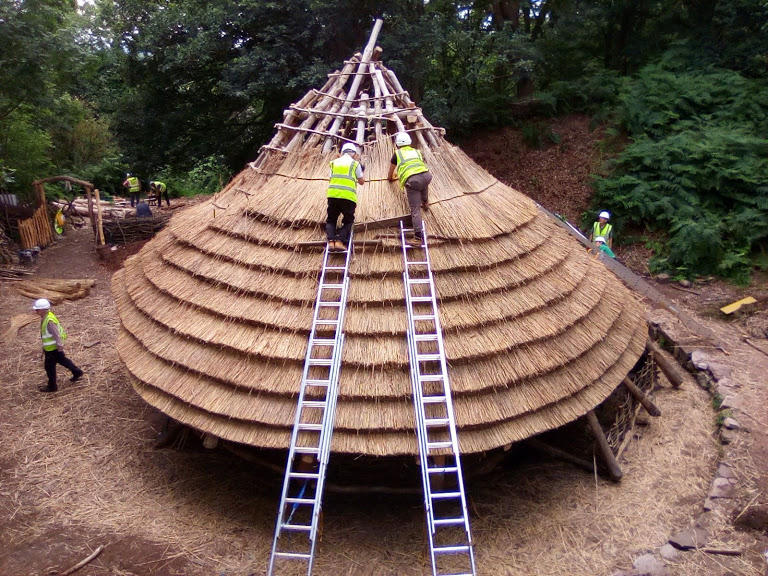
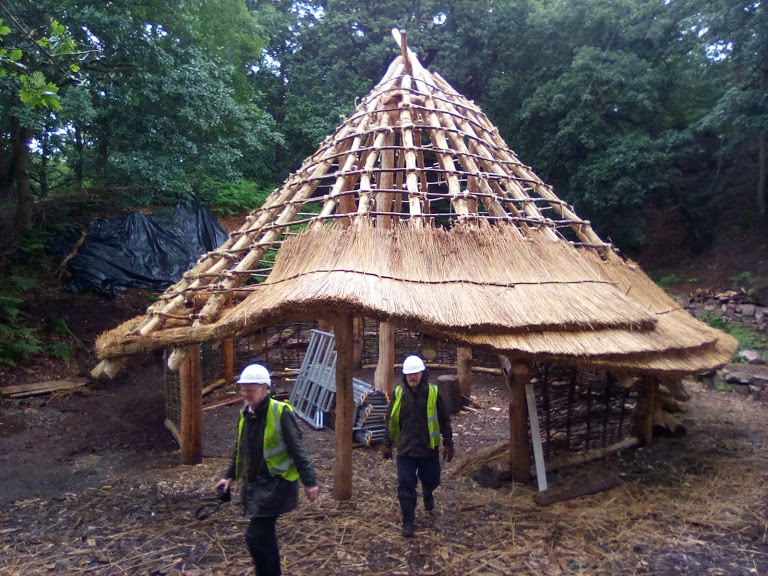
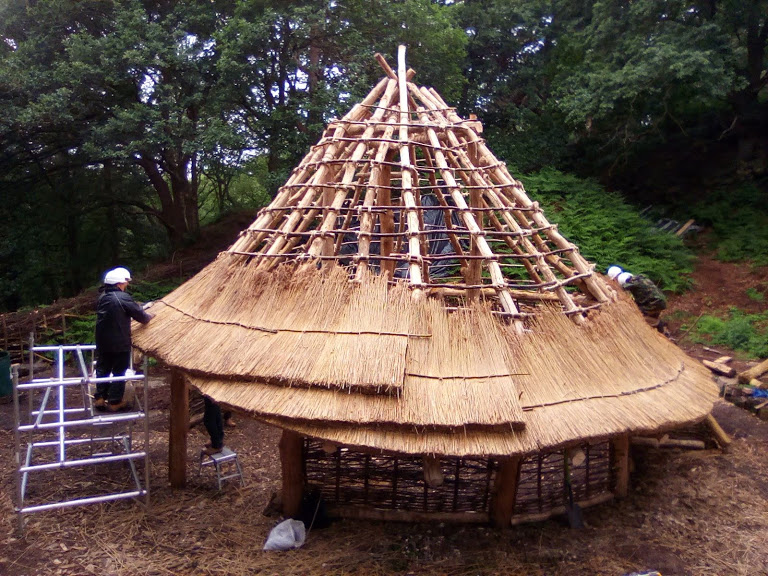
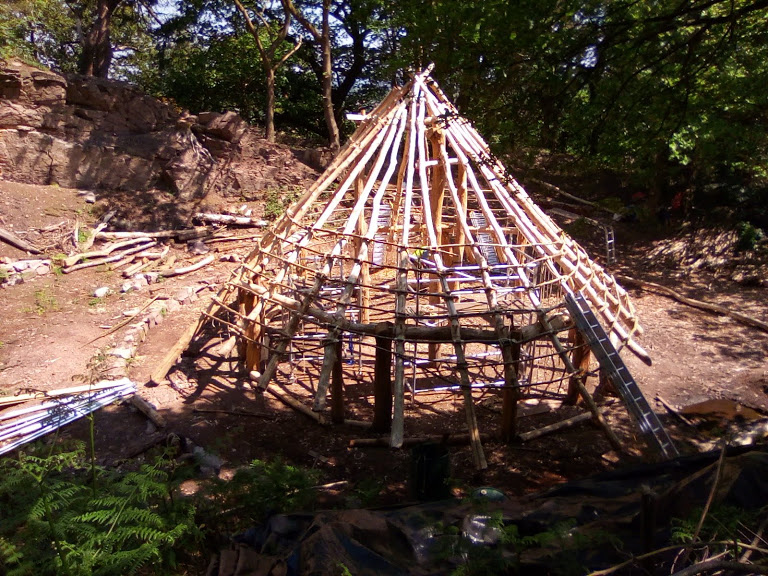
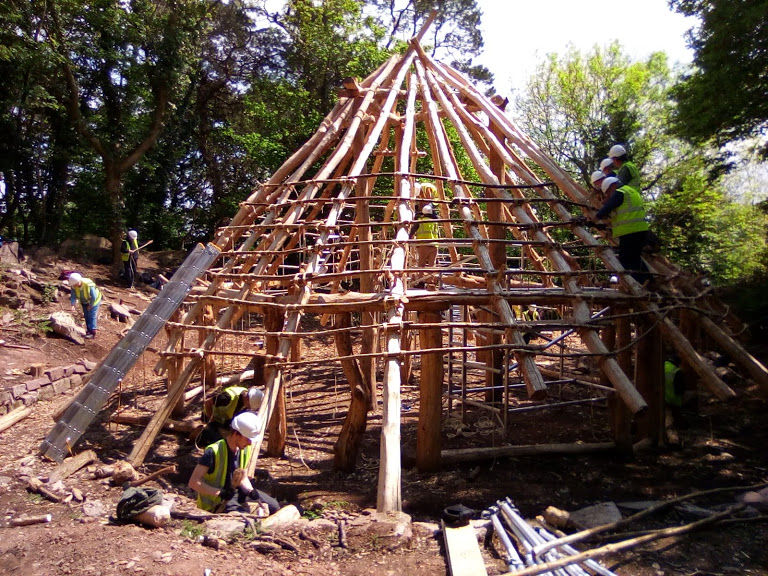
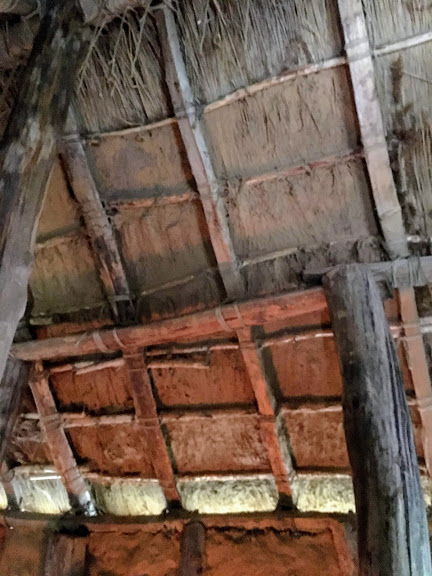
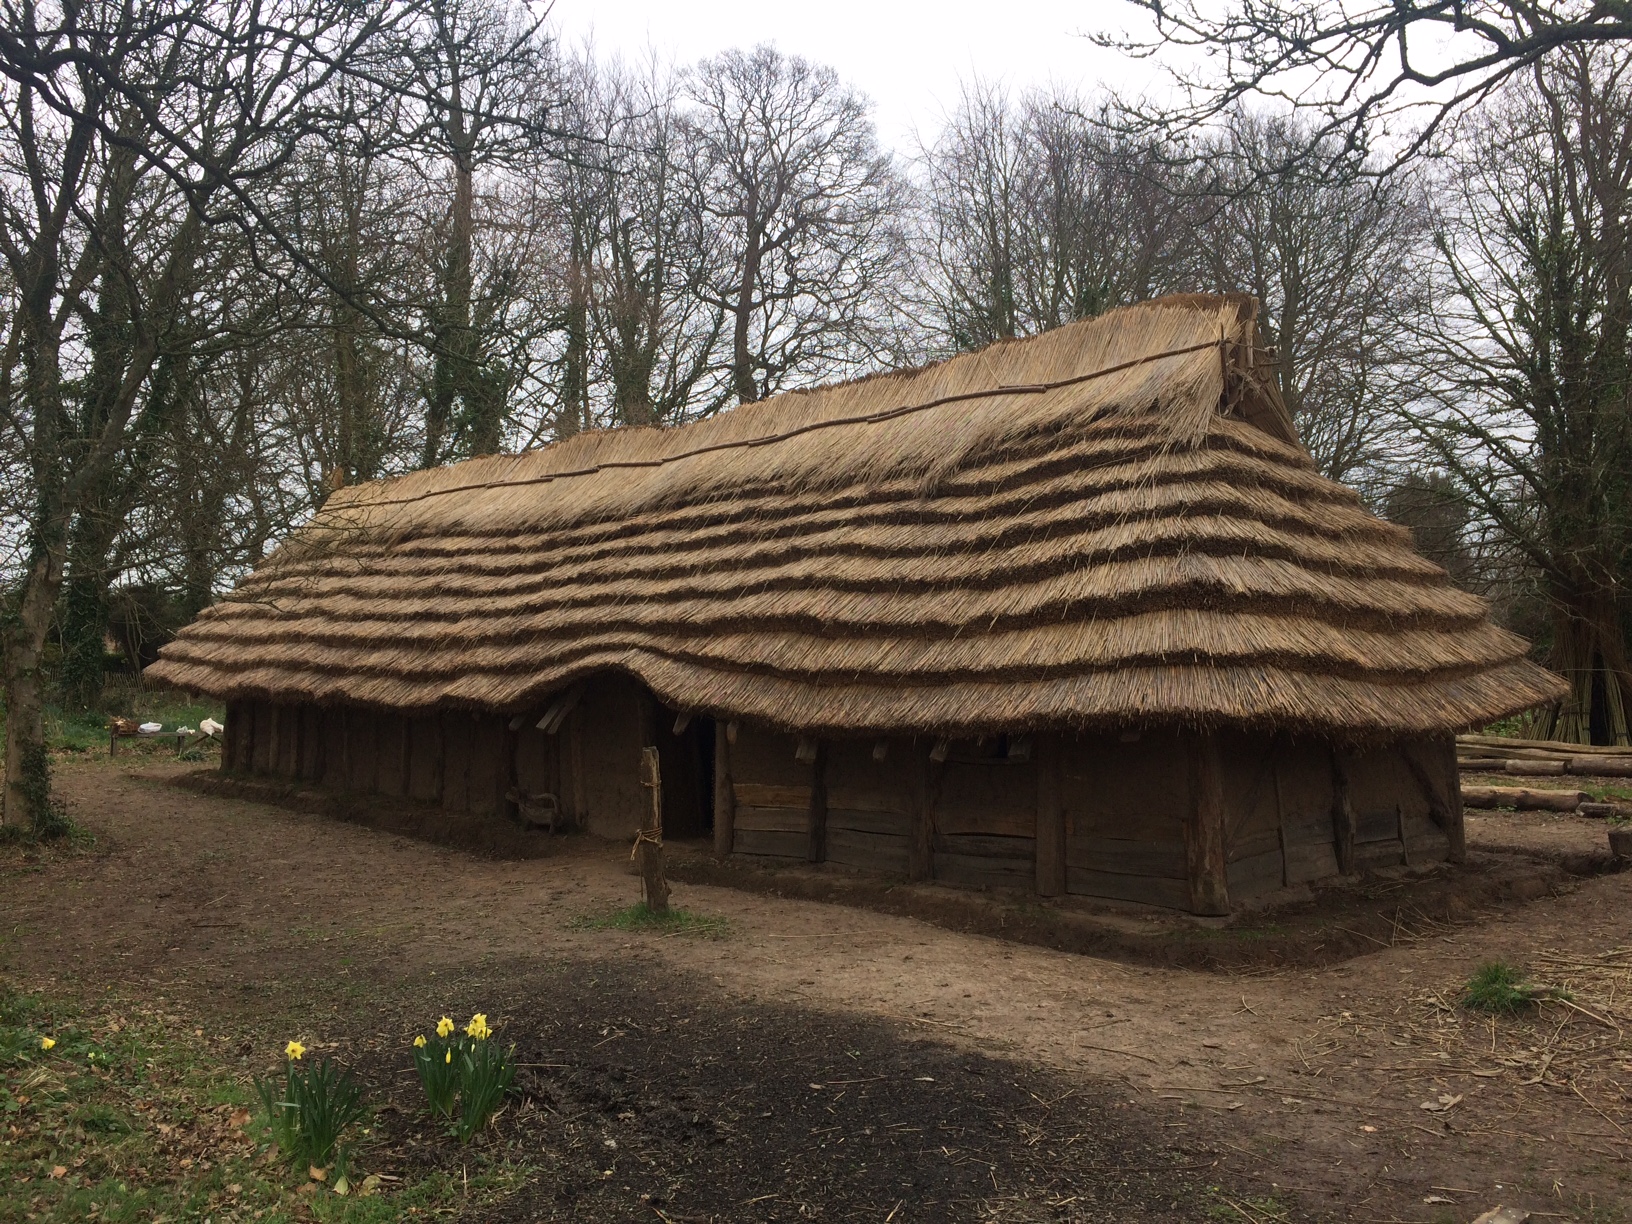
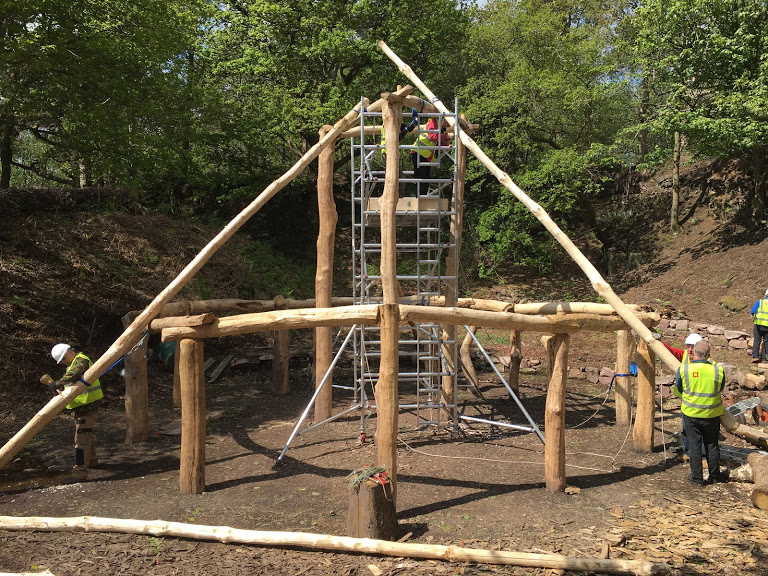
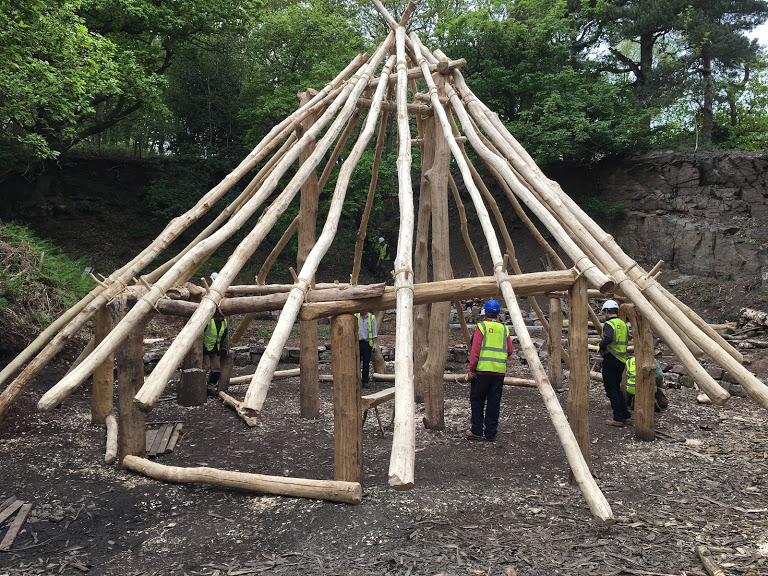
The top portion of the roof is definitely reflecting the triangular structure beneath and the roof is taking on a unique appearance that reflects the complexity of the ground evidence.
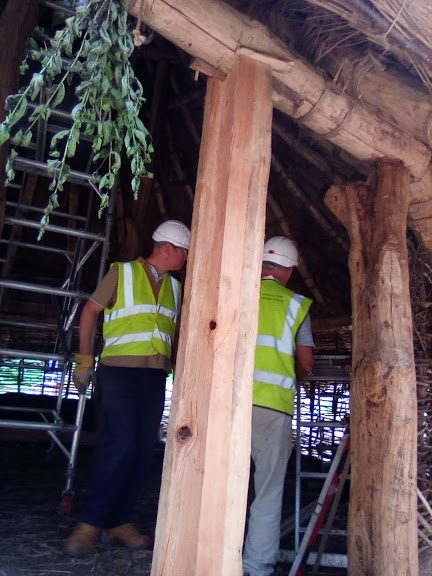
Some of the finishing touches of the building have begun. Window frames hewn from ash and fitted into the exiting woven hazel walls.
Carefully hewn door jambs for the main doors have been jointed into the wall plate and threshold.
The final projecting rafter has also been removed to allow the thatch to ride over the apex of the roof.
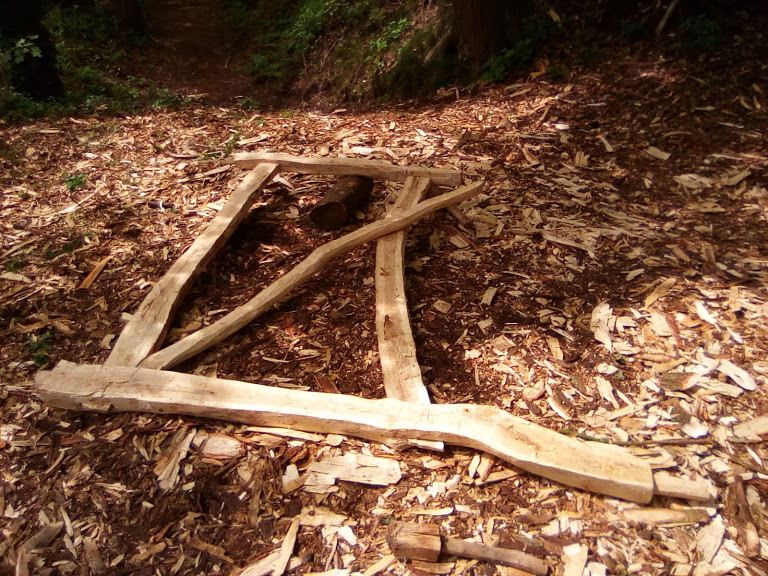
And beautiful planks are being split and hewn in preparation for bed frames and furniture.
Over the last few weeks we have watched the interior of the building becoming gloomier and gloomier as the hole diminished. Now the roof is closed and we await the next visit to complete the thatch cap and make it truly weatherproof.
After a huge effort, the roof is nearly complete. Its beauty is remarkable, and to those who know what they’re looking for, subtly reflects the unique structural solutions we have had to employ to make sense of the archaeological evidence.
After a three week break, the volunteers reunited this morning on the roundhouse project. The weather is forecast as mostly dry this week, which will be a pleasant change from our somewhat torrential last visit.
The focus remains thatching, there are still many layers to apply, but the bulk of the roof area has already been covered. Each higher ring of thatch shortens by a few bundles and so the task will begin to visually speed up before long.
We are rapidly approaching the final stages of this project and there are several tasks we have to get to grips with in the next few visits. One of these tasks is daubing. The earth based covering that will adhere to the wattle walls and make the building weather tight raises several interesting thoughts on this project. The classic notion of daub centres on clay, mixed with fibre (usually cited as dung) to prevent excessive shrinkage and cracking. This is certainly the case in areas where clay is readily available, but in other areas, daub has always been the local ground material mixed with anything organic to prevent shrinkage. Our project will need to test various types of materials and mixes to discover what works best in this environment. We currently have 12 tests, using a variety of materials and proportions. Time will tell which (if any!) of these will be most suitable for the task.
A volunteer team has also begun the task of thinking about – and building some of the interior furnishings for the building. Once again we face the issue of evidence regarding furniture for this period in the British Isles. We have some evidence from the earlier Neolithic period, and we have a range of evidence from drier climates in the Bronze Age, but we lack the definitive “what was in a Bronze Age roundhouse” evidence from the UK.
My solution to this is based on my own individual approach to reconstructions over the years and is open to debate. Some archaeologists would say that a good reconstruction should only showcase the evidence, or suite of evidence we have from that specific site – that we cannot and should not take evidence from other locations and apply it to a specific site based in a specific cultural and geological setting. Although I understand the detail of this argument, for me, this approach is also flawed, and can only ever present the visiting public with a tiny and unrepresentative sample of what life may have looked like in the past. Differences in preservation would result in some reconstructions having nothing in them, while others (in more desiccated parts of the world) would have an abundance of artefacts and furniture. This would inevitably affect the visitor experience and fundamentally their assessment of specific cultures. A lack of internal artefacts would be seen as a lack of sophisticated culture – rather than a lack of evidence.
My approach has always been one of drawing together technology and artefact evidence and combining it with local material evidence to present a fuller picture of how life could have looked in the past. In this way we push the comprehension of visitors into unexpected places and avenues while presenting a far more realistic view of human achievement in the past. It must be done carefully of course, and the key is to fully inform any visitor of the evidence and where it is from.
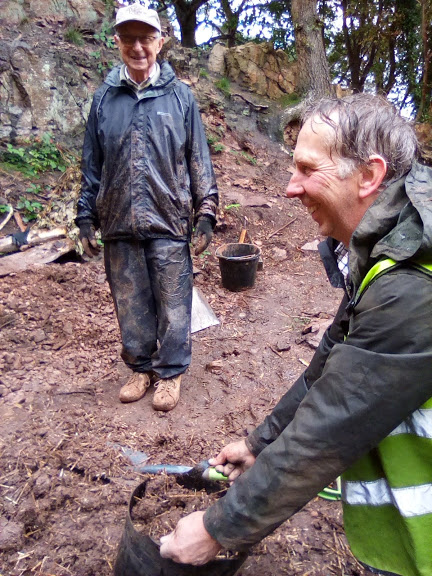
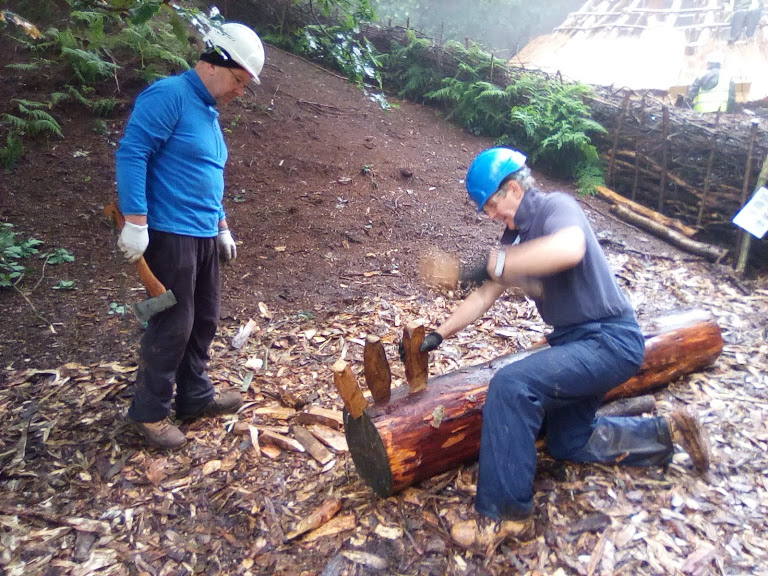
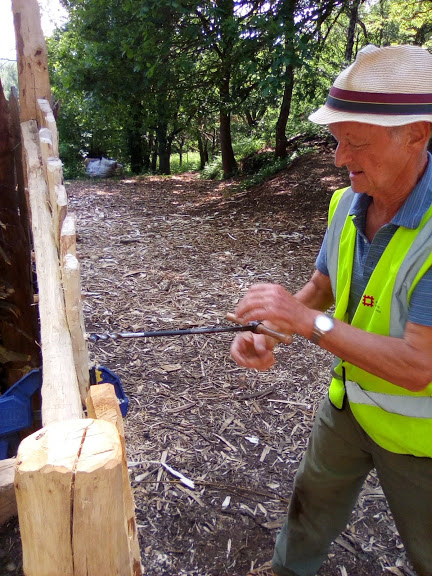
A bronze adze loses the battle with a hidden iron nail in a piece of timber
I have heard it time and time again over the years from members of the public, the (understandable) underestimation of the abilities and technological sophistication of our recent Bronze Age ancestors, let alone our more distant Palaeolithic cousins. The general view of many visitors is that our ancestors were unsophisticated humans who just “got by” in a harsh world they couldn’t really handle. The evidence, wherever we find it (and for any period), shows the contrary. The issue we have here, is the marked lack of organic evidence in the majority of our archaeological record. The Bronze Age in drier environments is full of amazing, detailed and beautifully made objects such as chairs, tables, shelves, colourful visual depictions, nets, baskets, containers, utensils. From nearer at home, a few water logged discoveries from earlier dates give us sophisticated carpentry evidence. The challenge for volunteers on this project is to use that evidence, and their technological know how to produce furniture and fittings for the building. It has to be appropriate, and fulfil the need of a working building.
The volunteers have begun work on a storage unit for the house. This is using some of the remaining larger hazel rods from the build as a framework and will support shelves.
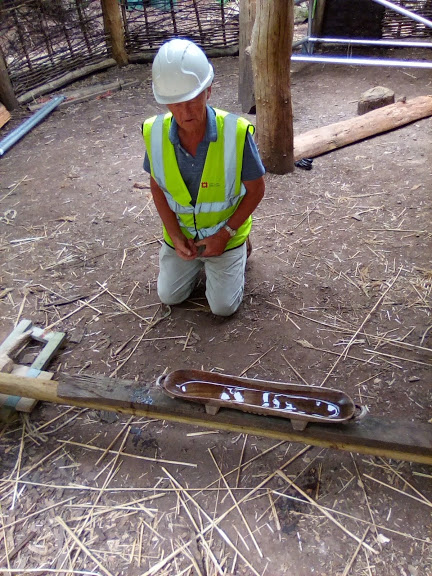
The main door thresholds are also being positioned. A simple water level was employed by Edwin to ensure they sit in the right position, and our final piece of good oak was split to produce a matching pair.
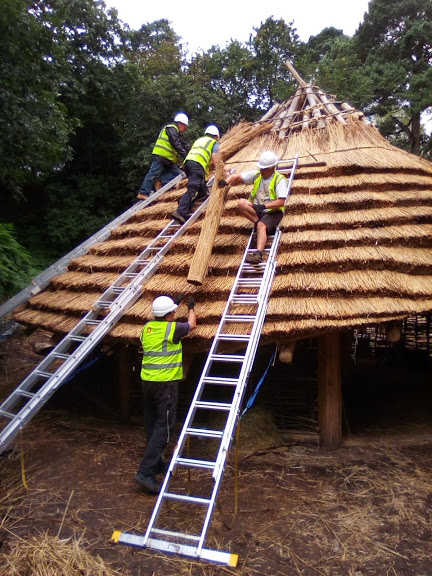
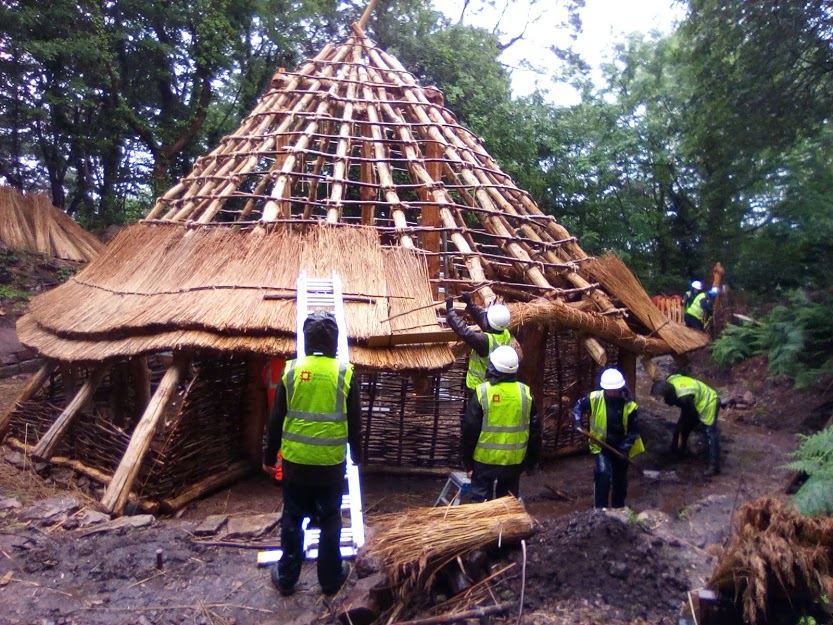
The thatch is beginning to race towards the top of the house. Each thatching team has found a comfortable rhythm makes for a deceptively easy progress. The task is still gruelling though, and in this weeks high humidity levels, particularly draining.
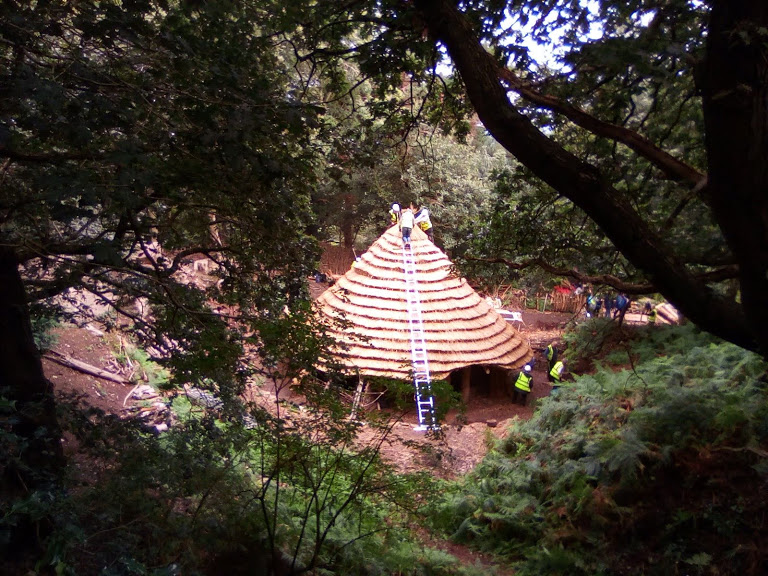
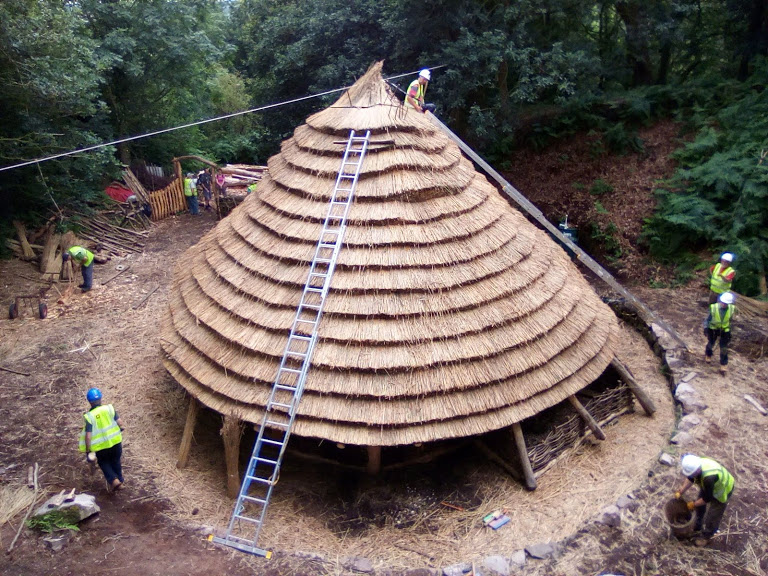
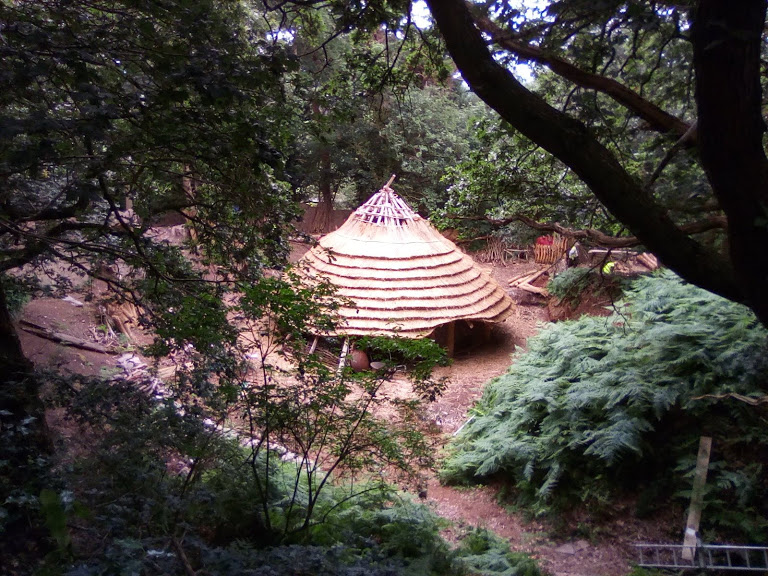
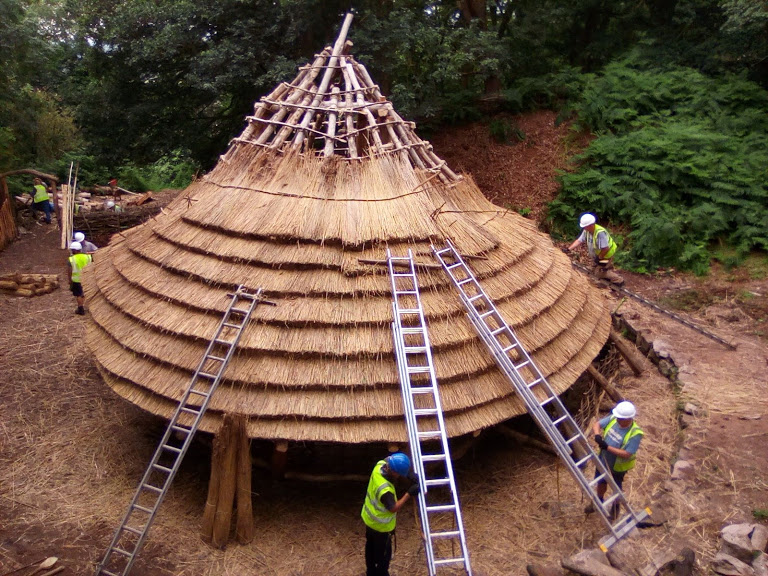
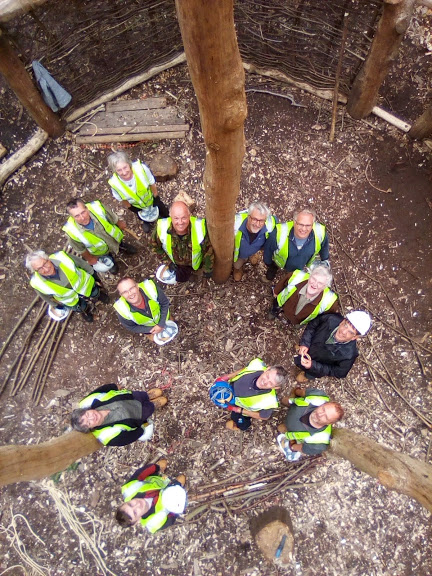
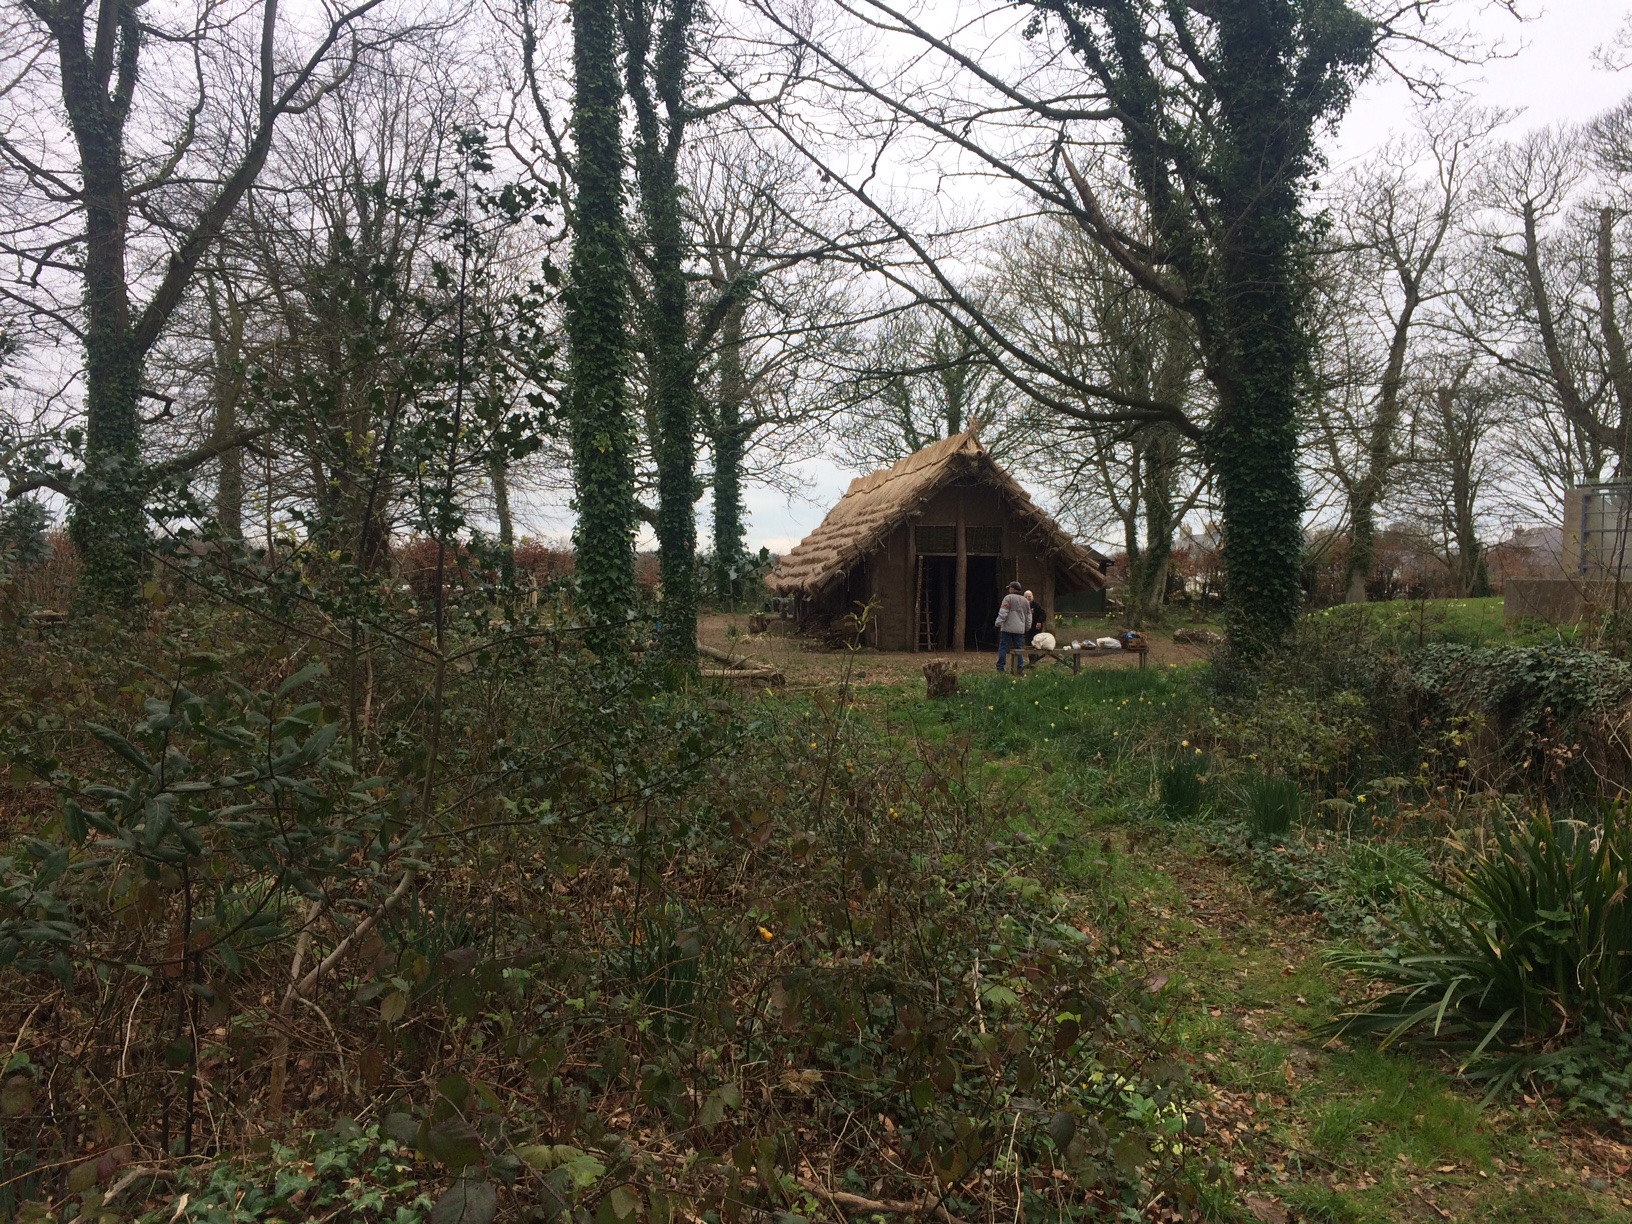
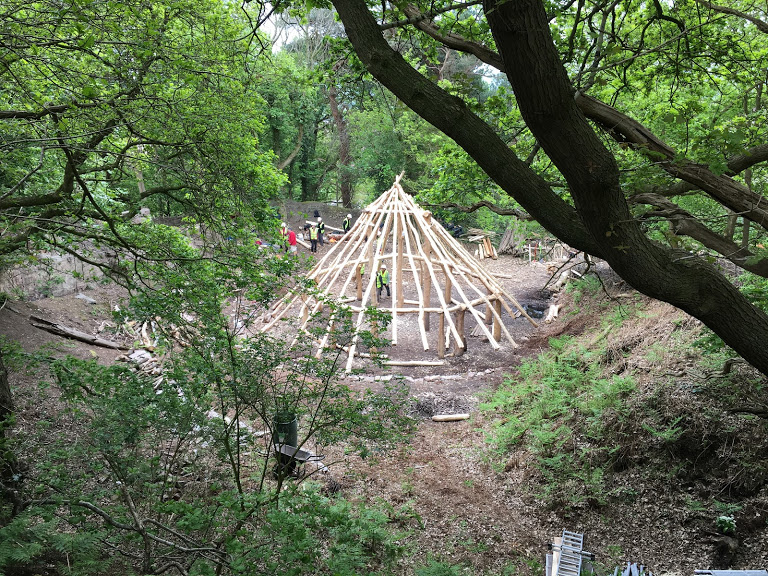
Wow, what an incredible week it’s been again. The building progresses and becomes more beautiful each day. The quarry lip gives us a unique perspective on a build like this – our very own drone view. I have never really appreciated the form of these buildings from a higher viewpoint, it really illustrates the size of the roof and the epic nature of thatching it!
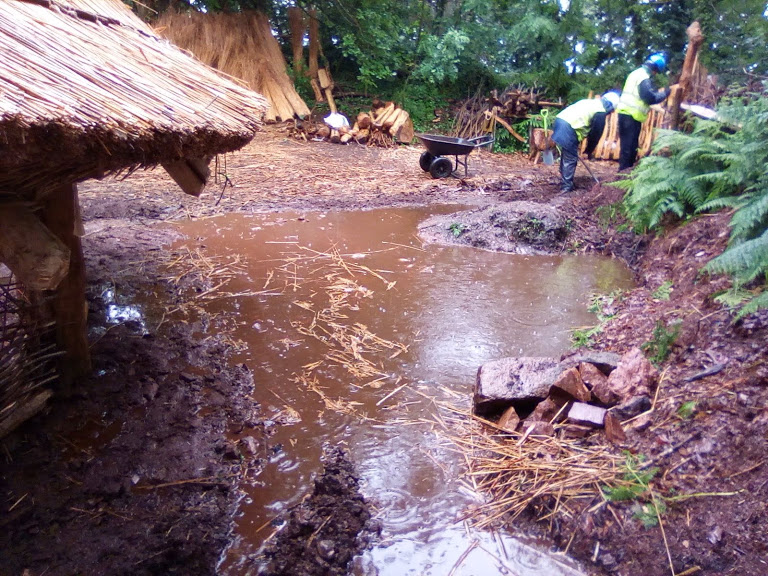
Well, our amazing track record with weather so far on this project has well and truly changed! This week we are forecast torrential rain for three days, and we have certainly had our share of it at Beeston. The aim of this week was to consolidate the thatching methodology with the volunteers and to form those teams that will end up thatching the majority of the roof.
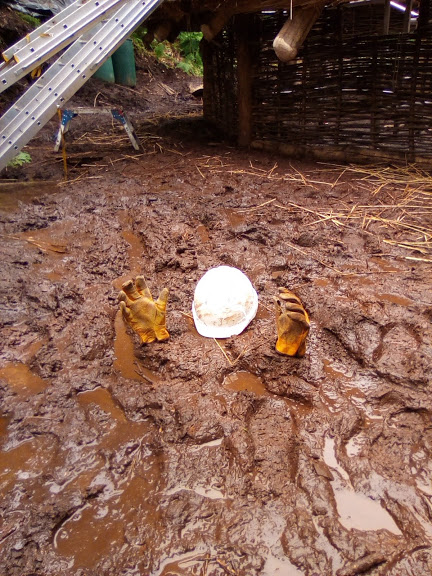
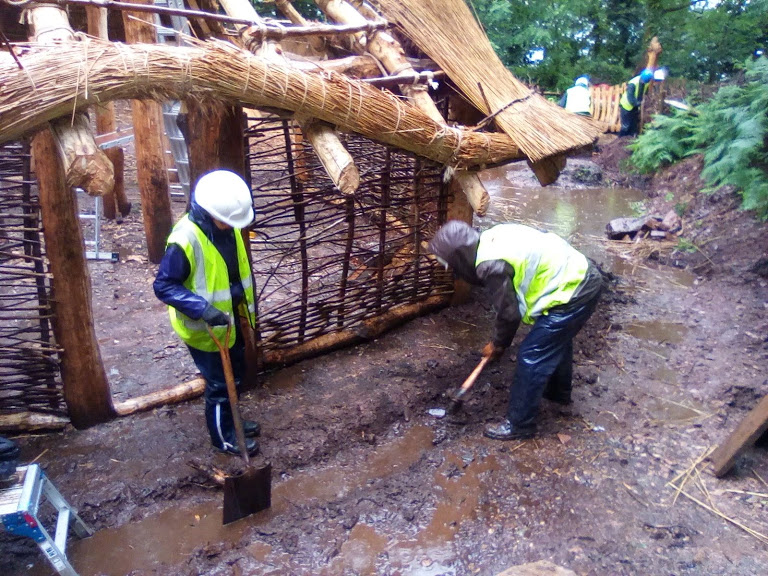
Wet, wet, wet
On Monday, we took advantage of the dry morning (under the threat of looming dark clouds) to get done what we could. The rain then set in as we finished for the day. Tuesday saw torrential rain and our valiant volunteers turning up to see what they could do. We agreed to work until we were soaked and set about thatching and alleviating a serious flood on site. The quarry collects water in conditions like this, so the volunteers dug a drain from the flood to the dead hedge perimeter and we drained the site successfully.
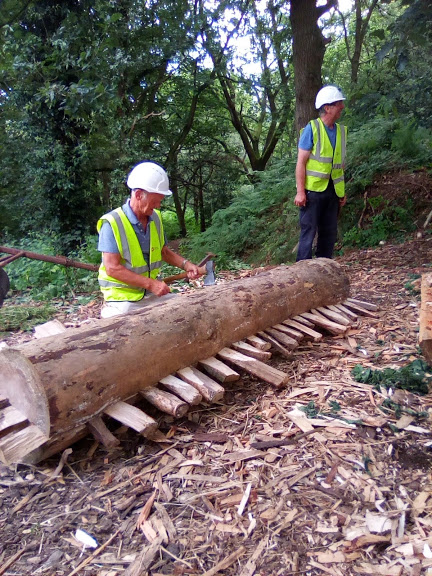
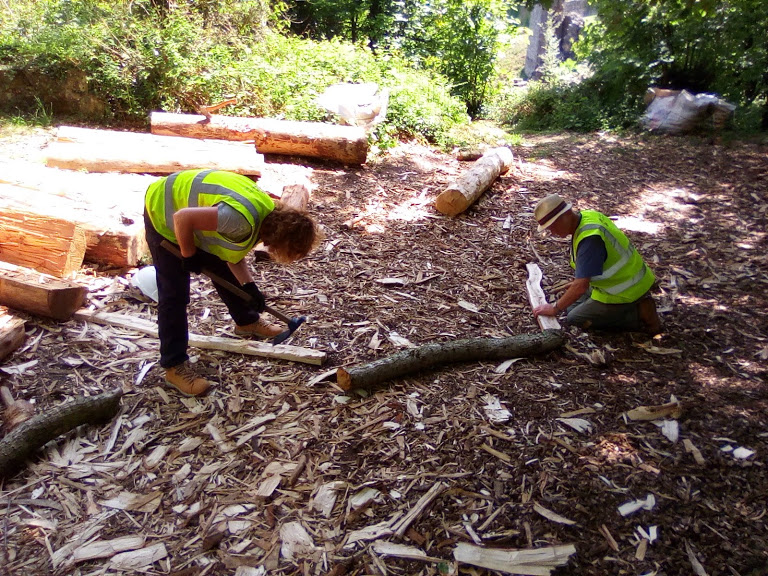
More pine logs are being split to produce timber for furniture making. From next visit onward, while the thatching continues, other volunteers will begin to make furniture and fittings for the house using the split and hewn timbers produced over the last few visits.
Wednesday’s threatened downpour didn’t materialise, and the volunteers took advantage of the drier weather to complete some good thatching. In the first 5 days of thatching, our teams have managed to thatch around 85 horizontal metres of thatch – despite poor weather, difficult access issues at the eave of the building, and the inevitably steep learning curve of mastering something entirely new! This bodes well for the rest of the summer!
Opinions are changing regarding the “Stepped vs Smooth” thatching debate. Culturally, there are numerous ways of thatching a roof – and the volunteers seem to have been almost equally split between the two camps. As the thatch grows, opinions are changing both ways – it remains to be seen what the final decision will be.
Despite the weather this week, the volunteers have pressed on with the tasks at hand, and the thatch grows day by day – gradually blocking out light from the interior. And for the first time, and despite the wet weather, parts of the structural frame remain dry! The roof is beginning to take effect.
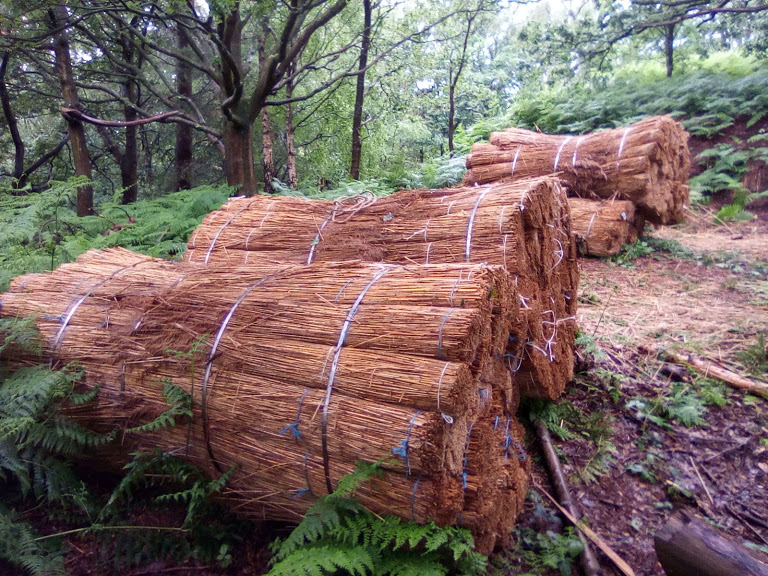
The immense pile of thatch bales is already diminishing; a testament to the growing thatch roof.
So far, Our health and safety record has been very good, but the mud this week led to an unfortunate incident with Dave. His continuous work in heavy mud finally got the better of him and he was lost without trace. We shall miss him and his efforts!
Next time, while the thatch continues, we begin the skilful task of making furniture for the building interior. It will be interesting to see how the volunteers approach this task and what ideas they have!
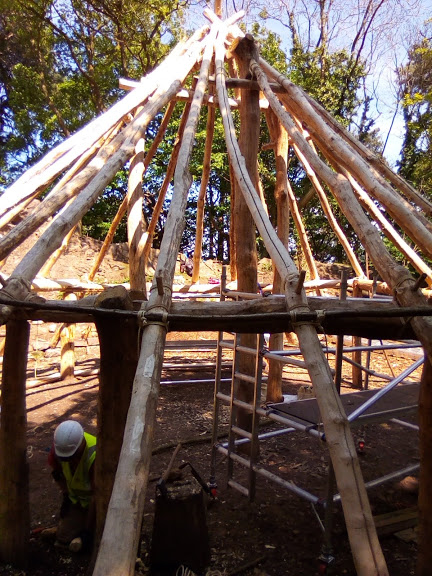
We have returned this week to start the epic task of thatching. Before we start however, we have the final battens to lash into position on the roof. Our two weeks away have given the sisal lashings time to move and it is interesting (if a little frustrating) to see that despite our efforts to stretch the rope (using levers) as we lashed them into position, some of the lashings are once again loose. These will have to be re-tightened before we proceed with the thatching. The conical roof shape allows for a little bit of slippage between the battens and the rafters. They can only slip a small distance before the lashings re-tighten against the rafter, but I would certainly prefer them all to be immobile before we proceed to the next stage.
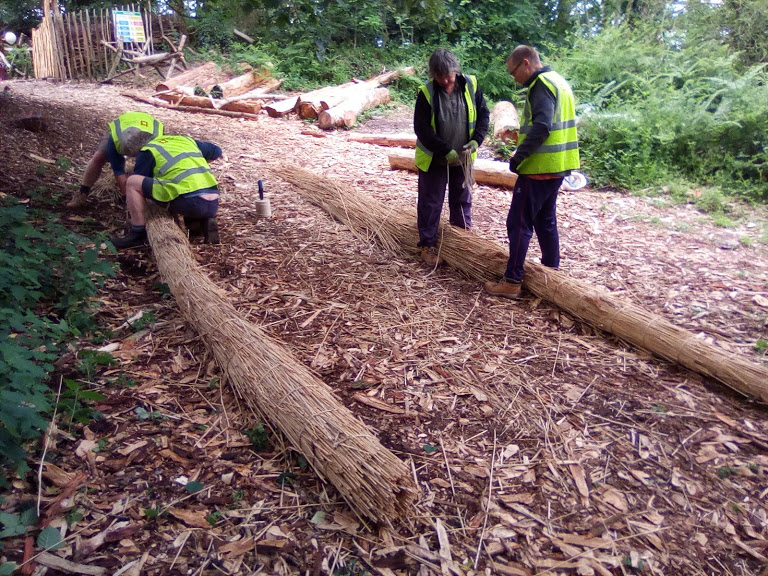
The thatch arrived on Monday. 1100 bundles of water reed that will make this building weatherproof. It was delivered to the base of the site, and on Tuesday, Denis Rowlandson and the volunteers moved the bundles closer to the construction site.
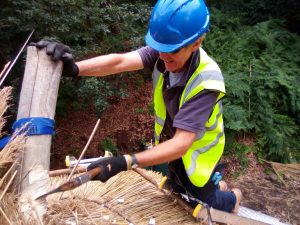
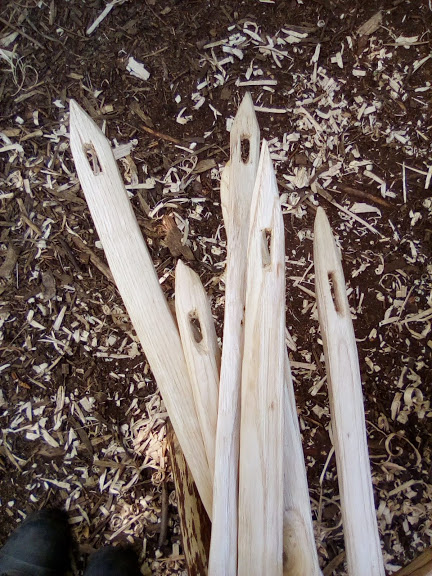
Other jobs this week include the construction of wall frames. The volunteers have been working on fitting the sill beams between the posts over the last couple of visits. These timbers form the foundation of our wattle walls. Each sill has been augured at roughly 360 mm intervals to provide holes into which the zales (uprights) are then driven. Our hazel weavers are then pushed into place to build a solid wall of woven material. As with all jobs on this project, it sounds deceptively simple – and it is deceptive. The construction of a solid woven wall (hurdle) is an art and requires an understanding of materials, and care and attention to use those materials in the best way. It is crucial that the weavers are bent around the zales – rather than allowing the zales to be displaced by the weavers. If this is done carefully in the first few rows of weaving, the zales effectively become “set” in position and prevent the many issues that can result from misaligned zales higher up.
The wall building stage has also raised questions of things like windows. The vast majority of roundhouse reconstructions do not utilise windows. This has always been a bit of a puzzle to me. I am not voicing a preference for windows in any way, but experimentally they must be an option? As far as I am aware, there is no evidence for or against them in the archaeological record (in western Europe at this time), and yet they never seem to crop up in reconstructions. My logic concerning windows centres on evidence from the Neolithic Period that clearly demonstrates the ability of ancient builders to block holes in buildings (doorways) using well carpentered doors. The surviving Neolithic door from Zurich clearly demonstrates this, but is a stand alone artefact from a waterlogged environment. My logic then, is that if the capability and sophistication in techniques existed to block large openings such as doorways, why do we assume that smaller opening in walls (windows) were not a “thing”? The ability to open an close an opening in a wall immediately allows access to free light, and extends the use of a building interior. Even with long overhanging eaves, the reflected light from a window offers free light into a building. Obviously, there are unknown cultural factors at play here too. But in principle, the technology existed, and the potential need existed for some kind of wall openings in bronze age buildings.
Volunteer Dave is working on developing an “annex” that sits beneath three rafters that touch the floor at the back of the building. Dave’s thought process is entirely valid – and centres on the use of a space that is created by some of the rafters extending beyond their “designed” eave length. I have certainly utilised this space in other buildings in the past. In one Iron Age building, we turned this space into a wood store and a pen for housing our Soay sheep. What makes this experiment interesting is the that access to this space is via the main building – effectively bringing it into the main floor plan rather than as an covered outside space. It will be interesting to see how it performs in use over the next few years. Again this raises the ongoing issues of what we think these buildings look like, and again, it reiterates the issue of trends, fashions and accepted norms in experimental reconstructions like this. We have all seen many roundhouses in our time, and they all follow a very similar format, despite the fact that their original evidence reflects potentially very different cultural traditions, specific local needs, and the nature of locally available raw materials. I am very happy that the volunteers on this project are brave enough to try things out, in the spirit of discovery that projects like these should embrace. At the end of the day, only through use will these modifications show themselves to be potentially valid or potentially flawed. They can be adjusted, improved or scrapped altogether, and as long as we are not directly contradicting available evidence, they are worthwhile.
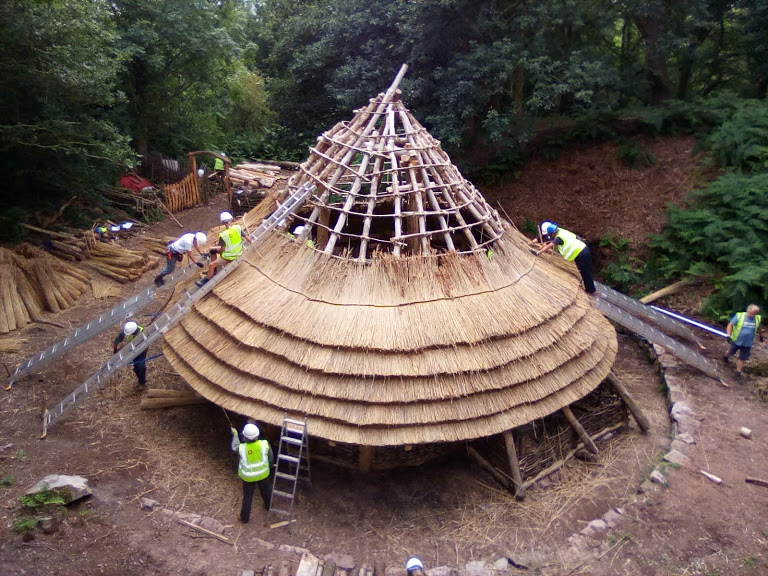
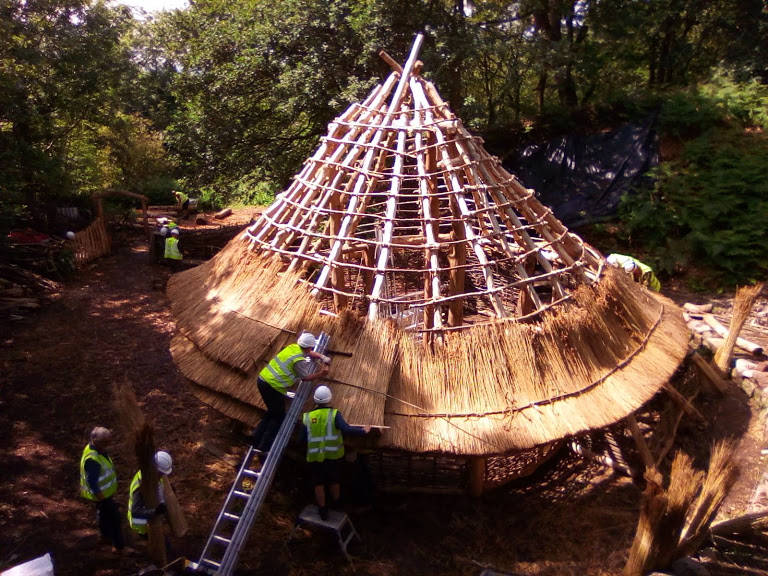
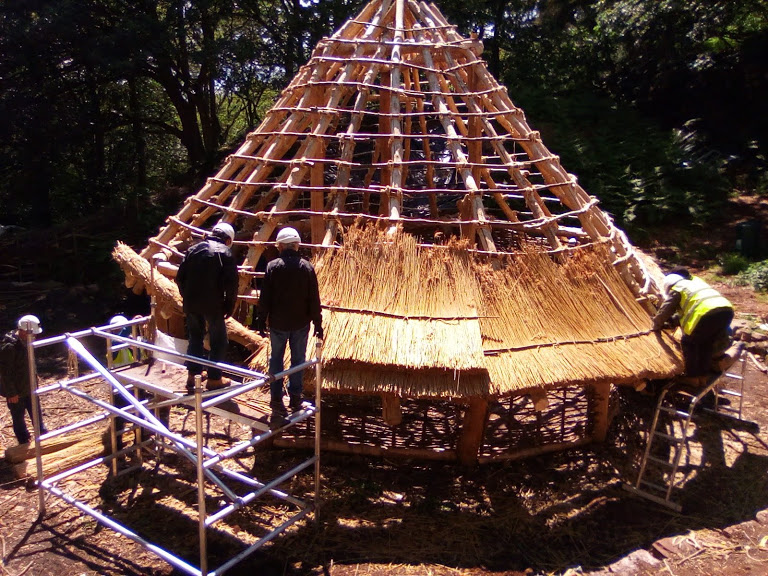
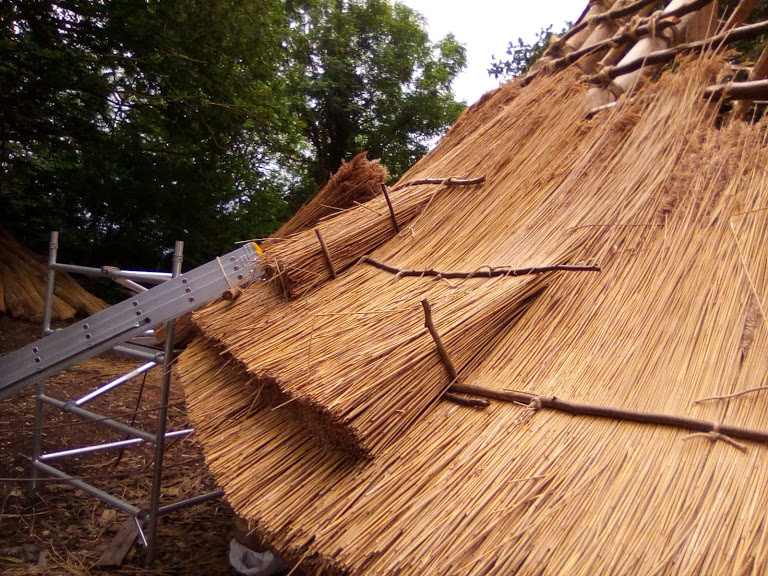
Thatching has begun this week. This task – like so many before, is superficially straightforward, but is an art in its own right. The volunteers understand the theory and the practicalities of thatching, they now have to quickly find their own rhythm and refinements to tackle the massive task ahead of them. The decision has been made by general consensus to start the roof in visible layers (to keep a close eye on the thickness of each layer), but with a view to possibly grading the roof to a smooth finish later on. The task is awkward, working in difficult positions, managing bundles of thatch that want to follow the rules of gravity, and ensuring the tension of each tie is good.
The bottom layers of thatch are the most awkward to do. Not only is the process alien to the volunteers, but it is difficult to apply enough pressure to the sway with awkward access solutions.
There are many ways to thatch a roof, depending on the materials and cultural traditions of the area. Our roof uses hazel sways (thin hazel rods) to clamp each layer of thatch in place with hemp or jute ties. The layers are put on according to the battens beneath – the aim being to produce a relatively thin roof (certainly in modern thatching terms) that will be weather proof, but crucially, will allow smoke to escape through the thatch efficiently.
The layers are built up in concentric layers to keep a close eye on this thickness. Once it is finished the visible steps can be left in position or graded into each other to form a more recognisable finish.
The next few project weeks will focus on this epic task – and see the frame become a building!
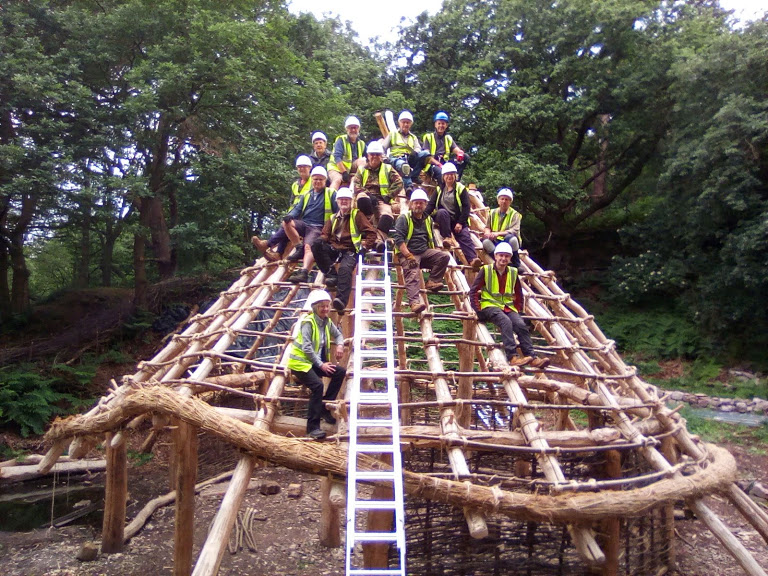
We have returned to a week of glorious sunshine and calm. The building looks beautiful and some of our core volunteers have returned from well earned trips away – the team is whole again.
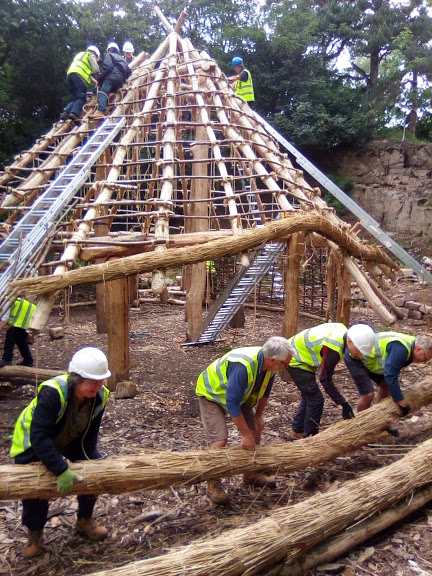
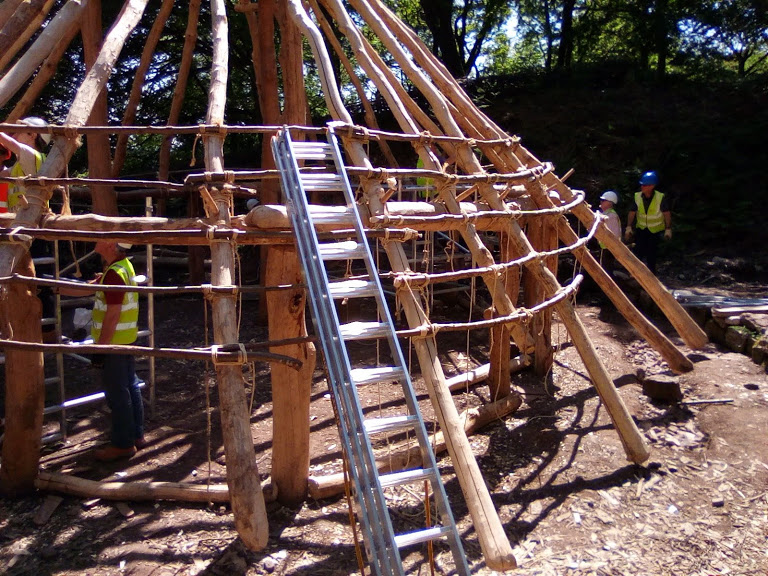
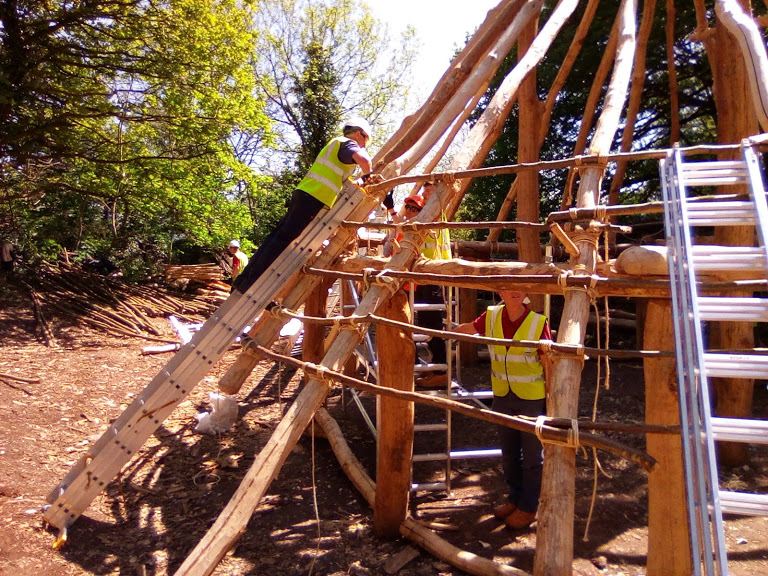
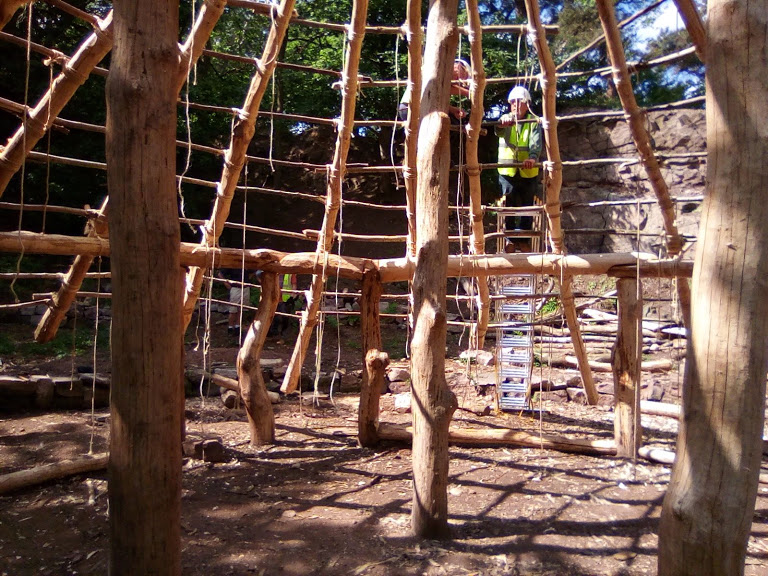
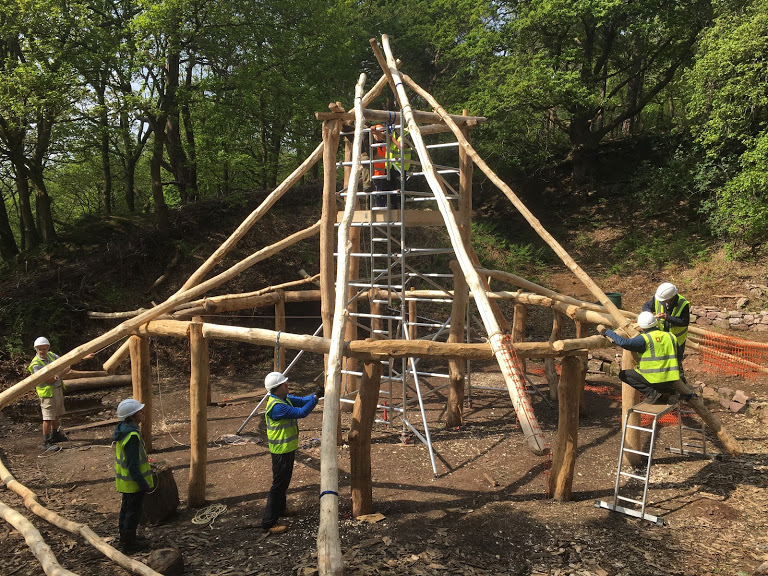
This week sees the installation of batten rings that are lashed to the rafters, forming a conical ladder up the roof. There are three priorities this week, Lashings, Lashings, and Lashings!
Batten 1 lashed in position
There are 25 rafters, and 17 rows of battens, which means we have in the region of 425 lashings to complete! The use of lashings in this building raises an interesting question. Over the years, I have constructed many buildings, using experimental and “known” methods of construction. The method used to attach the smaller roof elements to the rafters is still open to debate. Firstly, we mustn’t assume any single method for this across geographical, ecological and cultural zones. Local materials, cultural practice and concerns of longevity will all have a part to play in the material selection and development of technique for any process in the past.
Test lashings, soaked and dry
If we had access to unlimited coppiced materials, it would be just as easy to weave the roof (bending the coppiced rods between the rafters themselves) to form a large basket. I have used this method on several occasions to great effect, but it is very hungry for coppiced materials. If we had access to large quantities of freshly harvested willow wands, we could use them as ties. Access to a lime grove, or fields of nettles, or brambles would allow us to produce large volumes of fibres that could be transformed into rope. An area of thick gorse would allow us to form a thick blanket of densely packed material that we thatch directly into. The landscape setting, its geology, and therefore, the species that grow there, make for any number of solutions to the roofing stage of a building.
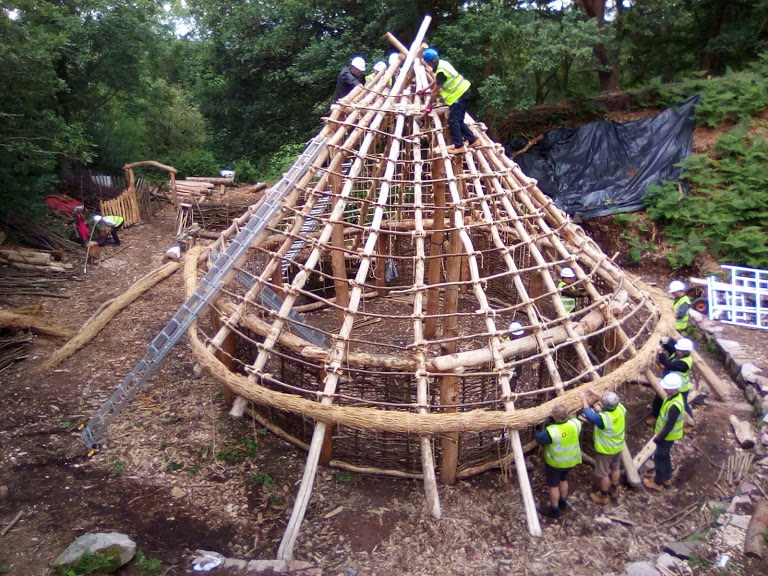
The conical ladder grows!
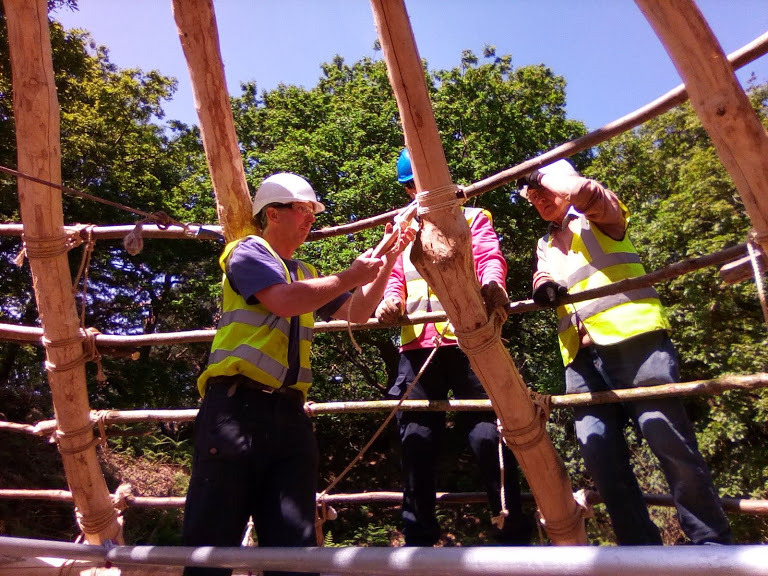
All of these solutions require time and effort to achieve, whether it be in the growing and harvesting of coppice materials, the harvesting and preparation of natural fibres, and the making of rope. Our project is not a full scale experimental project, – in other words, we are not doing every stage of construction using authentic bronze tools, and we are not harvesting all of our materials authentically. We have a deadline and a need to produce a fully functioning building that will last for many years, so our experimental potential is understandably limited by these factors (it should be remembered that most experiments fail!). This project is utilising pre-made natural fibre (in this case, sisal) string as its main lashing material. It is a material that I am generally unfamiliar with in a construction setting, and we have had to learn as we go regarding its properties and best use. Sisal seems to expand significantly when exposed to atmospheric moisture or rain, so we are pre soaking the lashings to ensure a tight fit over time, and stretching them as much as possible as we go with the use of oak pegs to apply direct leverage to the rope. As a fibre, it is also brutal on the hands (similar to willow bark rope) and so gloves are the order of the day!
Using an oak peg to lever the lashings tight
The batten rows are spaced at 16 inch intervals up the rafters to give the right spacing for tying on thatching bundles later on.
As with all tasks on this project, finding a rhythm is critical. By that I mean that each member of a team finds their own role, or sequence of roles, and fulfils them efficiently, without the need to stop and think “what next?” It takes time to reach this stage, but then the process flows at its optimum.
As the battens progress up the roof, the volunteers have to be aware of “corners”, where a rafter sits awkwardly beyond the natural roof line. These corners are best negotiated by ensuring two battens don’t meet there – forming two ends that stick out a bit like cow horns. These projecting battens will only cause us issues later when we come to thatch the roof. Although each batten ring shortens in length by around 2 metres on each level, the number of lashings doesn’t change – so once again, the task is labour intensive!
While teams have been lashing the battens, other teams have been producing thatching needles in preparation for the next phase of construction. These shaved wooden “swords” will take the thatching strings through the roof to physically stitch the thatch into position on the battens.
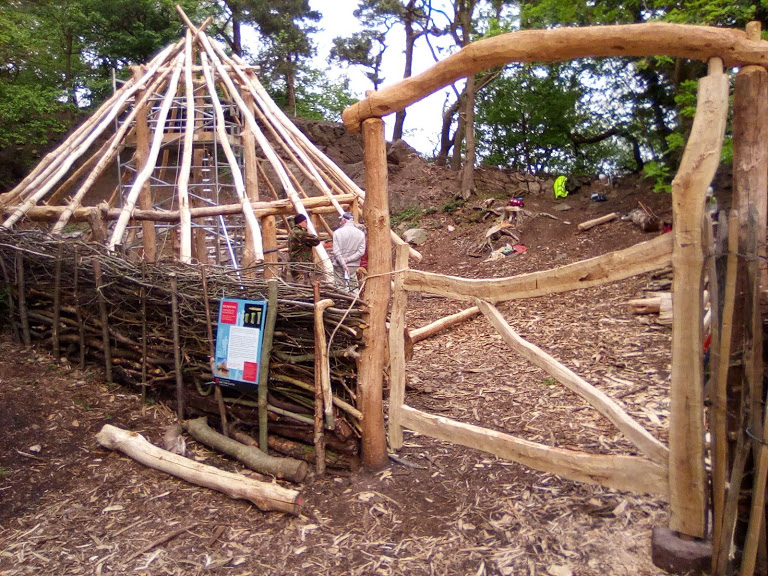
Edwin and team have also pushed hard this week to complete the stunning oak gate that will be the official entrance to the roundhouse compound. What an achievement! so much work, hewing planks, cutting joints, making and fitting pegs, but what a result! Well done gate team!
Wow!
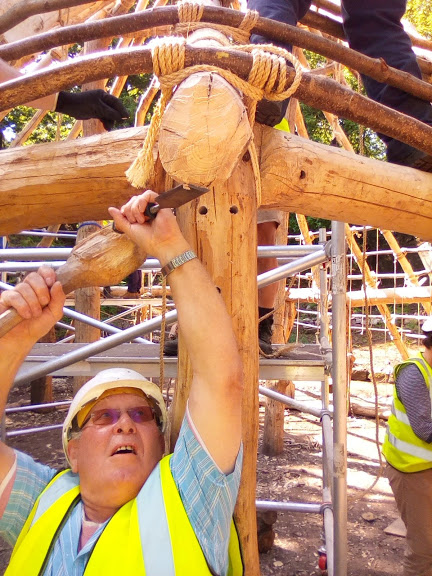
The central rafter that marks the middle of the doorway has also been refined and stabilised with the addition of a shaped timber corbel. This neat solution enables the rafter to be securely pegged into solid timber on a post that is already complicated with the meeting of 4 timber elements.
And while all this was going on, more volunteers have been working hard to install sill beams between each pair of wall posts to provide a solid base for our woven hazel walls to sit on. Each timber is augured to provide location holes for the wall uprights (or Zales), and need to fit securely to prevent movement.
The issues of sisal stretch have dogged us somewhat this week, and required the re-tightening of many lashings as we have gone along. Despite our best efforts, there seems to be no real pattern of loosening, regardless of soaked or dry rope. As a result, and despite huge effort, we have not achieved what we hoped we would at the beginning of the week. But perseverance and sweat have saved the day, along with the continual development and refinement of lashing method and we now stand poised to finish the battens and begin thatching in the next visit.
The final official project week has begun! After a break for Christmas, The team has reassembled for a final push on the longhouse doors. Work has continued while I was away and the building is looking amazing! Most of the daub is completed and some internal painting has started making a real difference to the panels and their finish.
Today we have discussed how the project can move on in terms of experiments….. …. The volunteers have a great approach to future work and are thinking of the many things they would like to achieve over the next few months and years. Any project needs this enthusiasm to really consolidate and improve what’s there. The discussion centred on how to record experiments and what to focus on.
What has become clear over the last two years is that, while I have been recording data such as measurements, timings and structural considerations, we have all been noticing experiential evidence that is difficult to quantify. In other words, we know how the building is made but we have recorded very little of how it FELT to make it, or the multitude of ideas and thoughts that various tasks and construction stages produced.
This is an area of interest for me after many projects over the years. We can look at the mechanical processes of construction, the efficiency of tools, the volume of materials used, the preferred method of construction compared to others, the effect on landscape, but our anecdotal evidence of how it felt, and looked, the aesthetics and personal stories and thoughts of our experience is still trapped in our heads!
There are many examples of this way of thinking. Last year, during a project at Stonehenge, I organised a bluestone sized piece of rock to be pulled and erected into place by the public over the course of a weekend. The stone weighed around 4 tonnes and we used between 70 and 140 people to move and lifted it into a hole in the chalk. What surprised me during that project were some aspects of the real world engineering required in wet and muddy conditions, but importantly, the number of people who came up to me afterwards to say how incredible it felt to be part of a large team all working successfully towards a common goal. It is this “evidence” we lack when considering the archaeological record, and yet it is exactly this personal story that is responsible for the construction of our past. The physical remains of buildings and monuments are only fingerprints of our emotional experiences, and although impossible to know exactly what ancient people felt, or the reasons why they did things, our modern perspective of similar tasks can only be helpful in trying to reach some understanding.
Another example comes from the many buildings I have designed and helped to build. Typically, when members of the public visit finished buildings, they have a range of reactions and emotions. A common one is they feel some kind of “vibe” or a feeling they cannot explain. For me, and I presume, many other builders of those same structures, I feel no “vibe” at all, but the building does represent a group of memories based mainly on people. I have technical memories yes, but the majority of what I experience are the memories of the conversations I had with hard working people. the humour, the ideas, the hardships and the relationships. The building is a monument to a certain group of people and their associated memories. A tie beam in a Viking Longhouse is actually a physical reflection of the 5 people who hewed it and the 30 that lifted it into position, and their names and personalities are etched into the timber through the marks their tools left behind and in its manhandled position in the building.
Wednesday 30th January 2019
The weather has finally caught up with us on this project! Yesterday we all got soaked and cold with the persistent heavy and cold rain. Today we have had prolonged bouts of hail which fell to such a degree that it looked like snow!
Still, we can’t complain after our incredible luck over the last two years!
Today work has continued (despite the freezing weather) on the willow doors. From the beginning, these doors have been seen as midterm constructions until more substantial doors can be made from planks. That said, there is certainly nothing wrong with willow doors. They can be covered with leather to make weatherproof closures and are light and quick to build.
Danny has finished the weaving on door one and is now working on fitting it to its opening.
Teams are rapidly progressing with the remaining doors and it looks like they will all be in place this week.
Thursday 31st January 2019
The mud is slightly less today and the weather is dry, for the moment!
The building has changed again, with working doors appearing in doorways and re-adjusting our consideration of the building yet again.
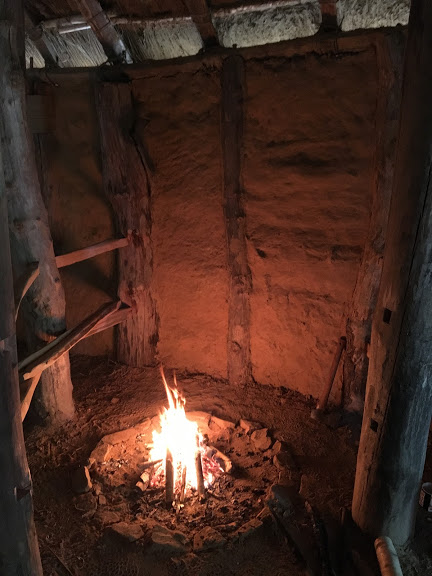
The nearly completed structure is crying out for some internal warmth and light from a regular and well managed fire. A real wood fire is an essential and integral part of any traditional structure and serves a range of purposes (obviously heat and light for daily life) including the less obvious task of maintaining and preserving the organic raw materials used in its construction.
Firstly, a fire obviously produces regular levels of heat that dries any accumulated dampness in the thatched roof, walls and floors. This regular drying discourages the development of fungal spores and prevents organic materials from rotting.
Secondly, the smoke that is produced by a well maintained fire percolates the structure, its smaller wooden elements such as battens an organic ties and especially the thatch. This regular smoking prohibits the infestation of the building by rodents and boring insects and significantly increases the longevity of the building’s life and crucially, reducing the need for serious structural repair.
Fires in traditional buildings can be safely managed with simple rules and procedures, and their educational value cannot be underestimated when considering how schools and the public interact with a building designed to interpret the lives of people in the past.
My experience of building and using traditional structures for educational and experimental purposes has confirmed the need for small but regular fires to get the best out of a structure on every level.
Friday 1st February 2019
The changeable weather heralds the official end of my involvement in this project.
What a fantastic experience its been! The building has taken on a life of its own due to the incredible volunteers who have not only built it, but who are working towards refining and improving it in the future.
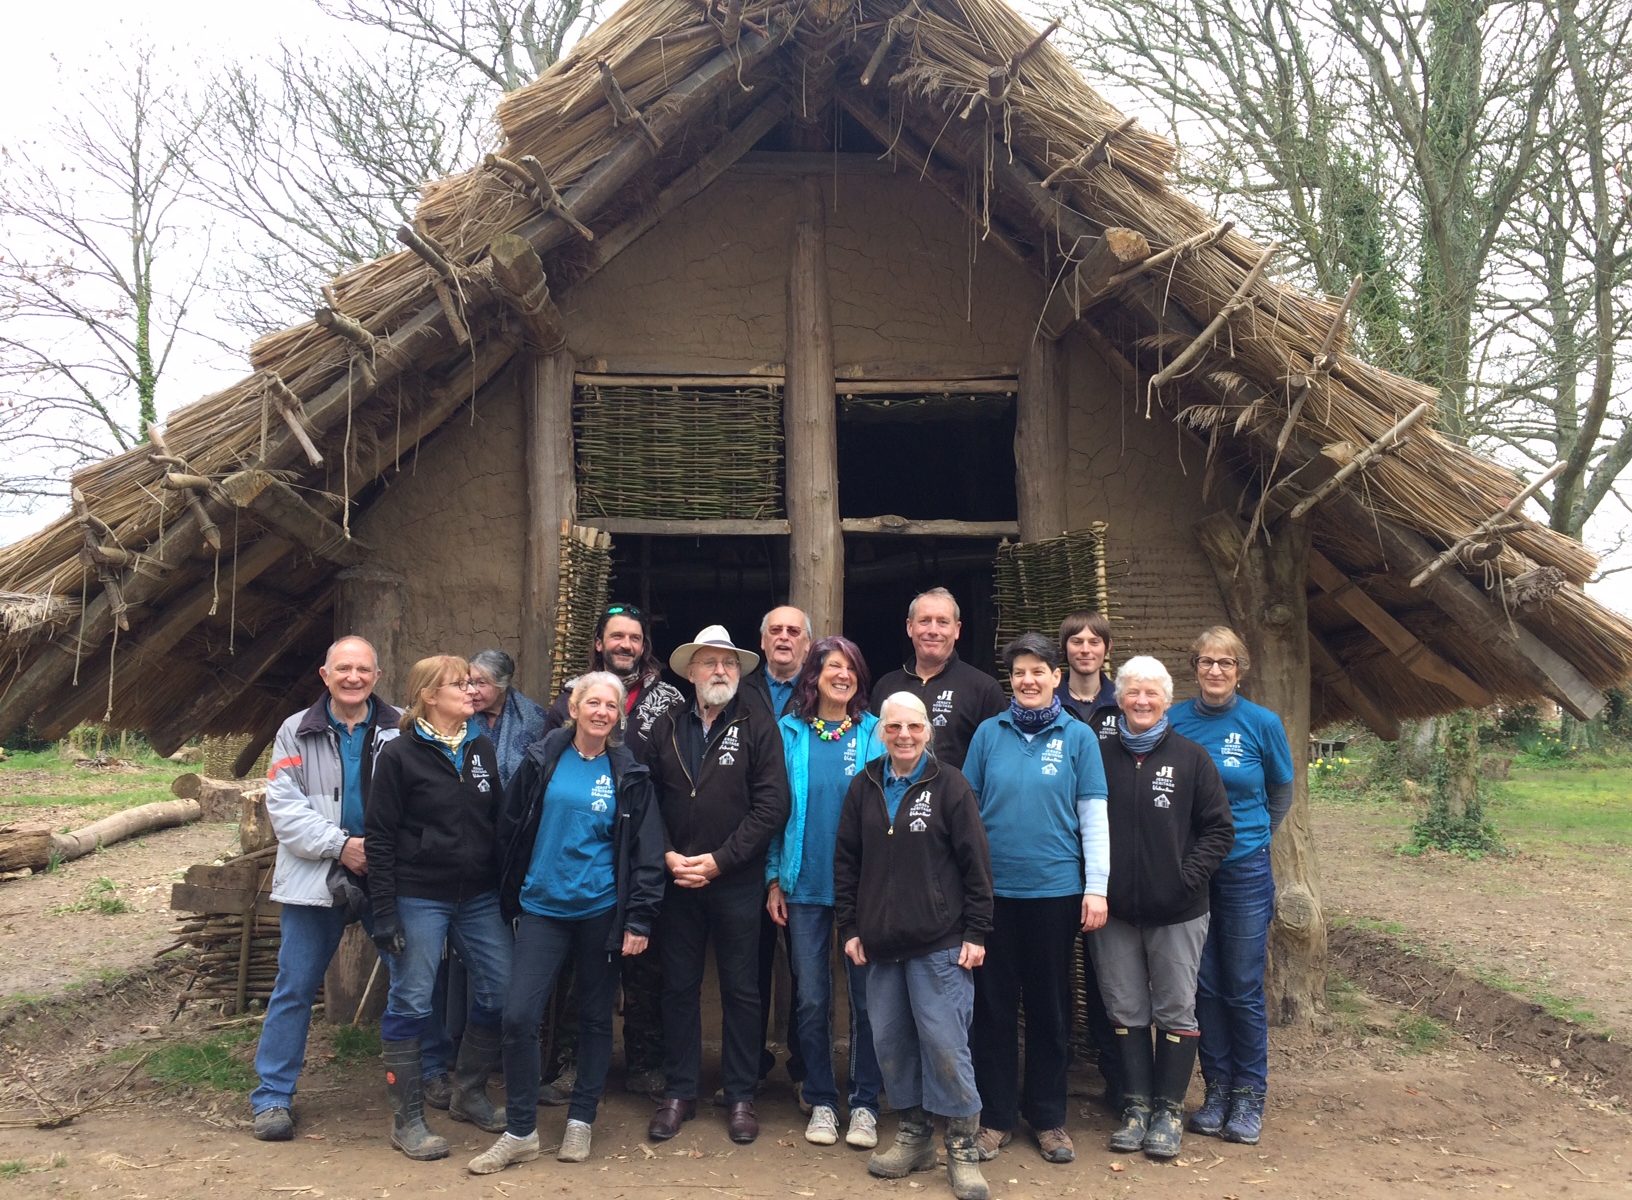
This team, few of whom had met each other before this project began, have gone from very little or no experience with buildings and projects like these, to being a well rounded, experienced, skilful, confident and passionate bunch of experts! My regular involvement stops at this point, but I have every confidence in their abilities to use evidence, material knowledge and experimental questions to really bring the house alive for visitors.
Looking back over the last 28 months, it is incredible to see how far this project has come. The building, a beautiful thing in its own right, is nevertheless, a physical reminder to us all of the people who built it. It is an impressive example of people coming together for a common goal.
Today, Iris hit the nail on the head when she said “Without “Tribe”, this couldn’t have happened”, and the point is well made. It has taken that communal spirit and enthusiasm to make it a success. The learning curves involved in this project have been equally impressive and very steep! Each volunteer has learnt a multitude of skills and understood material properties, and they have practised those skills as the building progressed until they are now expert. Importantly, and this should not be forgotten, although each new learning phase has been exciting and engaging, what has actually finished each phase and the building as a whole is sheer effort and thousands of hours of sweat and toil.
We have learned many things about the building and its construction and over the next few months I will compile all of my data and thoughts and let you all know what those things are. Have we learned what it was like to build in the Neolithic? Well, obviously we are no longer neolithic people, without their inherited construction traditions, or their innate tool efficiency based on a life that only knew stone and bone tool technologies. But all of us have learnt something of the camaraderie and physical requirements, not to mention motivations and problem solving that a project like this requires. We have made friendships that were unexpected and above all, we have a fuller understanding of the capabilities of our Neolithic ancestors. It has been a privilege for me to witness a group of people come together and work their socks off while genuinely appreciating the sophistication and knowledge of those Neolithic builders.
I am excited to see what this remarkable group of people bring to the building over the next few years and to see how their skills and enthusiasm will flourish in the house they have built.
I must give huge thanks to the staff at Jersey Heritage who have been nothing but supportive throughout this project. They have really understood the relevance and importance of a project like this in a modern world that increasingly undervalues traditional skills and ancient practice. I know they are equally proud of their fantastic volunteers and their amazing achievements during this project and are supporting their future work and goals in the building. Future plans include exciting developments such as furniture building, a Neolithic garden, some beautiful plank doors, Neolithic pottery, fishing equipment, and bow making. An exciting continuation of an awesome project!
This week sees the installation of the rafters to form the main roof structure. The volunteers have spent many days stripping the bark from 24 Ash poles in preparation. The process of fitting rafters involves the hauling up of the poles onto the timber frame of the building, marking each rafter where it touches the wall plate and purlin, cutting curved notches that match the profile of the wall plate and purlin, then positioning and lashing the rafter in both locations with natural fibre rope. The process is completed by augering a hole through the rafter and wall plate, and tapping in a perfectly fitting peg to prevent the rafter from twisting.
Initial positioning of principle rafters
Day one saw the construction of the tower scaffold and the installation of the first three rafters that sit in the middle of each purlin. The volunteers did well, having to learn a new process and method while working at heights.
Looking toward the main doorways
Day two saw another 7 rafters installed and the roof really begins to take shape now!
Raising and pegging teams finding a good work rhythm
One of the main issues with this roof is the transition in shape, from a roughly circular wall plan to a triangular apex. The corners of the triangular purlins project beyond the natural 45 degree roof line. We are attempting to solve this using the natural irregularities found in our available rafters, placing those with a natural dogleg on the corners to ride over the purlins. When these are positioned, we may well have to trim the projecting purlin ends to bring them closer to the roof line.
Intermediate rafters being positioned
While all this has been going on, the unseen heroes of this process have been shaping and refining the pegs that hold the rafters in position. It sounds easy doesn’t it – peg making? But the making of a finely tuned peg that will drive into a hole, gripping the timber tightly without splitting it out, is a difficult and lengthy job that requires precision, an eye for detail and patience!
Pegged rafter with square lashingLife at height, the hauling and lashing team taking a break
Away from the roof, Edwin has designed a split oak gate to to form a more fitting to the enclosure. Along with others, they are shaping oak elements that will come together to complete the project. The first phase involves the making of a pivot block in sandstone to house the hinge member of the gate. Once again, Edwin is showing his skill and talent in the most remarkable way!
Wow!The gate pivot fits like a glove!The gate taking shapeThe gate frame nearly there!The gate frame hanging and looking beautiful
The volunteers are also learning new lashings (Square lashings) that lock the rafters together with the purlins and wall plates. Once learned this neat and strong lashing will be employed hundreds of times in the roof to secure the rafters and ring beams (circular battens that form a conical “ladder” on the roof). A square lashing requires good techniques to do its job…..
Wednesday saw another 7 rafters pegged into position and it looks fantastic!
Suddenly we have a roundhouse!
The interesting central three post structure that has caused such intense thought in the design and construction of this building continues to throw up suggestions in my mind. Today, while watching the volunteer teams fitting the rafters from the modern access solution of a scaffold tower (fitted awkwardly within the confines of the inner triangle), I wondered if this triangular structure would have served exactly the same purpose in the past. It would make a very stable tiered working platform – or staging for the installation of rafters during the construction phase. Post construction, the internal staging could be removed, leaving the post and purlin configuration we have built, to serve a range of structural and other purposes. I know this is a very functional explanation, and I have no doubt that the triangle may have represented some kind of lost meaning, but it would solve the issue of lifting and managing timbers at height.
Rafter positions – the theoryRafter positions, reality
Thursday saw the last straightforward rafters positioned and work starting on the final three. These three rafters run from the wall plate to the very points of the triangular purlins. The temptation here would be to simply drop a rafter into the natural cruck formed by the crossing purlins, however, this would cause serious problems in the pitch of the roof at these positions and cause a real headache during the thatching stage.
The triangular purlins, and short secondary purlin just to the right of the post
In order to prevent this, there are many possible solutions, but the volunteers have suggested a neat and practical method. The aim is to run the final rafters up to the tops of the inner posts without disrupting the roof line by lashing in short purlins that join the two rafters at either side of the proposed location. This forms a platform for the tricky rafters to rest, and be lashed onto. However, it is important structurally that these rafters don’t just float and rely on the suspended lashings for strength, so the ends of the last rafters will be cut at 45 degrees in order for them to butt up against the inner posts so the roof weight is transferred directly to the main structure of the building.
Final fitting and lashing of a rafter
The result is quite neat and relatively straightforward to achieve.
Friday saw the completion of the rafters, and the removal of the very modern tower scaffold to reveal the glory of this fine building!
The roundhouse grows from its environment – hugging the ground like a timber limpet!
The main structural timbers are now positioned, and we head inevitably toward the lighter framework that will support the thatched roof!